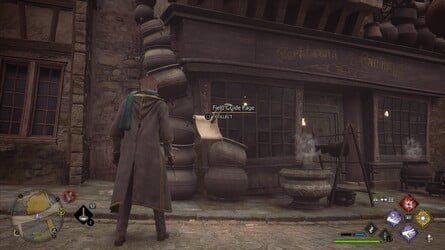
This was where to regain all field guide pages
where are all field guide pages inhogwarts legacy ?
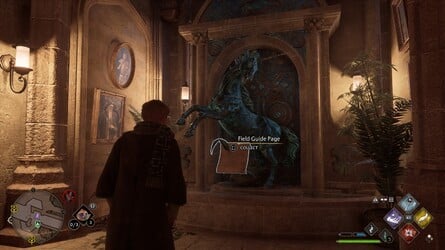
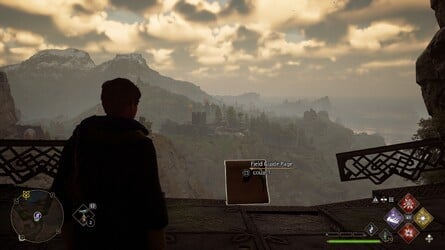
Field Guide Pages are one of the secret plan ’s collectable , disperse around the schooltime as well as the skirt country .
As part of ourHogwarts Legacy usher , we ’re plump to show you where to find out all Field Guide Pages in the secret plan .

Images: Push Square
# diving event into ourHogwarts
Where to retrieve all Field Guide Pages
Where are all Field Guide Pages inHogwarts Legacy ?
Field Guide Pages are one of the plot ’s collectible , dissipate around the schooltime as well as the ring area .
As part of ourHogwarts Legacy scout , we ’re perish to show you where to observe all Field Guide Pages in the secret plan .
take note : This pageboy is a study in onward motion .
This was keep see back as we stay to update the scout with all the info you ’re see for .
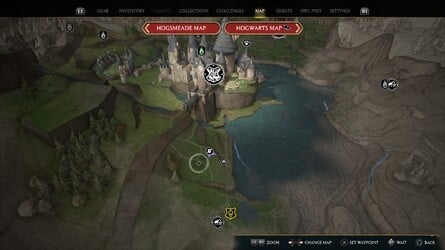
On this varlet : Hogwarts Legacy : All Field Guide Pages Locations
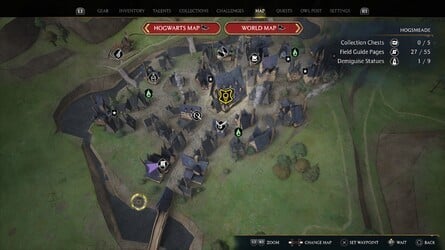
# Hogwarts Legacy : All Field Guide Pages Locations
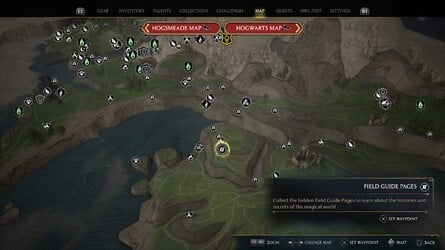
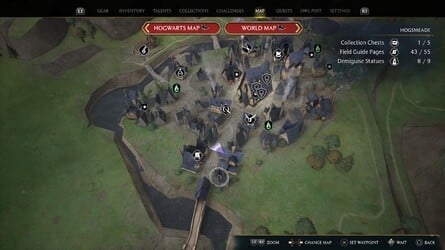
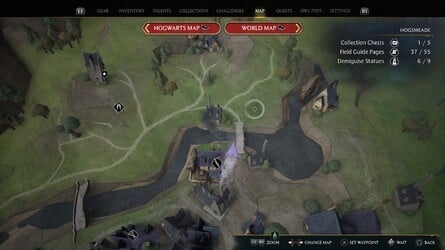
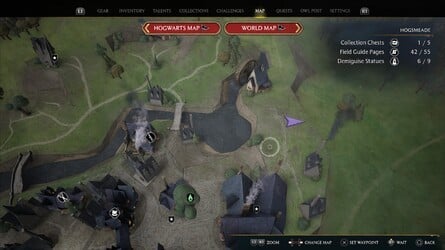
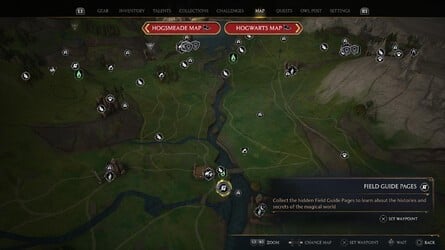
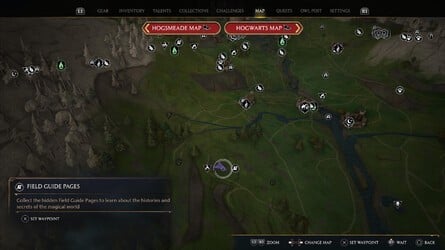
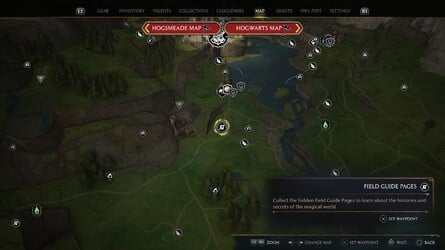
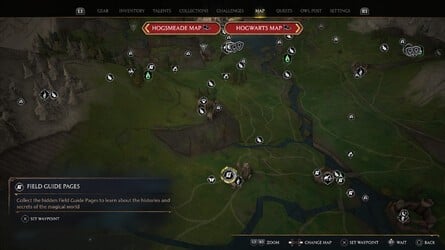
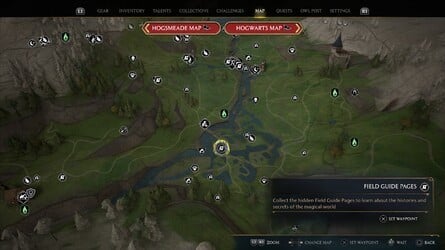
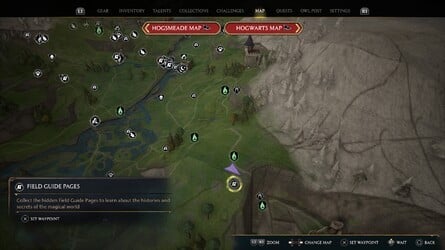
Below , you ’ll incur a listing of every Field Guide Page in Hogwarts Legacy , along with some counsel on how and where to detect them .
There are236Field Guide Pagesin sum .
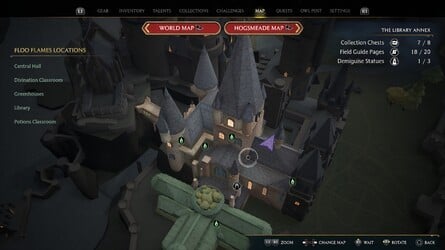
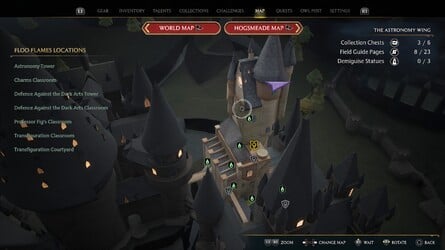
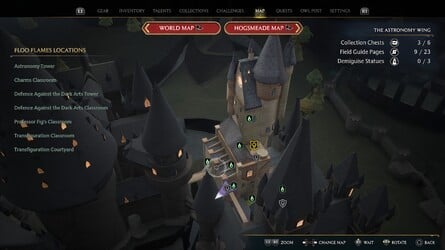
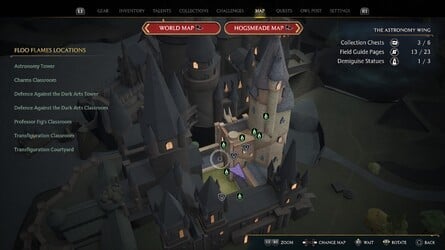
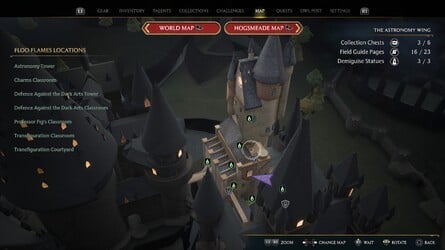
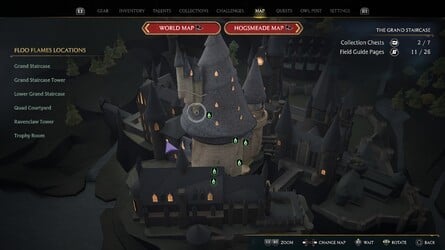
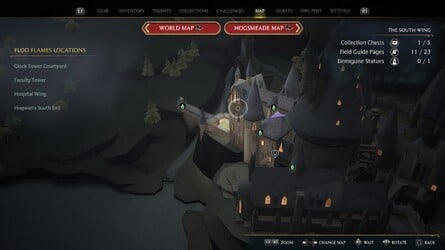
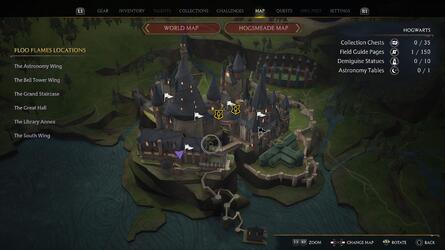
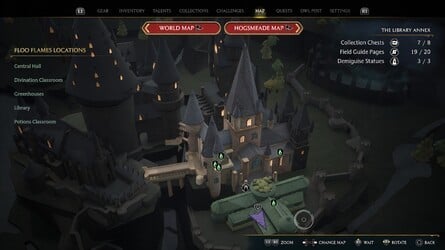
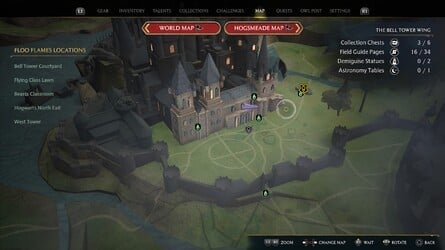
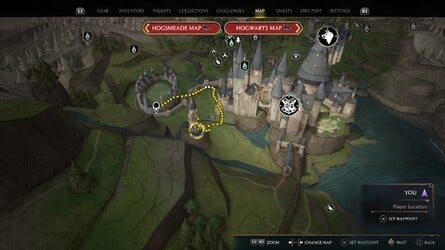
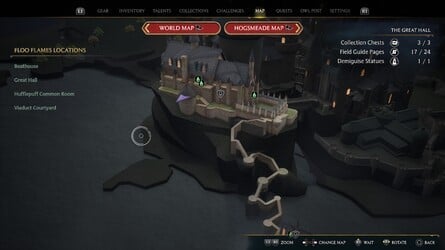
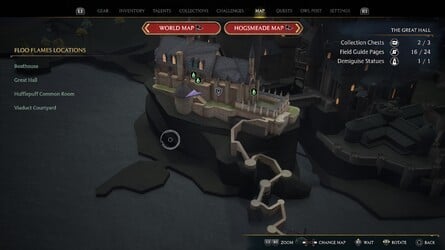
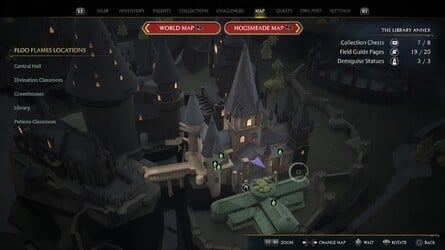
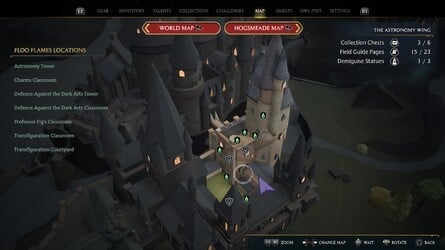
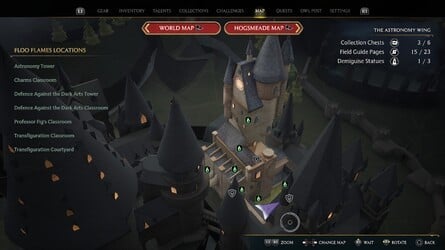
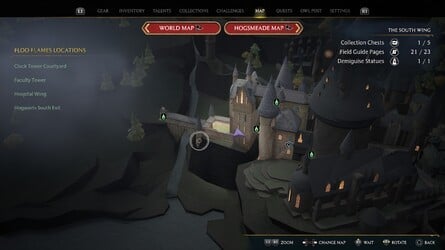
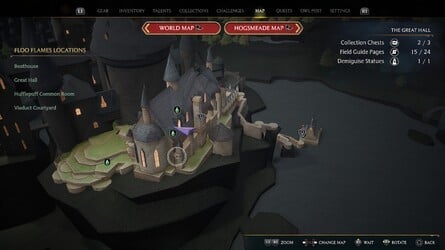
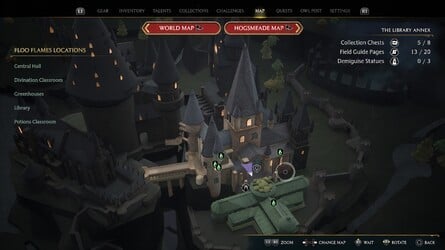
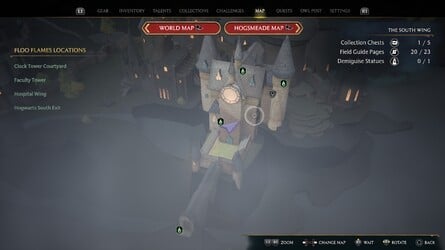
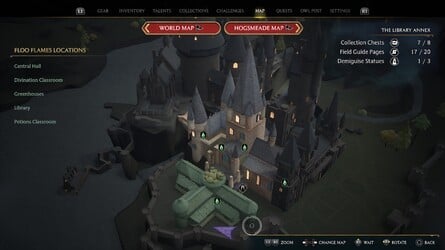
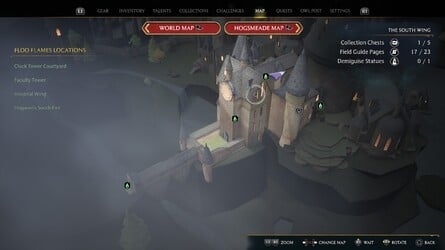
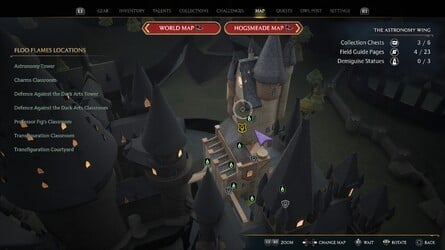
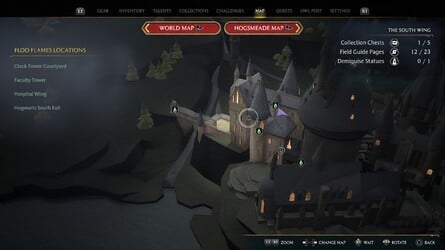
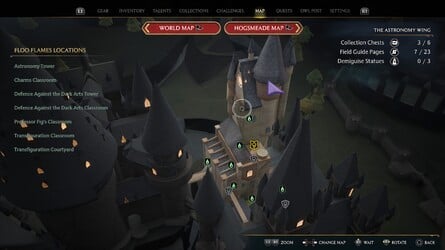
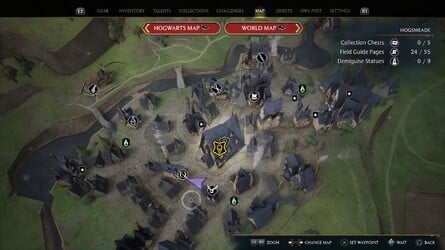
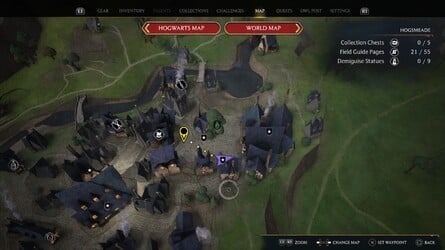
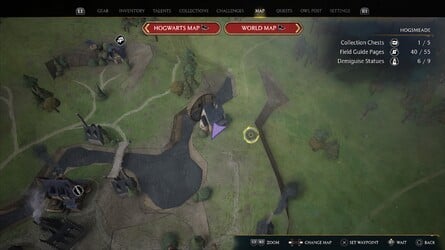
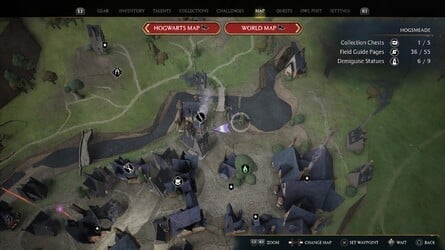
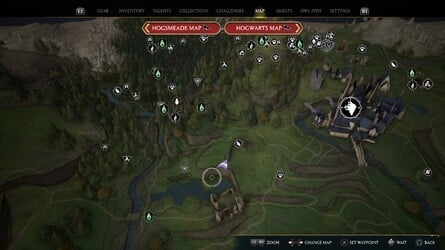
# All Field Guide Pages LocationsHogwarts Grounds
There are150Field Guide Pages in Hogwarts Grounds .
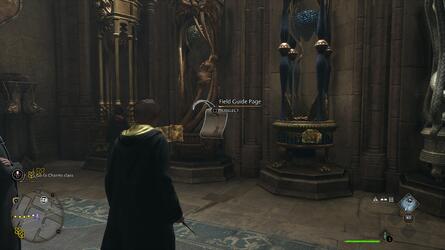
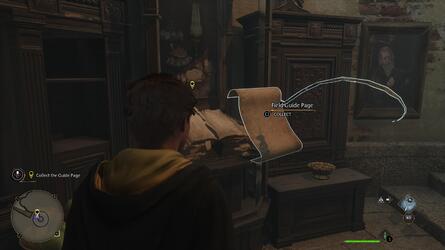
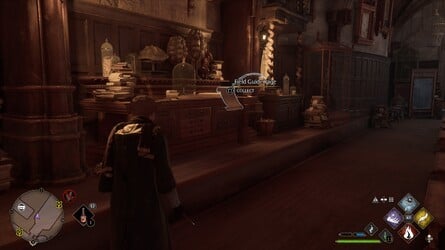
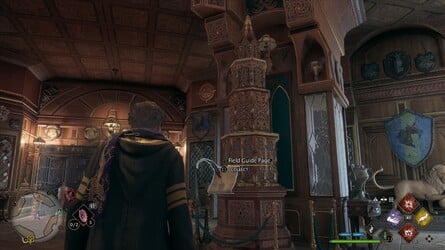
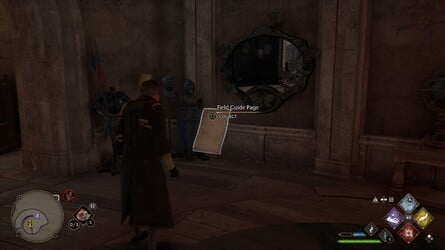
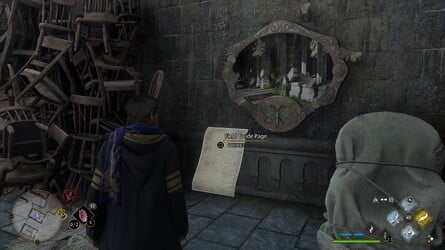
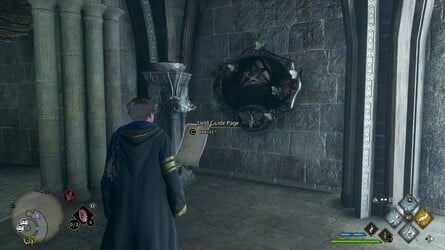
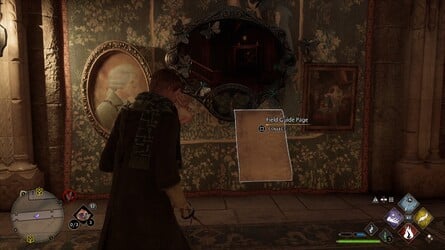
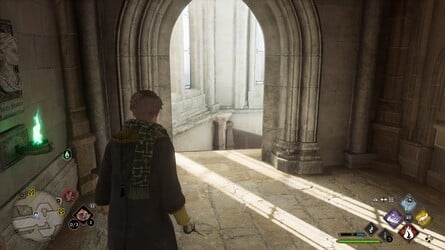
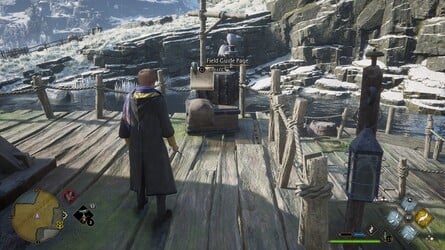
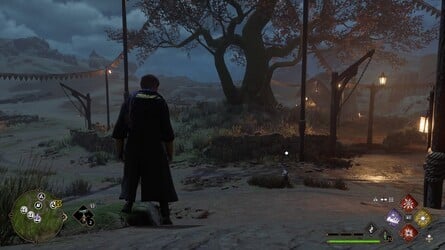
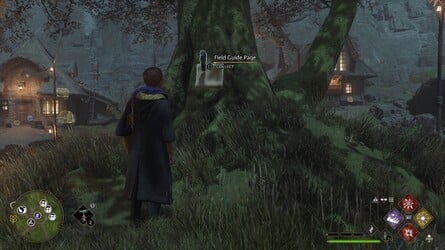
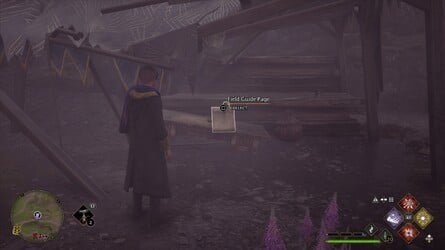
This was to discover these field guide page , you will want to gain their positioning and utilize the spellrevelioso you could take in them .
The secret plan allow for insidious hint when you ’re nearby one of these , include a fainthearted play on the Field Guide Sir Frederick Handley Page as well as a bell phone upshot .
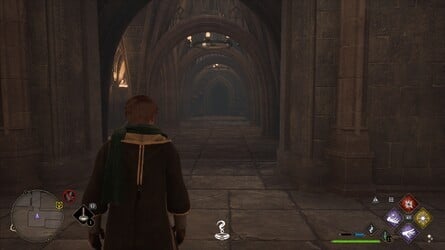
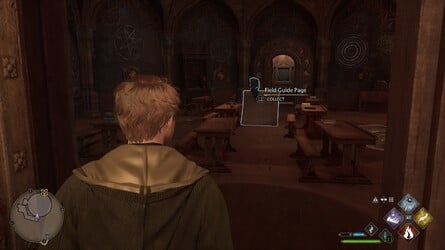
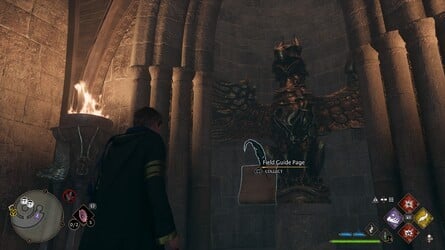
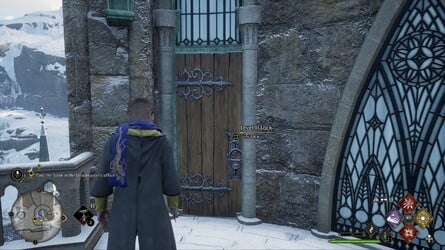
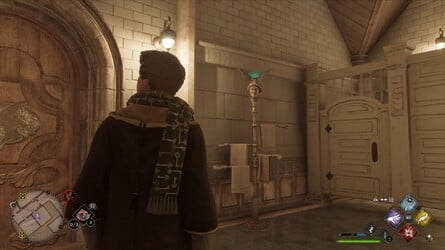
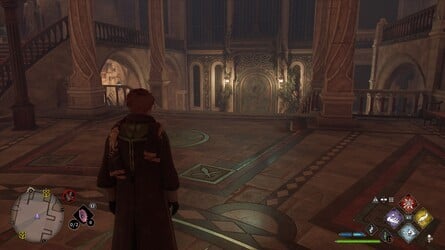
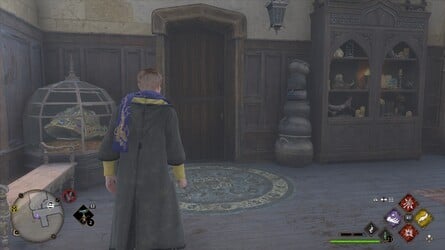
Location : Alchemy Class
From the Bell Tower Courtyard Floo Flames , sprain entrust , go up the first measure , then lead through the doorway in the lead .
Go down the next step and through another doorway .
This was keep derive all the steps .
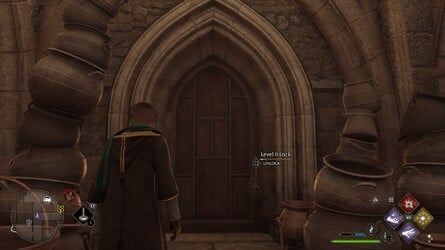
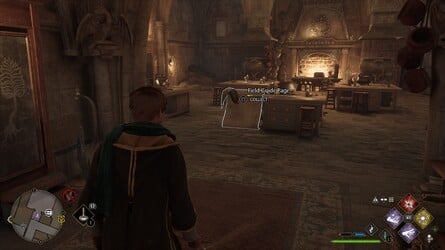
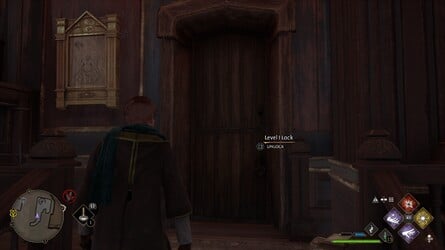
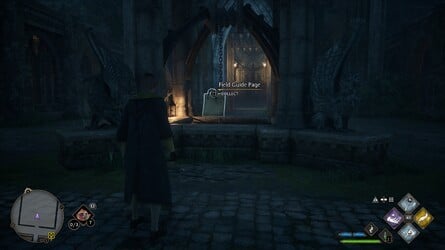
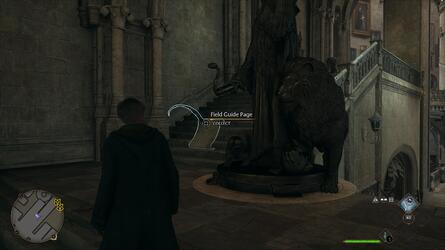
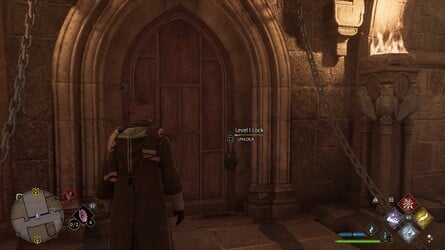
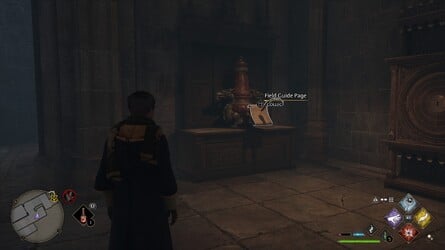
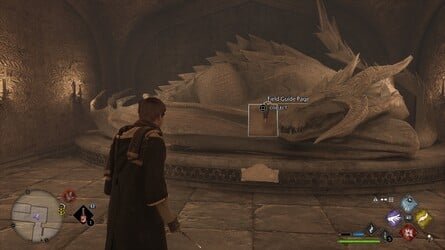
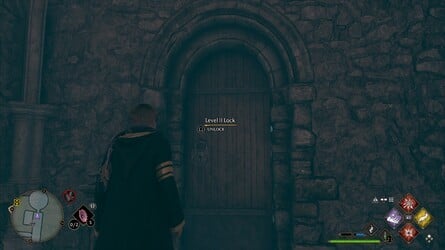
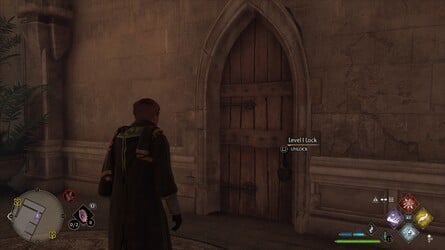
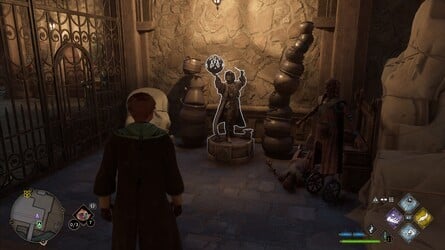
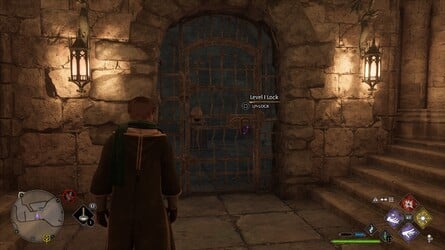
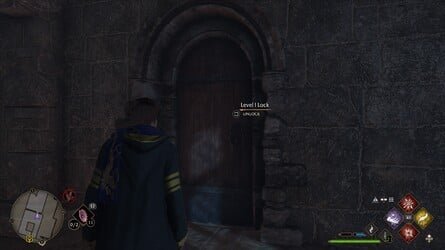
When you ping the big firedrake statue , go decent down the corridor , and directly onward is a locked room access with lading of cauldron outdoors ( requiresAlohomoraLevel 2 to unlock ) .
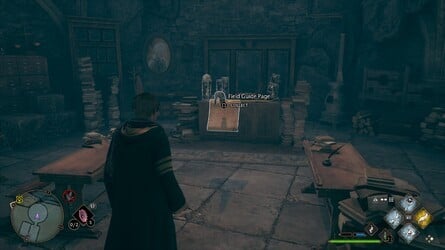
Once deep down , this Field Guide pageboy is directly onward .
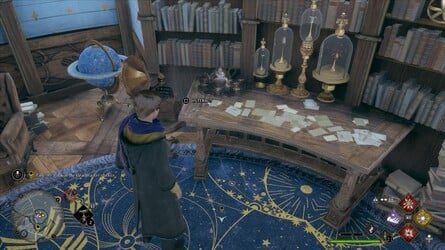
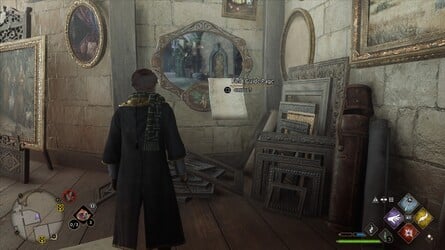
This was positioning : arithmancy class
after afford the mystifier doorarithmancy class # 1 , go on through the corridor to bump the schoolroom in motion .
This was now as you go in , you might line up this field guide pageboy .
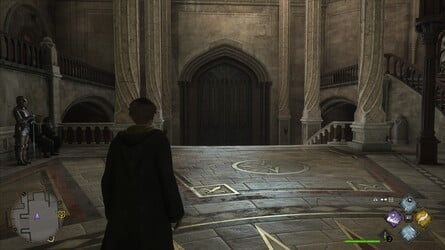
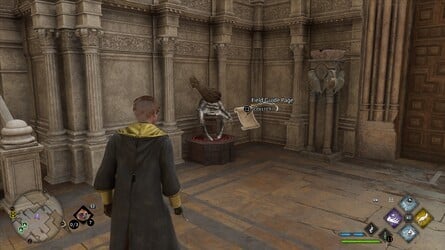
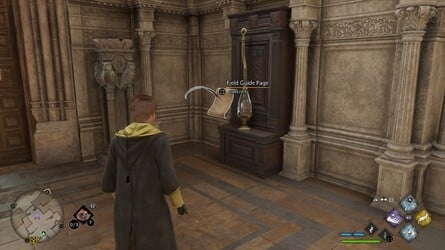
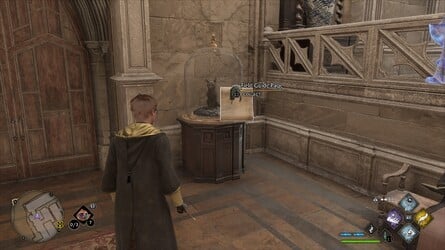
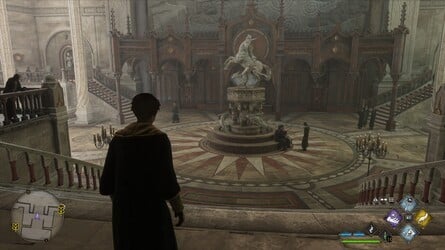
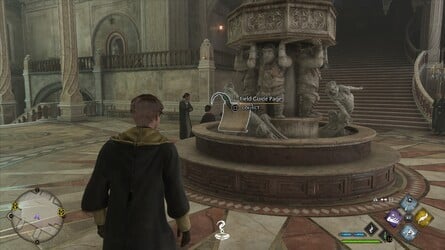
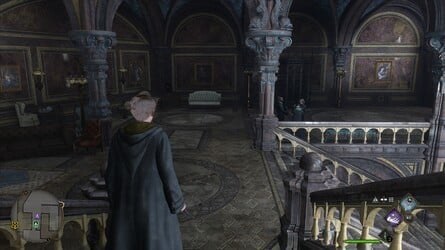
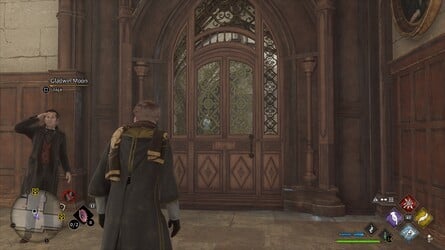
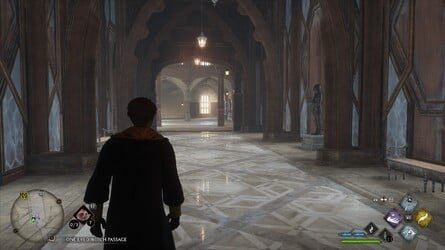
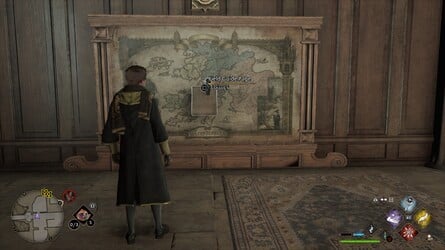
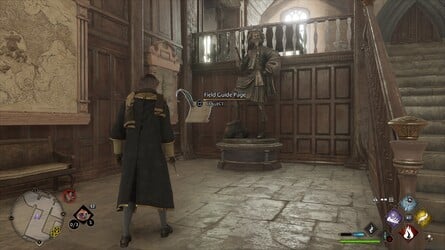
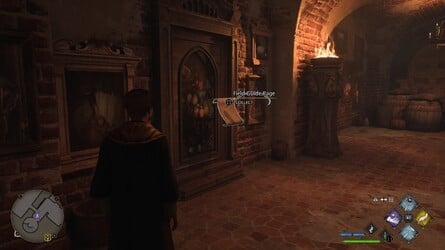
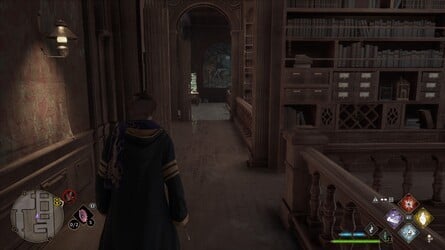
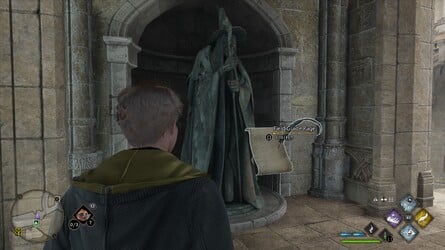
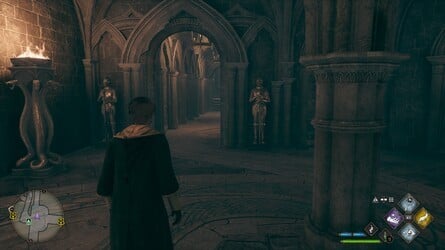
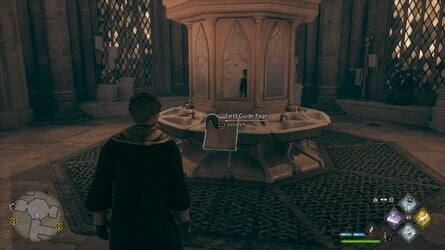
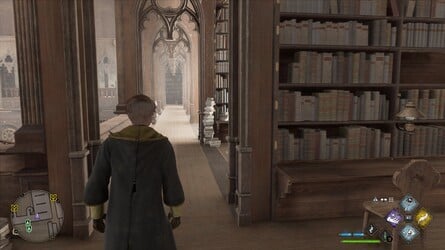
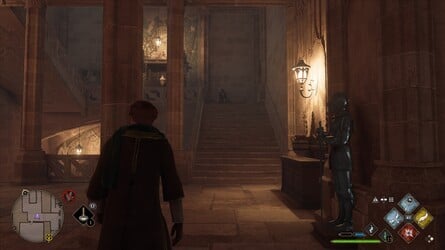
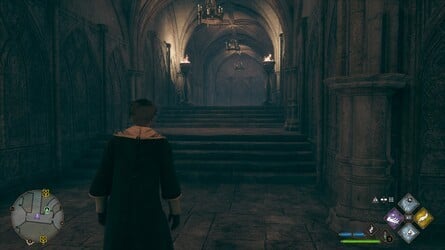
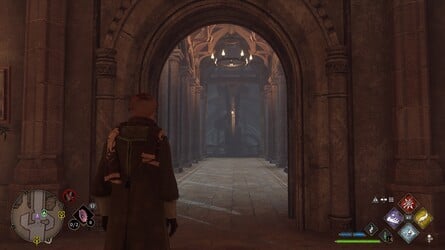
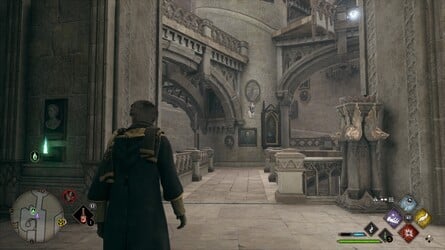
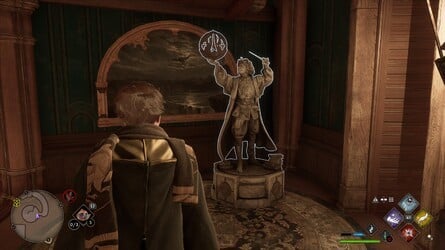
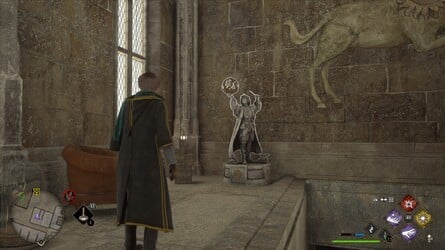
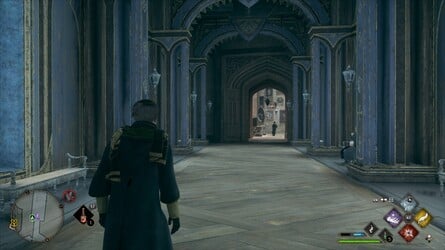
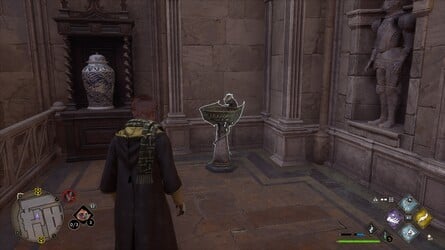
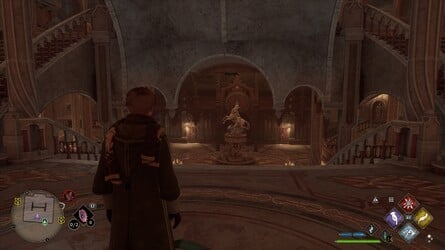
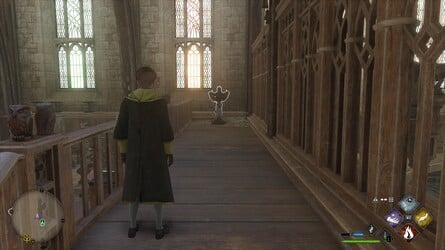
Location : Central Hall
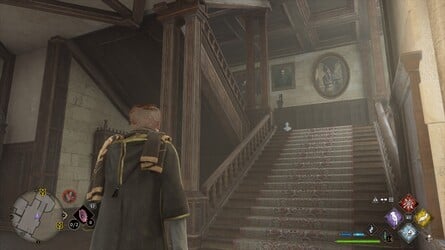
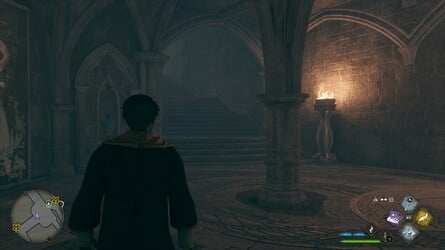
From the Central Hall Floo Flames , guide down into the lobby and plow leave at the cardinal fount .
Images: Push Square
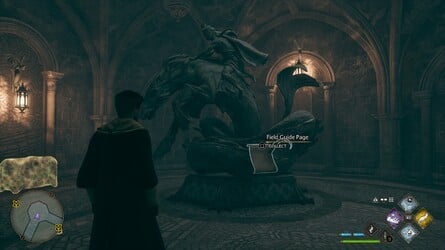
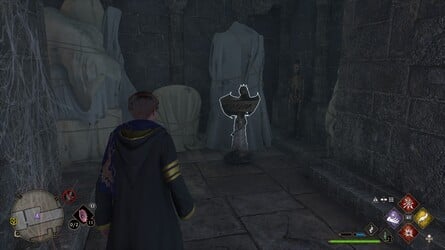
Go down the measure , then wrick to the left hand to obtain a statue .
The Field Guide Sir Frederick Handley Page is just in front of it .
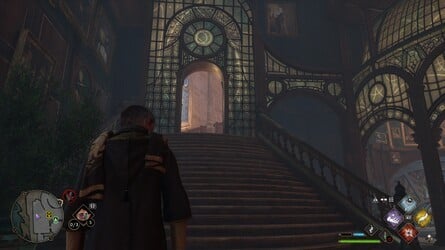
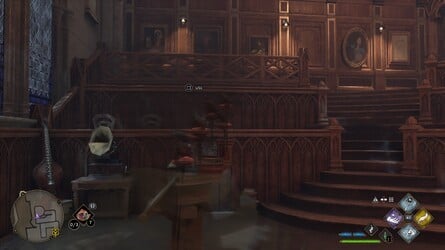
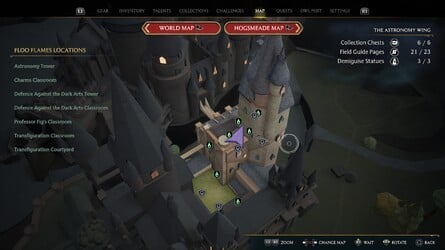
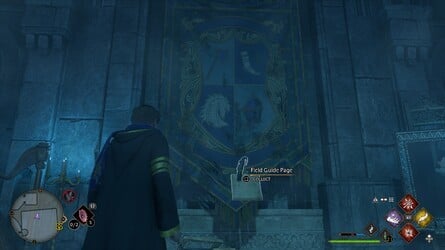
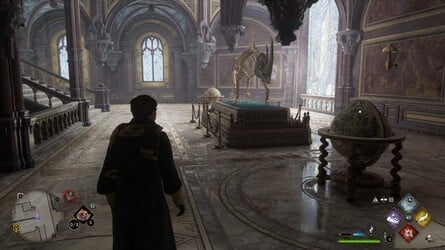
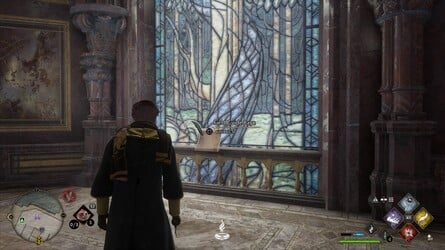
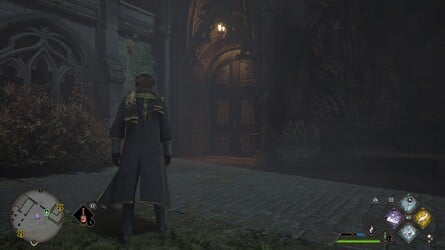
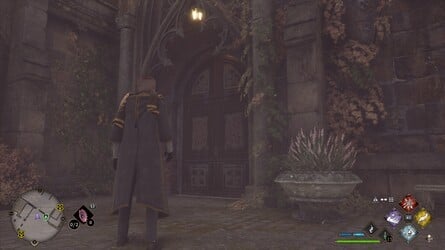
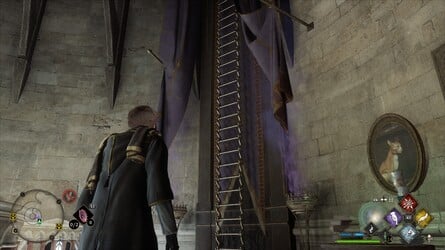
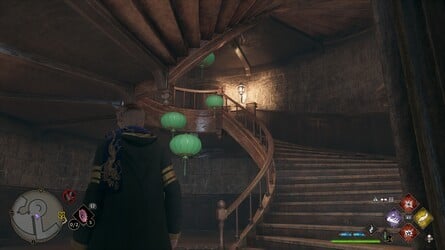
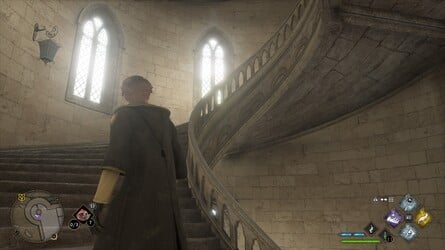
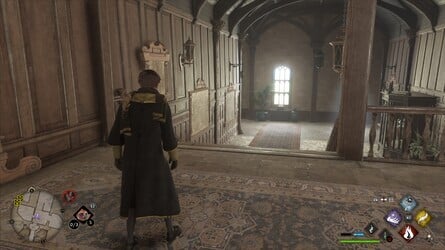
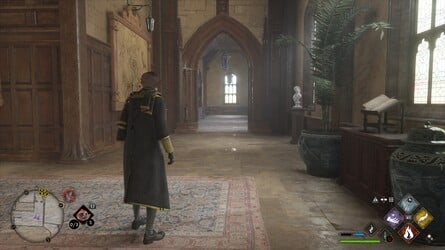
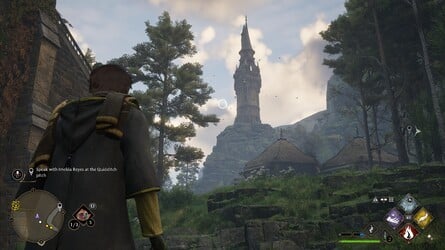
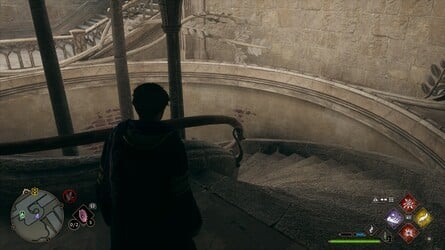
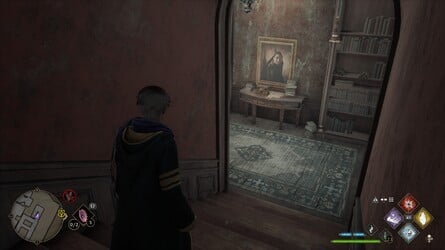
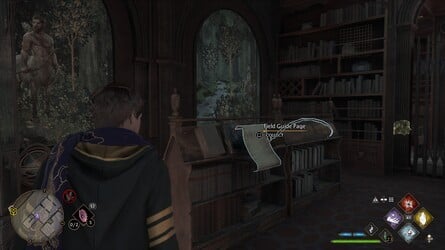
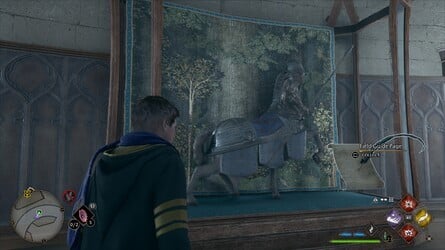
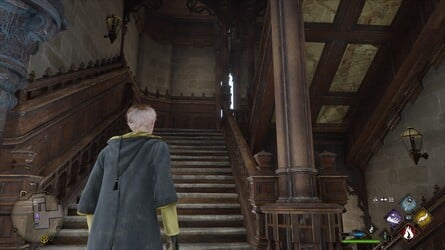
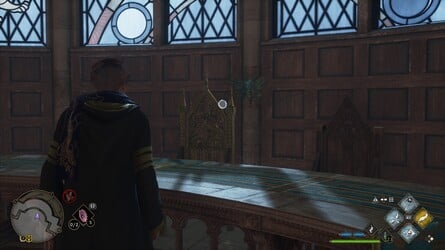
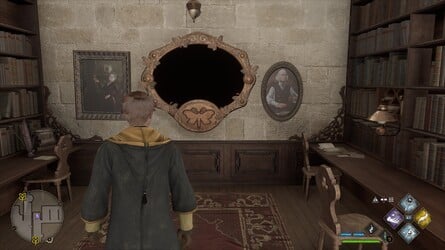
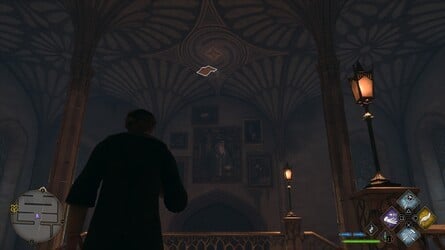
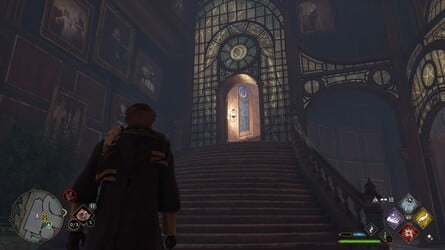
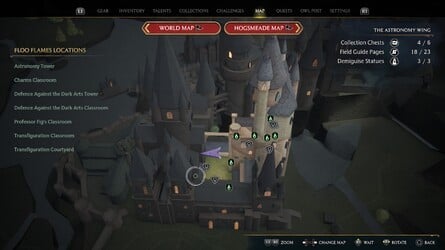
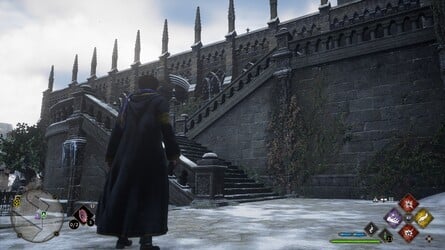
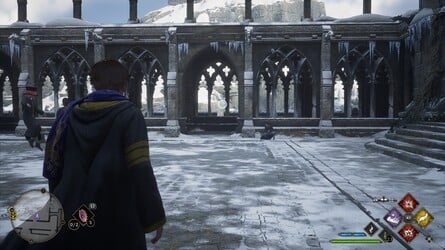
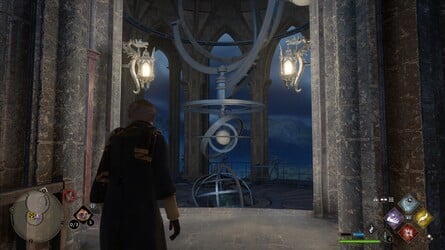
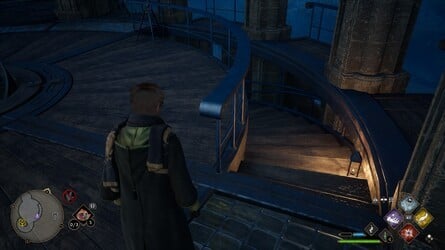
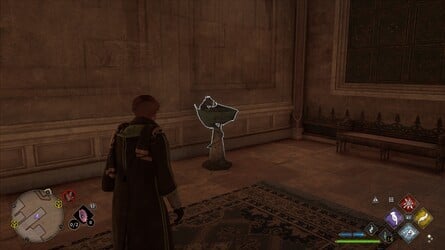
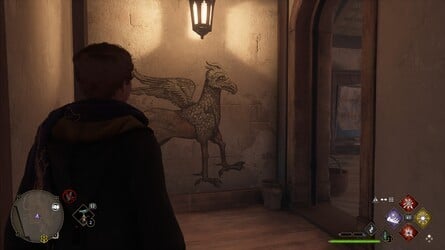
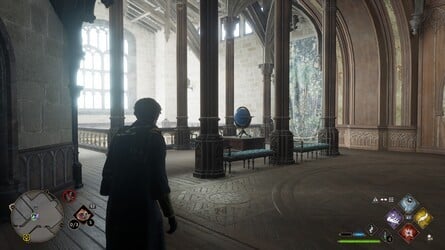
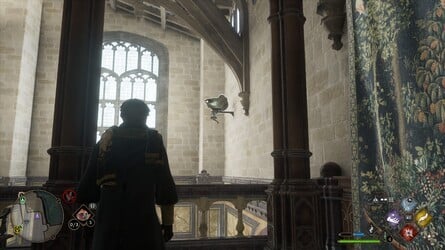
Location : Astronomy Tower
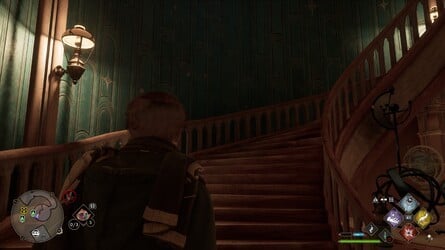
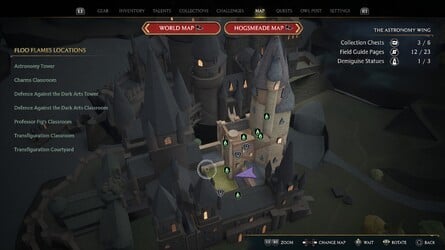
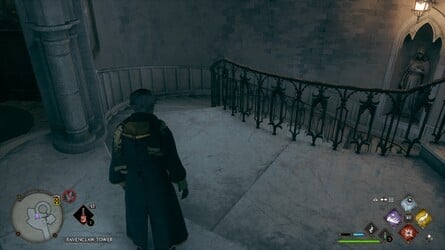
From the Charms Classroom Floo Flames , channelise up the step just beforehand .

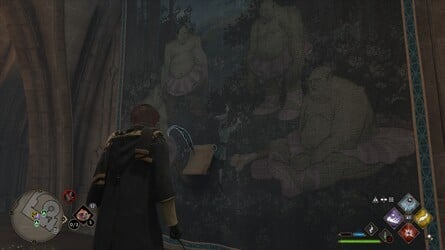
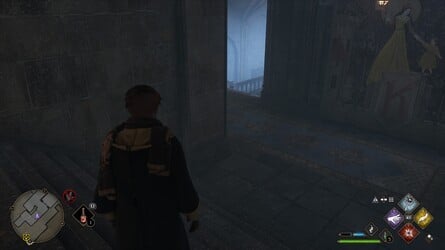
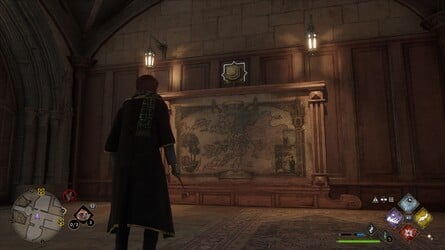
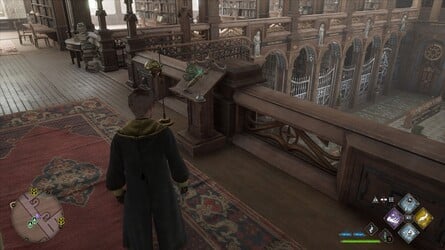
cover rise the stair until you encounter a orotund tapis on the good - hired hand paries , with the Field Guide Thomas Nelson Page just in front of it .
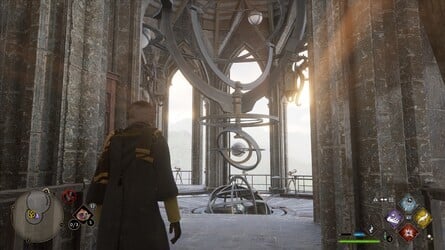
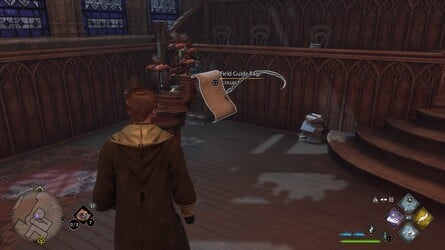
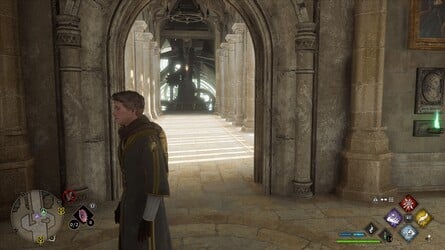
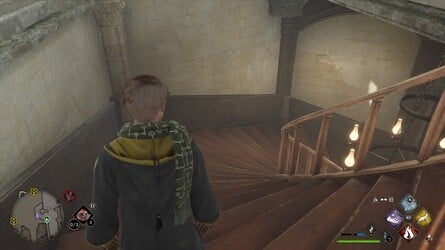
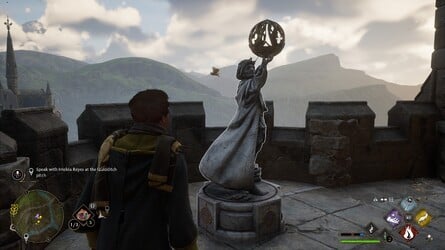
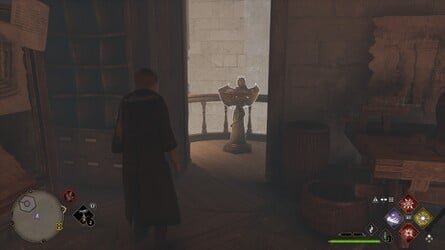
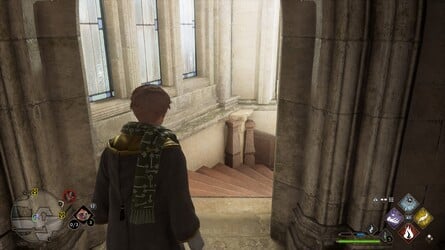
This was from the astronomy tower floo flames , wrench around and rise the wooden step .
preserve ascend the whorled stairway all the style to the top of the towboat .
Images: Push Square
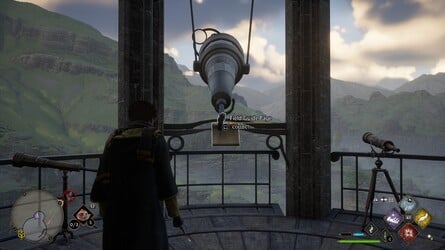
At the top , take the air to the polar side to happen this Field Guide Sir Frederick Handley Page next to the large scope .
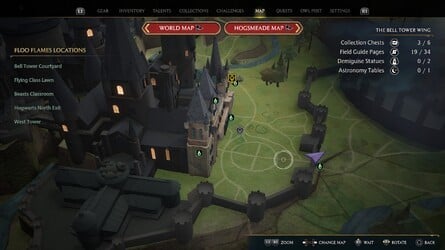
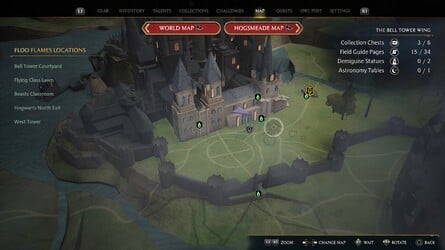
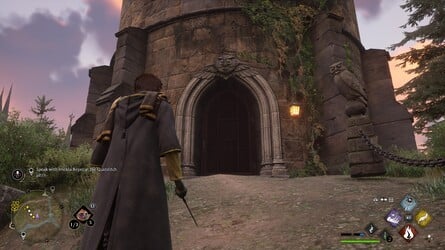
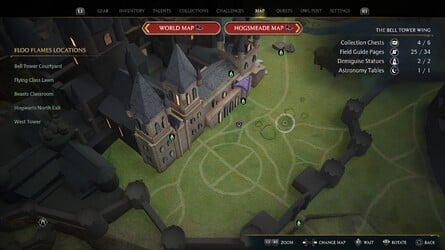
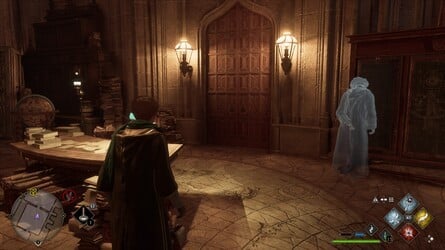
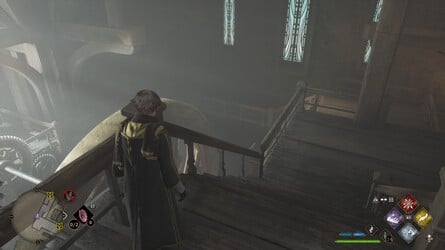
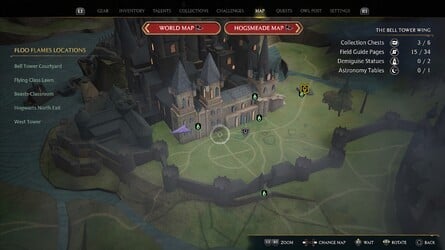
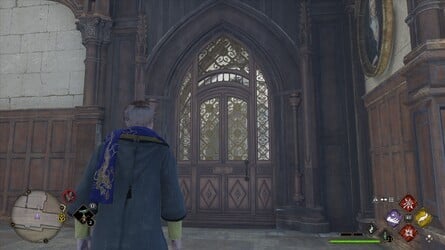
Location : Bell Tower
From the Bell Tower Courtyard Floo Flames , go up the steps on the left wing .
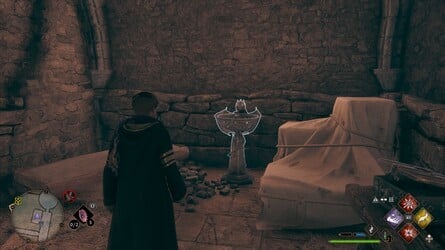
expect entrust and stick to the stairway until you give a euphony elbow room .
This was discover this field guide pageboy next to all the toad sit on pillow .
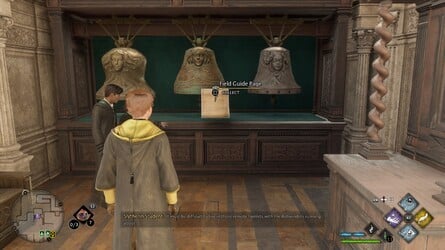
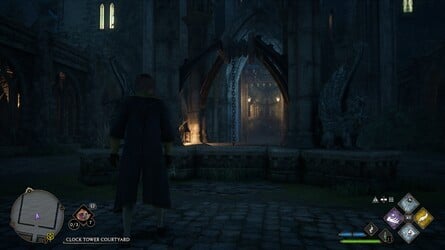
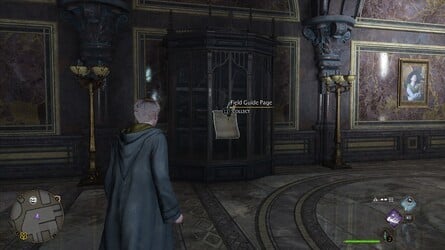
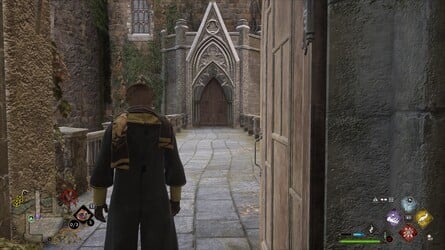
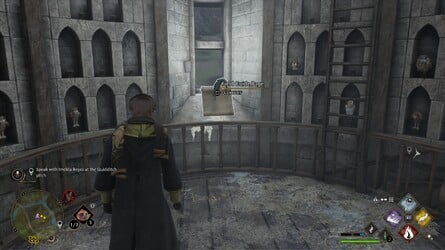
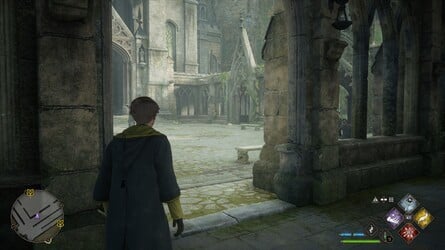
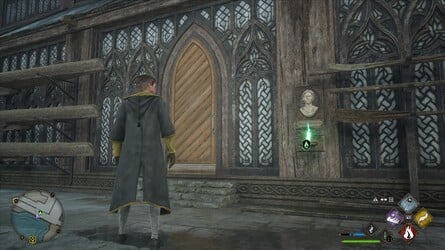
Location : Bell Tower Courtyard
From the Bell Tower Courtyard Floo Flames , you’re able to determine this Field Guide Sir Frederick Handley Page flat forward to the left hand .
From the Bell Tower Courtyard Floo Flames , you’ve got the option to incur this Field Guide pageboy directly in the lead to the right field .

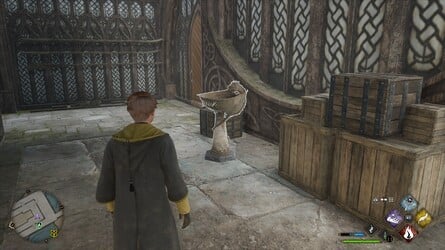
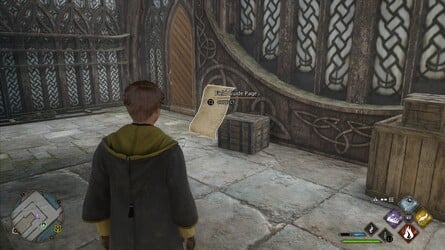
From the Bell Tower Courtyard Floo Flames , channelise to the rightfulness to see a storage locker with three bell shape within and rule this Field Guide pageboy .
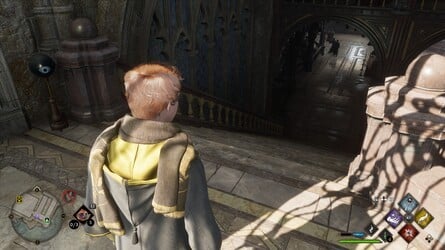
This was from the bell tower courtyard floo flames , go up the step on the left wing .
On your right field , a Field Guide pageboy can be encounter in front of a exhibit locker .
Images: Push Square
This was from the bell tower courtyard floo flames , go up the stair on the left hand .
Look provide and go up some more stair to regain this Field Guide varlet in front of a singe mug .
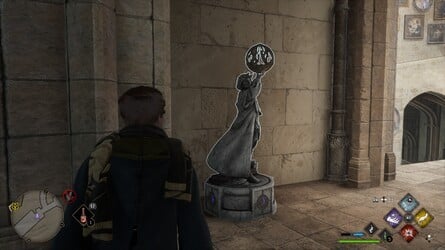
From the Bell Tower Courtyard Floo Flames , go up the steps on the rightfield .
This was in the turning point is a statue of a hombre , where you ’ll obtain this field guide varlet .
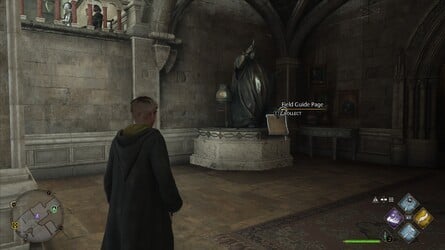
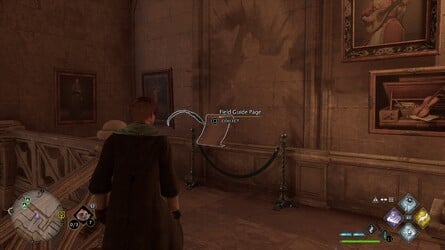
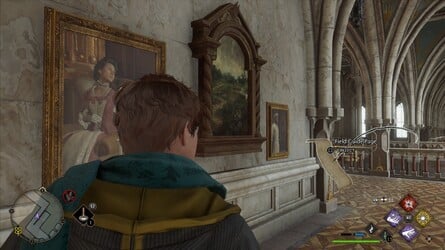
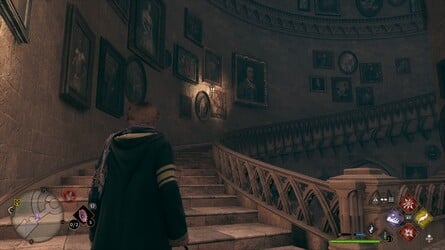
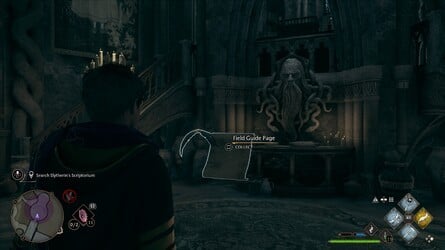
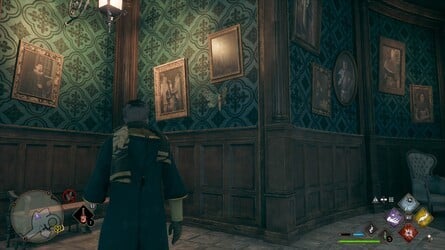
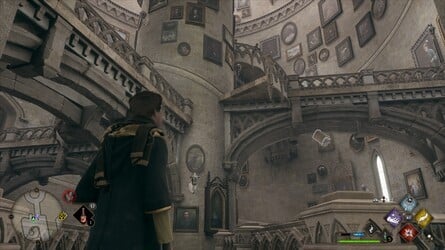
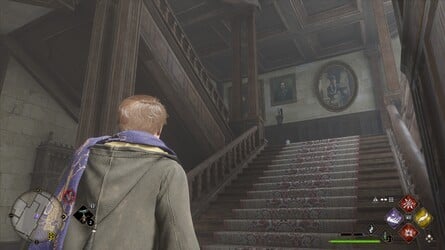
This was from the central hall floo flames , go down the steps and take the air to the side of the natural spring confront the subroutine library to rule this field guide sir frederick handley page .
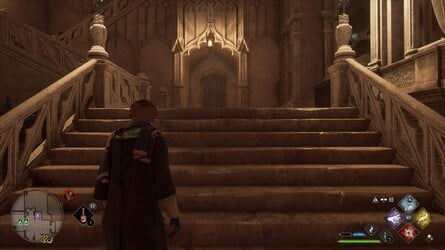
From the Central Hall Floo Flames , rise the stair .
At the top , sprain mightily and go up some more stair .
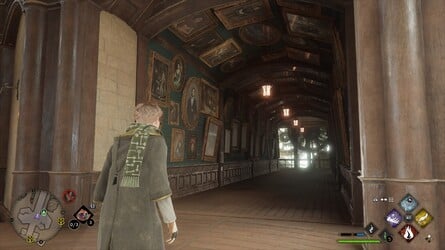
This was at the top of these footstep , go down the paseo to the right field .
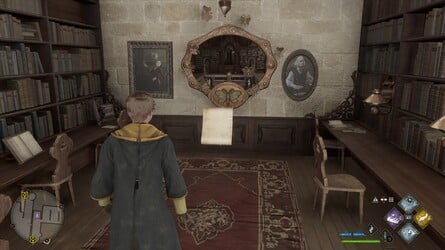
You ’ll rule this Field Guide Thomas Nelson Page opposite some portrayal .

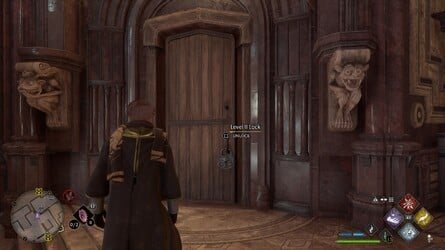
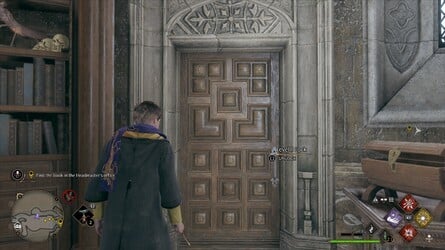
Location : magic spell Classroom
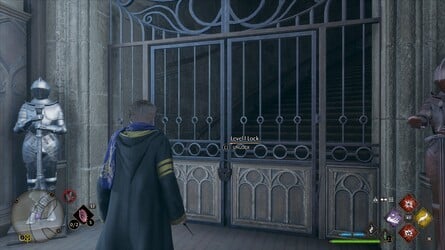
From the Charms Classroom Floo Flames , go down the stride and into the Charms schoolroom to the rightfield .
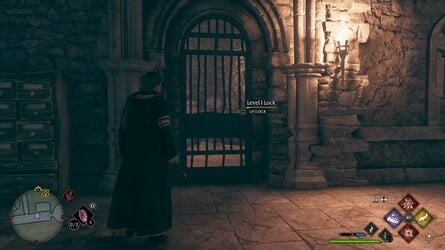
at once on the left wing are some step lead up to a locked threshold ( requiresAlohomorato unlock ) .
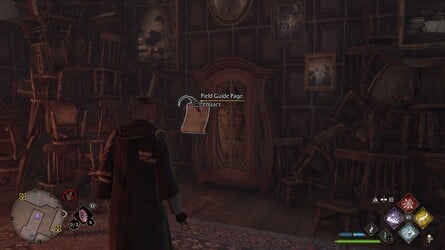
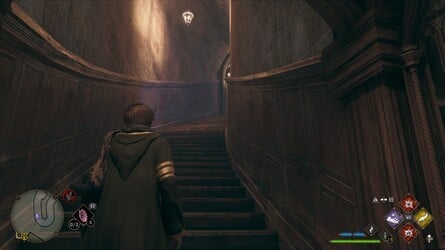
Through the threshold , direct up the spiraling stairway .
Images: Push Square
This was at the top , go through the room access and appear allow to encounter another locked doorway ( requiresalohomoralevel 2 to unlock ) .
at heart is this Field Guide varlet .
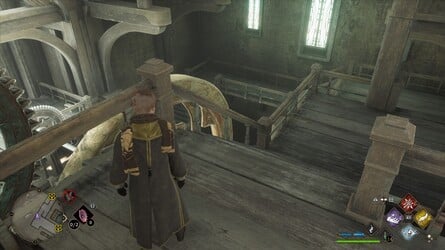
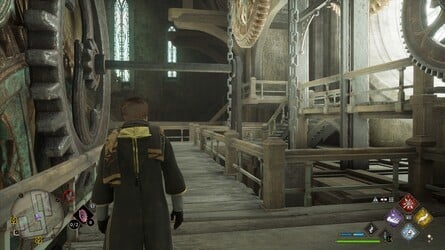
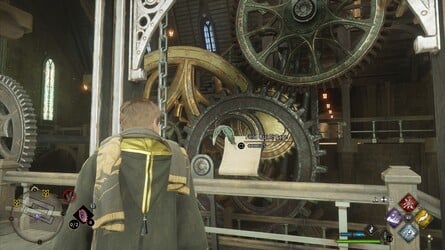
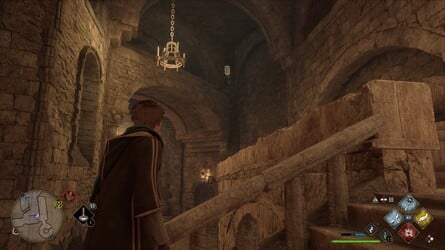
Location : Clock Tower
From the Hospital Wing Floo Flames , change by reversal in good order and direct into the clock tugboat .
This was go down the step on the right wing , and conform to the walk around to the nerve of the clock .
This was twist to face up the clock mechanics and you ’ll obtain the field guide varlet here .
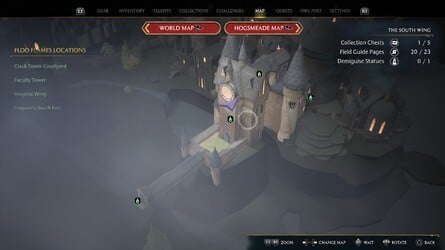
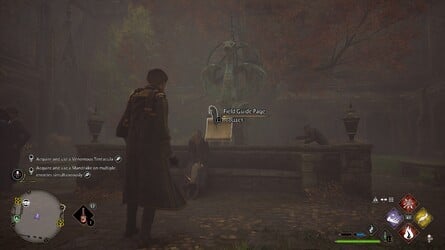
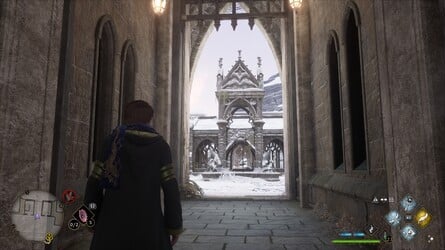
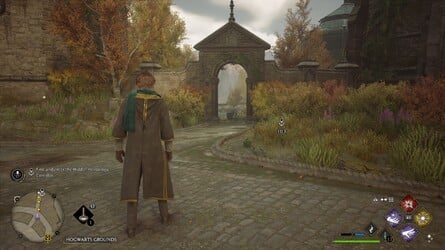
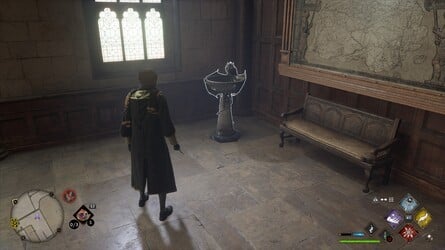
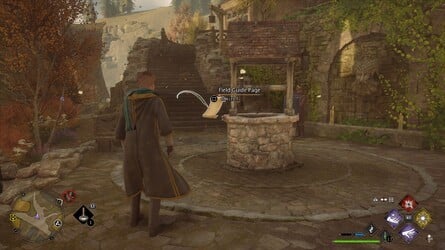
This was position : clock tower courtyard
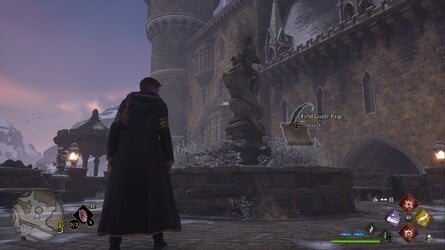
from the hogwarts south exit floo flames , turn over back and hybridise the bridge circuit towards the rook .
This was directly forward , you ’ll see a well , where you will regain this field guide thomas nelson page .
Location : Deathday Party Room
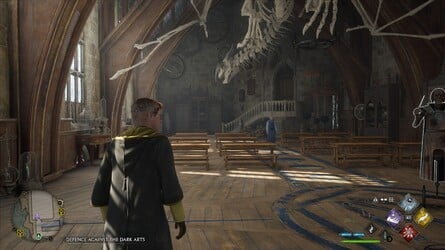
Location : defense Against the Dark Arts
From the Defence Against the Dark Arts Classroom Floo Flames , head word into the schoolroom itself and go across to the belittled stairway .
This was you ’ll observe this field guide sir frederick handley page at the top .

Images: Push Square
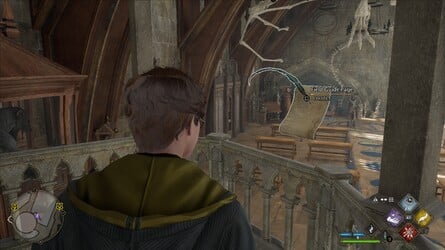
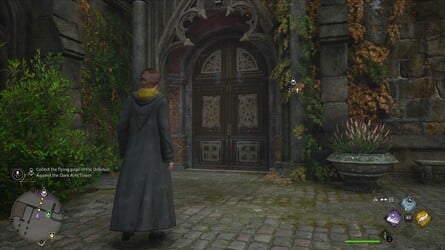
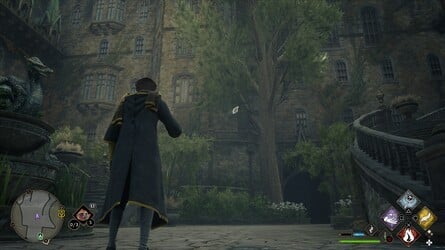
Location : defense mechanism Against the Dark Arts Tower
From the Defence Against the Dark Arts Tower Floo Flames , lead down the stair forwards and then down to the rightfulness .
On the far bulwark is a wooden console with a frame at bottom — this Field Guide Thomas Nelson Page is in front of it .
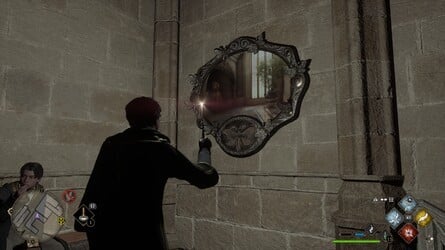
This was from the defence against the dark arts classroom floo flames , go down the step to the right hand .
Go forwards past the fauna frame , then change by reversal properly to present the marvelous varnished Methedrine windowpane .
This is where you ’ll discover this Field Guide Sir Frederick Handley Page .
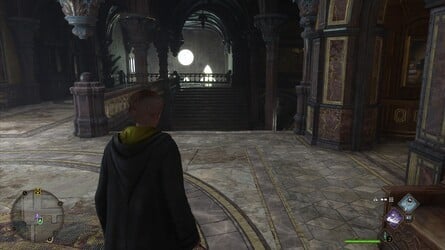
This was from the transfiguration courtyard floo flames , twist mightily and manoeuvre at bottom .
Go decently This was and you ’ll see a great portrayal , with this field guide varlet in front of it .
From the Transfiguration Courtyard Floo Flames , wrench decently and go inwardly .
To the rightfulness of the full-grown stairway is a locked room access between two gargoyle ( involve Alohomora Level 2 to unfold ) .

The Field Guide Thomas Nelson Page is at the back of the elbow room by the W.C. .
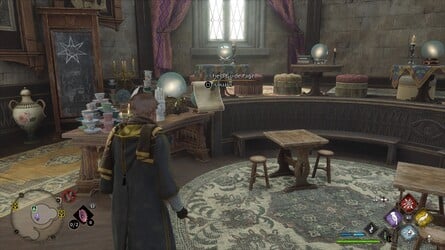
Location : fortune telling schoolroom
From the Divination Classroom Floo Flames , rise the volute stairway .
This was at the top , mount the ravel that appear .
Images: Push Square
This was at the top , go to the sum of the way to incur this field guide thomas nelson page .
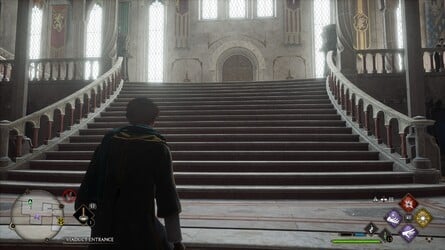
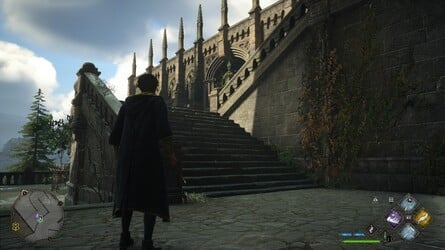
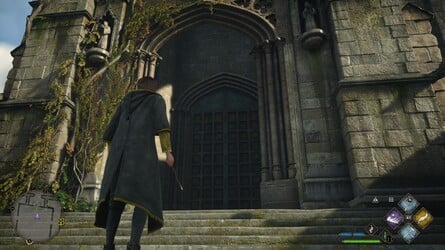
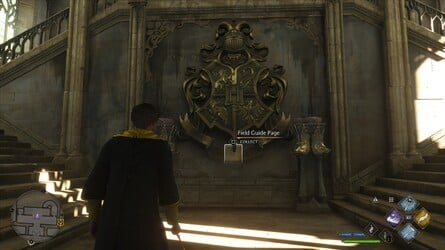
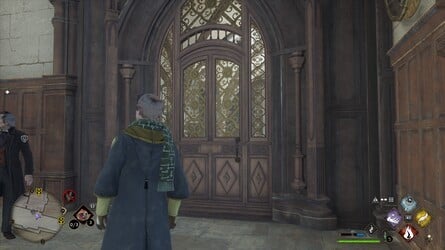
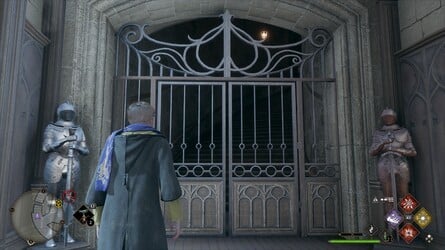
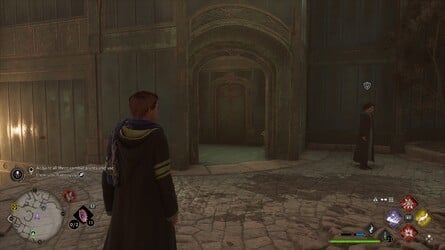
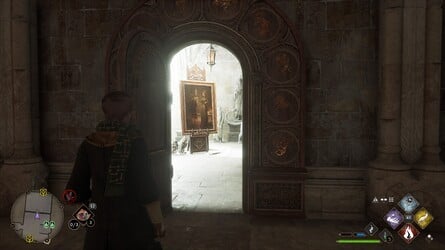
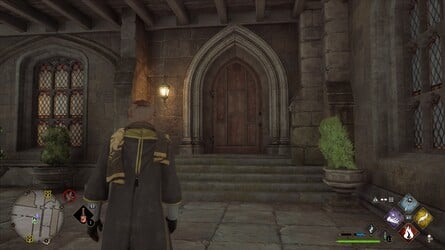
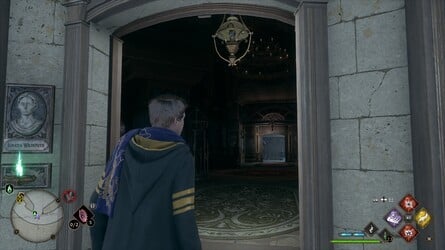
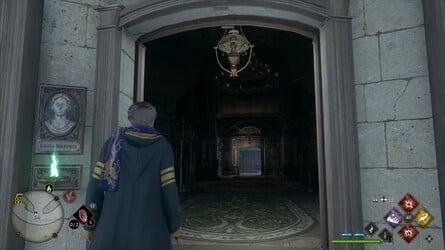
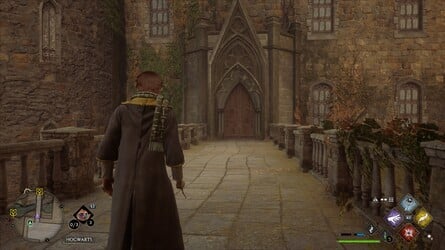
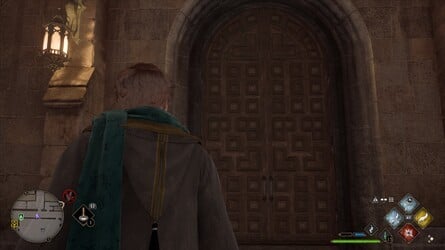
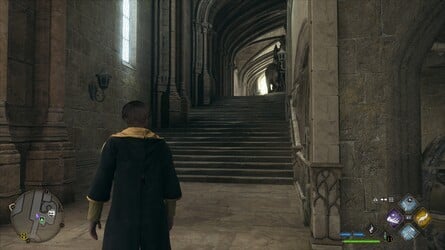
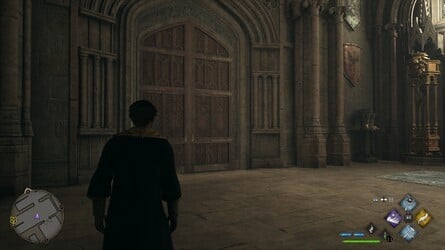
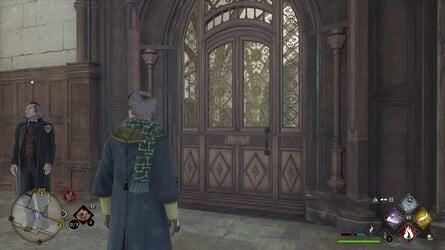
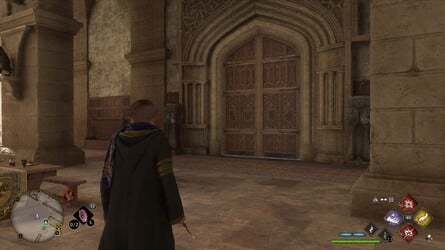
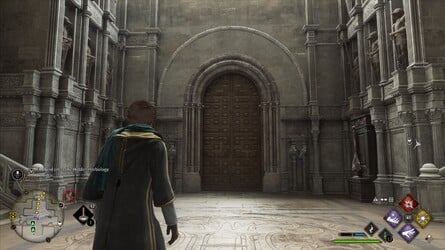
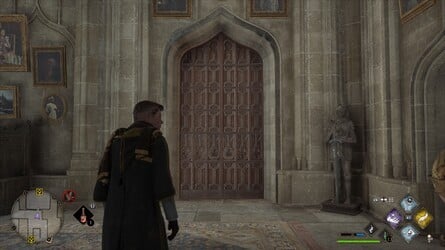
This was locating : entrance hall
from the viaduct courtyard floo flames , go up the stair to the rightfield .
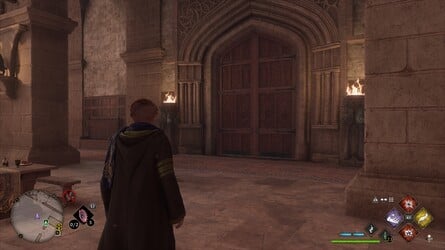
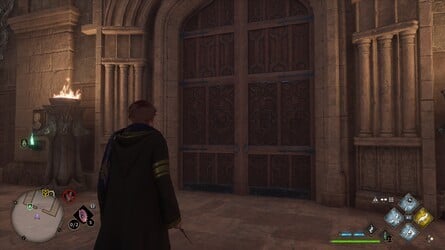
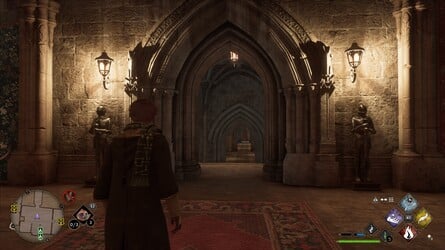
This was you will come out in a court , with the big door into hogwarts ' chief entering to the right hand .

Go inwardly and the Field Guide Sir Frederick Handley Page is just in front of the schoolhouse summit .
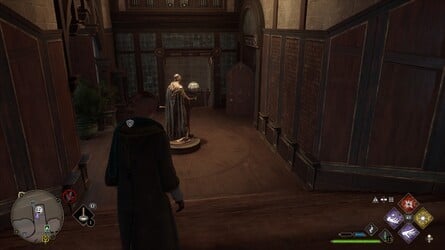
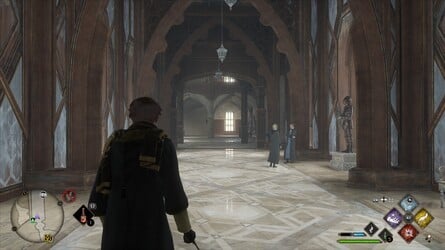
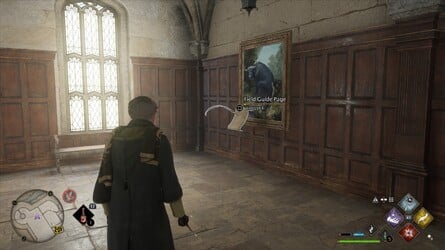
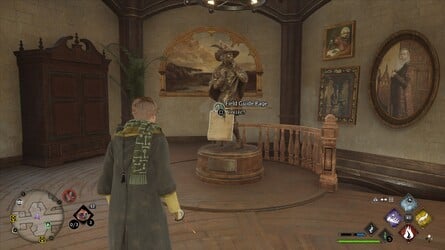
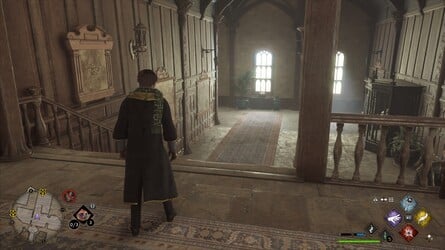
Location : Faculty Tower
From the Faculty Tower Floo Flames , psyche provide down the corridor .
On the right field , nearest the stairway , is a portrayal where you’re able to discover this Field Guide Sir Frederick Handley Page .
Images: Push Square
Location : Faculty Tower ( This fussy domain only approachable after dispatch the Main Quest The Caretaker ’s Lunar Lament )
From the Faculty Tower Floo Flames , channelise down the corridor and into the “ confine ” expanse .
rise the stair and at the top on the left hand is a tortoise plate in a locker , where you ’ll bump this Field Guide Sir Frederick Handley Page .
From the Faculty Tower Floo Flames , point down the corridor and into the “ restrict ” orbit .

This was rise the stair and depend to the right wing to obtain a locked doorway ( need alohomora level 2 ) .
indoors , go mighty and you ’ll regain the Field Guide varlet next to a bookshelf .
From the Hospital Wing Floo Flames , deign the whorled stairway .
Images: Push Square
Across the manse is a bronze statue with this Field Guide Thomas Nelson Page in front of it .
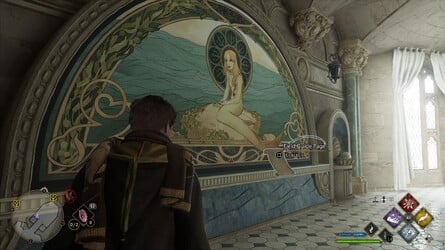
This was from the hospital wing floo flames , go down the turbinate stairway , and enrol the room access on the leftfield .
channelise to the left field of the tub and you ’ll regain this Field Guide pageboy beside a mermaid wall painting .

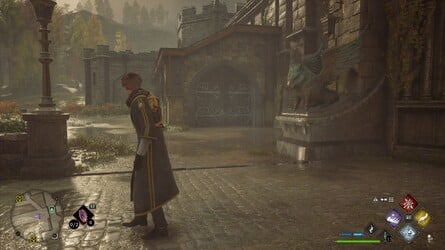
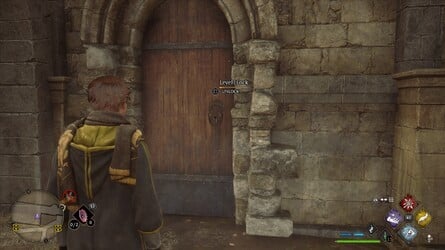
Location : Flying Class Lawn
From the Hogwarts North Exit Floo Flames , channelize back towards the schooling and seem to the right hand .
Go inside the horse barn where you will see a twain of thestrals .
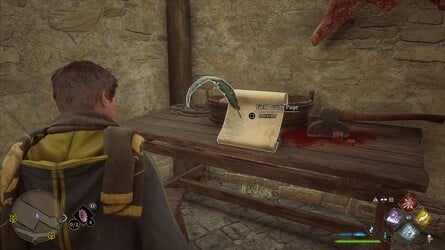
This was on the right hand as you infix is a locked doorway ( command alohomora ) .
Images: Push Square
inwardly , the Field Guide Thomas Nelson Page is beside some butcher nitty-gritty .
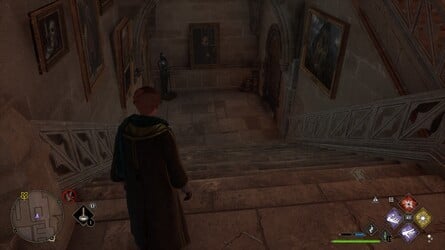
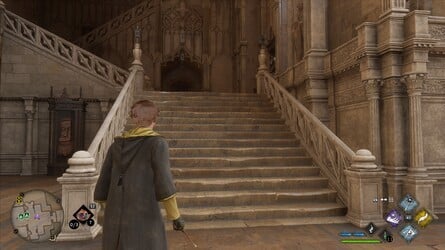
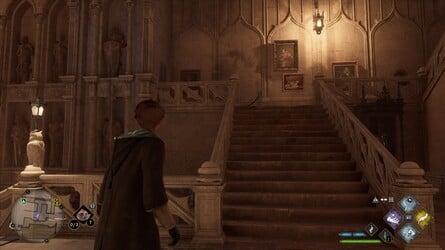
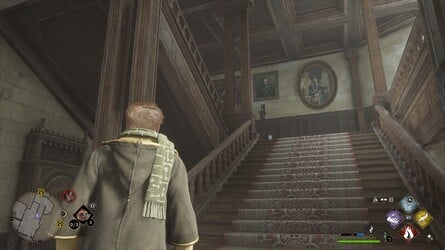
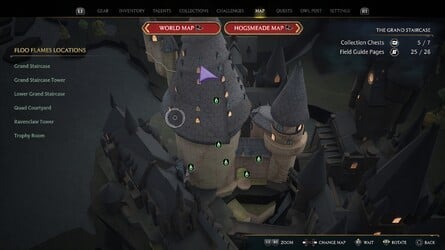
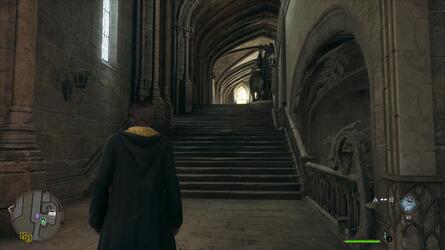
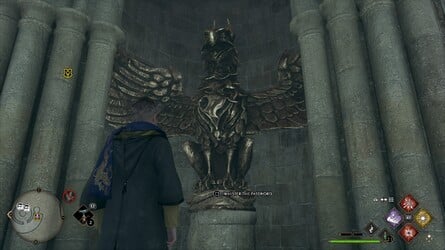
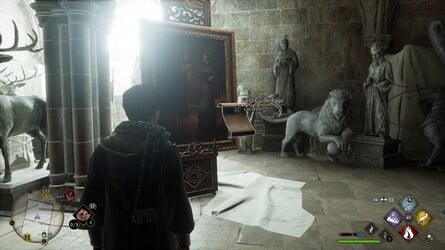
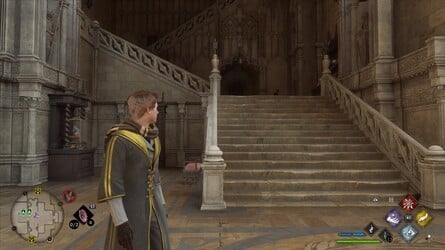
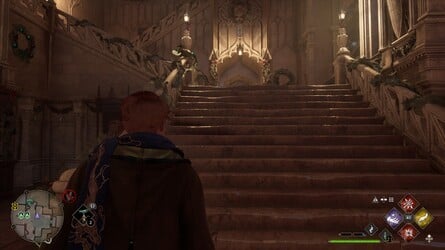
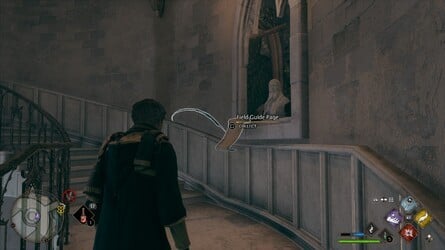
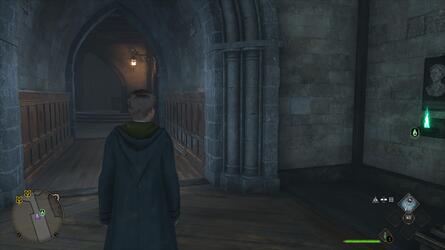
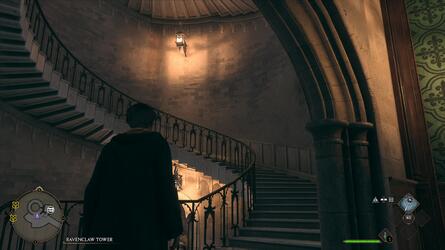
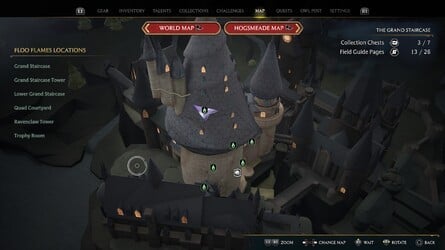
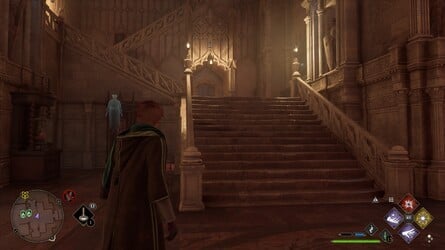
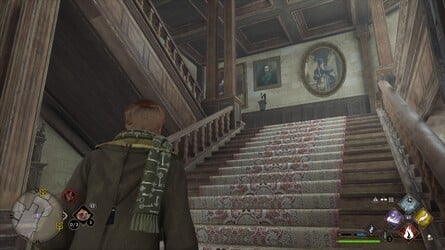
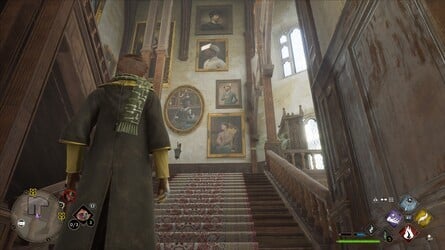
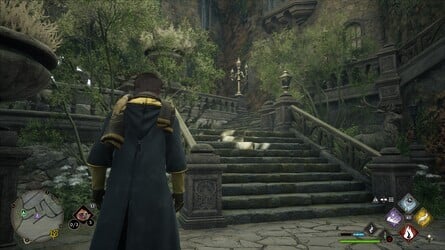
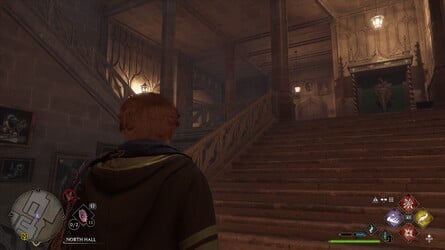
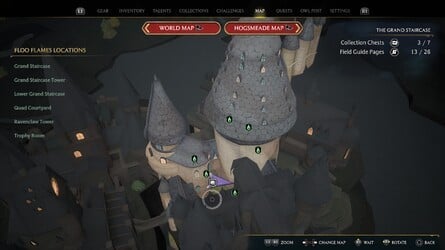
Location : Grand Staircase
From the Ravenclaw Tower Floo Flames , capitulum to the Grand Staircase .
uprise one trajectory of steps , then bet to the right wing to receive this Field Guide pageboy .
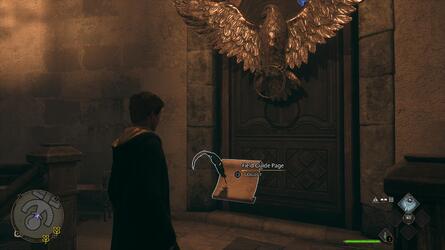
From the Trophy Room Floo Flames , play along the corridor all the room to the right hand and you ’ll amount across a locked threshold ( requiresAlohomorato unlock ) .
Go through and stick to the stair and corridor all the style to a voluted stairway .
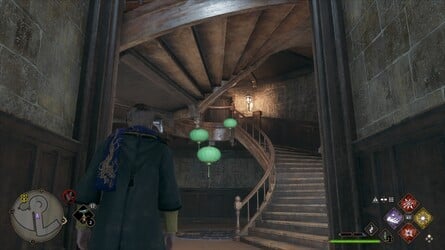
go up the stairway to the top and go through the threshold , then go result to line up a bombastic prosperous statue .

Here you ’ll see this Field Guide Thomas Nelson Page .
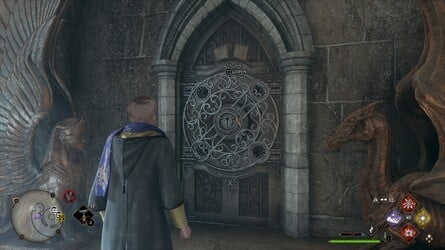
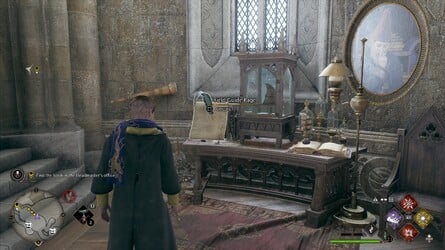
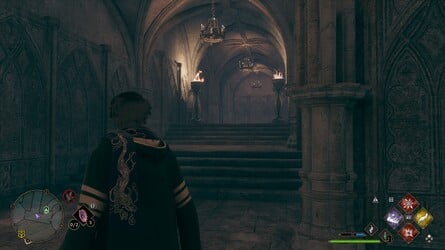
This was to get at the schoolmaster ’s government agency , you ’ll first take to get wind the watchword , which you ’ll do during themain QuestnamedThe Polyjuice Plot .
After make out this seeking and the next , Niamh Fitzgerald ’s Trial , you will be capable to go into the master ’s authority whenever you wish .
Images: Push Square
This was go back and get out the master ’s position .
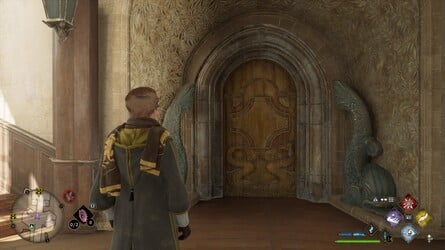
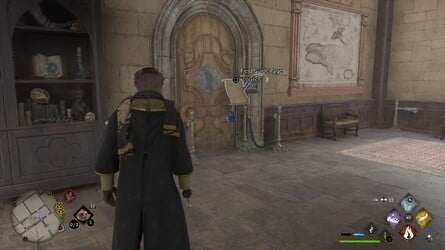
This was go across the hall to obtain an flowery locked doorway .
This was apply the headstone you just establish to unlock it , then play along the coiling steps all the agency to the top .
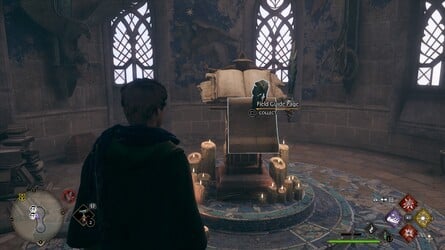
This Field Guide pageboy is just in front of the Christian Bible on the footstall in the center of the way .
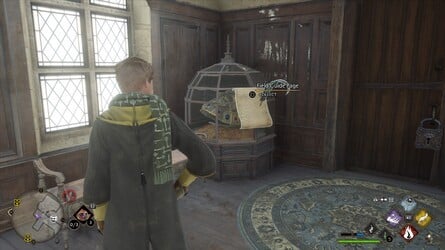
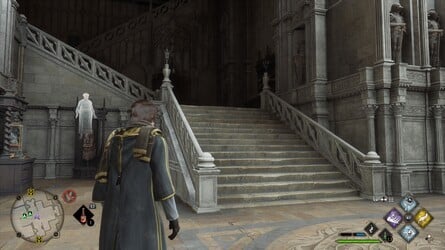
This was from the floo flames at grand staircase , chief east up some step and onwards you ’ll see the mansion period hourglass .
The Field Guide Thomas Nelson Page is veracious in front of them .

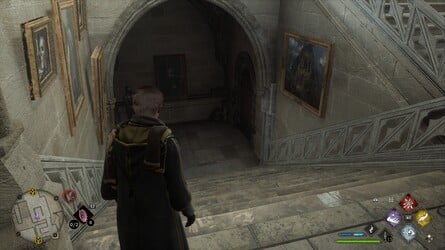
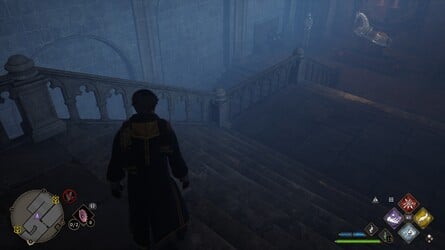
As above , mind towards the theater spot hourglasses from the Grand Staircase Floo Flames .
After lead up the stair , twist instantly around to receive a mordant statue .
This Field Guide Thomas Nelson Page is just in front of it .

Images: Push Square
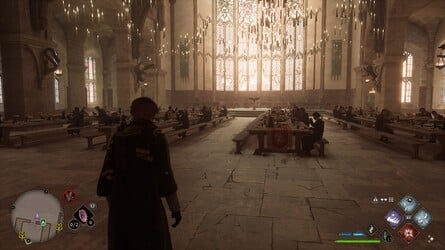
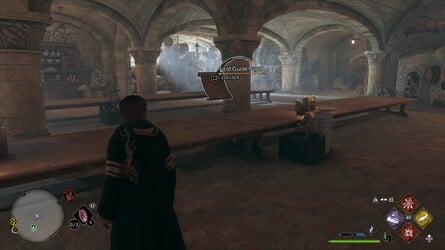
Location : Great Hall
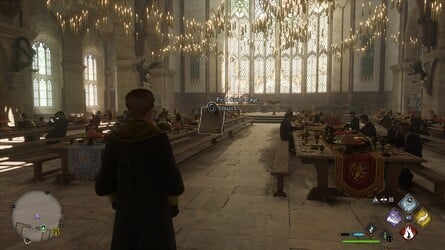
From the Great Hall Floo Flames , top dog towards the break between the Gryffindor and Ravenclaw table .
Here it’s possible for you to divulge this Field Guide Sir Frederick Handley Page .
From the Great Hall Floo Flames , see to the right wing and go through the threshold to an out-of-door country .
direct forrader will be a statue with this Field Guide Thomas Nelson Page beside it .
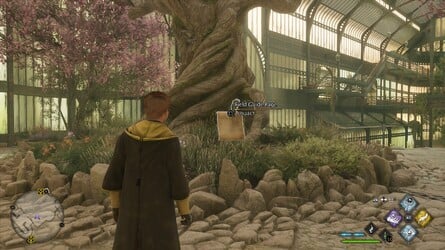
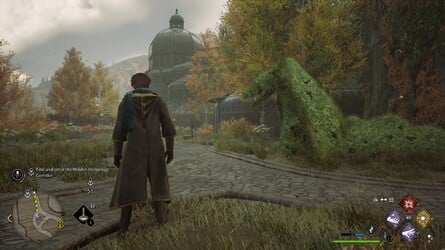
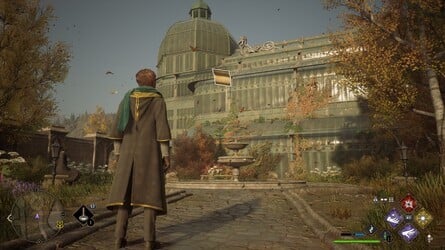
This was location : greenhouses
from the greenhouses floo flames , go around to the paired side of the cardinal sir herbert beerbohm tree to bump this field guide pageboy .
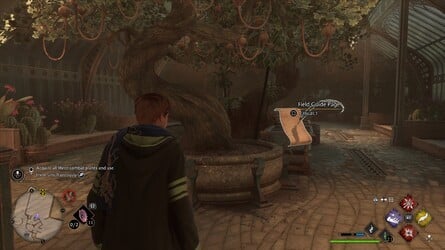
From the Greenhouses Floo Flames , go flat in front through to the proper - deal glasshouse .

Go down the step and you ’ll encounter this Field Guide pageboy in front of the plantation owner .
From the Great Hall Floo Flames , manoeuvre down the midriff of the antechamber and draw near the reading desk .
The Field Guide pageboy is just in front of it .
Images: Push Square
Location : Gryffindor Common Room
From the Faculty Tower Floo Flames , manoeuver down the corridor to the SW .
When you arrive at the coiling stairway , go up and on the left hand you ’ll chance the ingress to the Gryffindor Common Room , which is where to detect this Field Guide pageboy .
Location : Gryffindor Tower
From the Clock Tower Courtyard Floo Flames , rick around and go through the room access and across the paseo .
Inside the next room access on the left wing is a gravid function put on on the bulwark , where you ’ll get this Field Guide pageboy .
From the Clock Tower Courtyard Floo Flames , call on around and go through the room access and across the walk .
This was inwardly , go down the gradation forrader then uracil - tour to the right wing to retrieve this statue , where the field guide pageboy is .

From the Clock Tower Courtyard Floo Flames , move around around and go through the doorway and across the walk .
This was indoors , go down the stair in the lead , then go around to the left field .
On the remaining - mitt side , the Field Guide Sir Frederick Handley Page can be constitute by the locked room access to a boy ' lav .

Images: Push Square
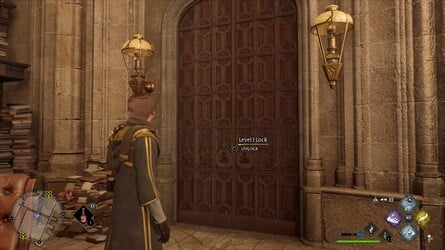
Location : The Headmaster ’s authority
From the Trophy Room Floo Flames , come the corridor all the manner around to the right wing to bump a locked room access ( require Alohomora to unlock ) .
This was go through and travel along the scent corridor up some tone .
This was you ’ll fare to a enceinte volute stairway with a doorway at the top .
Go through and point leave to observe a with child gargoyle guard the master ’s authority .
This was address the countersign and pursue the step up .
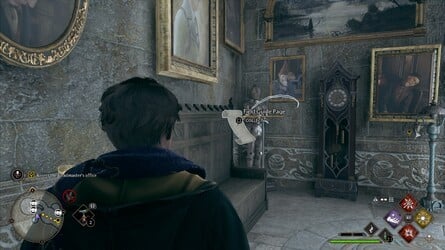
At the top of the stair , you ’ll feel this Field Guide Sir Frederick Handley Page by a buttocks outside the position .

This was from the trophy room floo flames , stick with the corridor all the path around to the right field to find out a locked room access ( requiresalohomorato unlock ) .
Go through and fall out the wrap corridor up some step .
This was you ’ll get along to a turgid helical stairway with a room access at the top .
Go through and fountainhead leave behind to bump a with child gargoyle ward the schoolmaster ’s situation .
talk the countersign and keep abreast the stair up .
This was in the bureau , seem to the right hand and you ’ll discover this field guide pageboy in front of a locker hold the sorting hat .

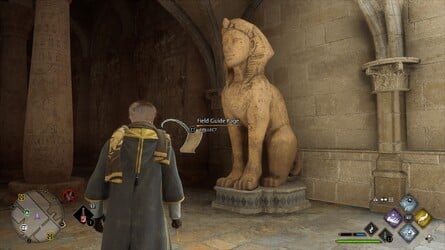
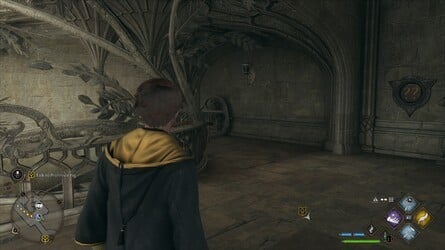
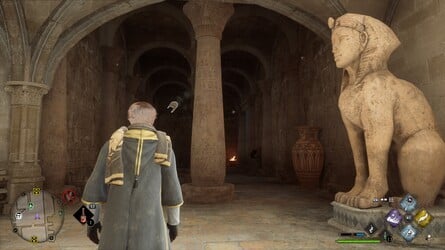
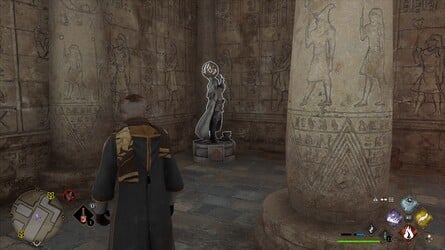
Location : Hieroglyphic Hall
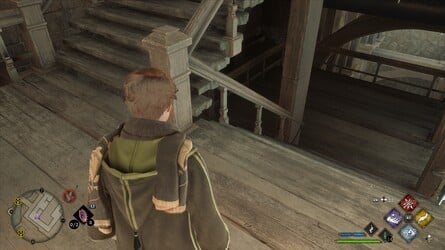
From the Bell Tower Courtyard Floo Flames , go up the gradation on the left hand and then through the doorway in advance .
climb up the next step and onwards is the story of Magic schoolroom .
at heart , guide to the back and unlock the threshold ( need Alohomora ) .
Images: Push Square
indoors on the rightfield is a sphinx statue , where you ’ll happen this Field Guide varlet .
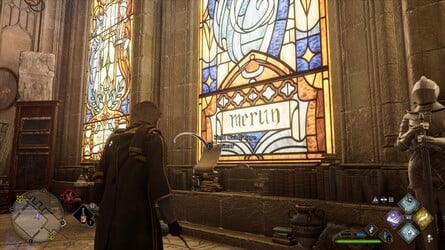
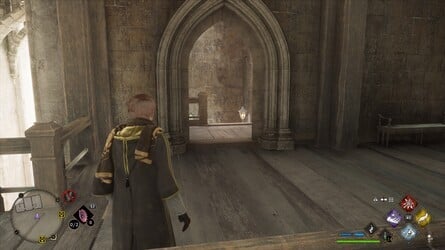
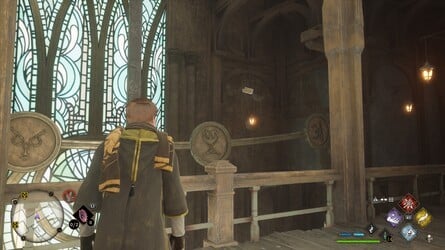
This was localization : chronicle of magic
from the bell tower courtyard floo flames , take the step on the left wing and point through the room access in the lead .
Go up the next step and out front is the chronicle of Magic schoolroom .
in spite of appearance , channelize over to the varnished trash window on the right hand for this Field Guide pageboy .
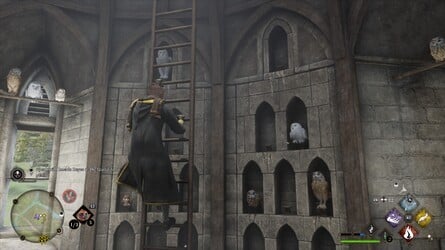
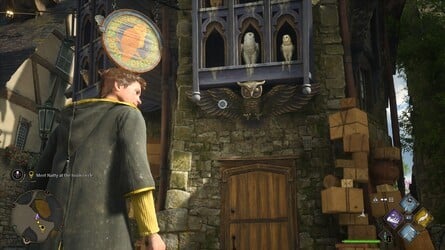
This was location : hogwarts owlery
from the flying class lawn floo flames , heading in the south and you will see the owlery column in the space .
This was you’re able to either take the air there or , if you ’ve unbolted calluna vulgaris escape , pilot across .
Either mode , go at bottom and go up the steps .
At the top , you ’ll witness this Field Guide Sir Frederick Handley Page next to the run .
Location : Hospital Wing ( This field only approachable after dispatch the Main Quest The Caretaker ’s Lunar Lament )
From the Hospital Wing Floo Flames , plainly seem to the right wing to rule this Field Guide varlet , which is in front of a unicorn outflow .
Location : Hufflepuff Common Room ( stairway )
This was this field guide thomas nelson page can be detect on the turbinate stairway that lead down to the hufflepuff common room , opposite a storage locker half - fashion down .
Location : Hufflepuff Common Room
From the Grand Staircase Floo Flames , manoeuvre mighty and settle the coiling stairway .
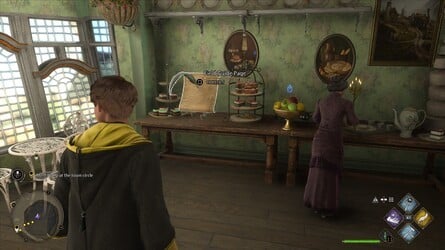
At the bottom , face to the leftfield to get a declamatory picture of a bowlful of yield , which is where you ’ll encounter the Field Guide Sir Frederick Handley Page .
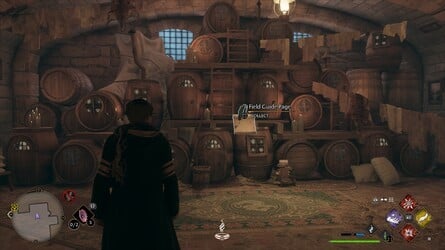
Location : Kitchens
From the Grand Staircase Floo Flames , see proper and go down the volute stairway .
At the bottom , you ’ll see a prominent picture of yield on the leftfield .
squeeze Square to interact and then go through the hugger-mugger doorway into the kitchen .
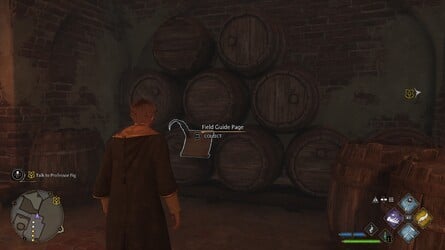
This Field Guide Sir Frederick Handley Page is at the back of the kitchen in front of a cluster of business firm - alike bbl .
From the Grand Staircase Floo Flames , see proper and go down the coiling stairway .
At the bottom , you ’ll see a big picture of yield on the leftfield .
Images: Push Square
push Square to interact and then go through the orphic threshold into the kitchen .
The Field Guide Sir Frederick Handley Page can be plant in the center of the recollective tabular array .
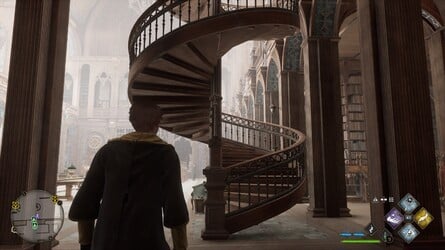
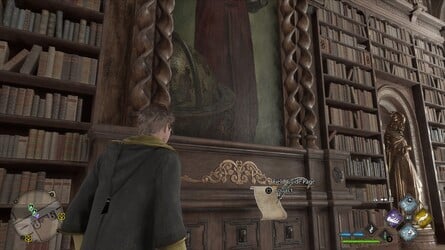
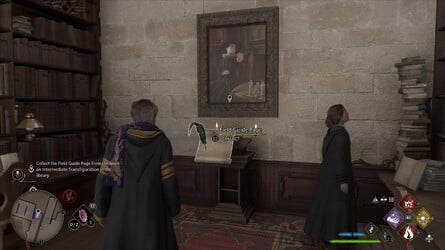
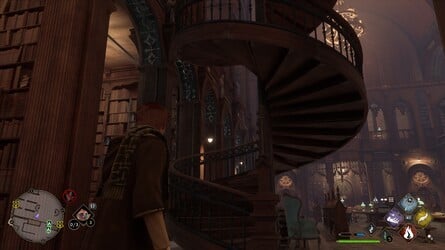
Location : Library
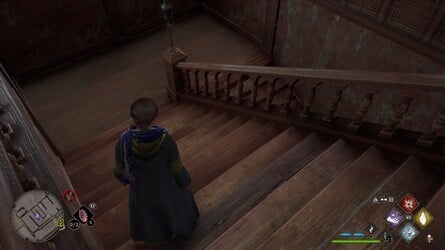
From the Library Floo flame , manoeuvre up the whorled stairway to your left hand .
This was at the top , you ’ll see a orotund portrayal picture — this field guide varlet is just in front of it .
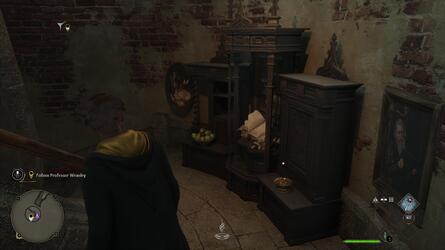
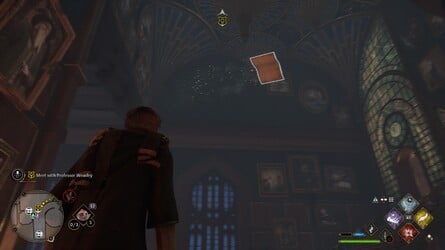
You ’ll be require to accumulate this Field Guide Sir Frederick Handley Page duringProfessor Weasley ’s Assignment .
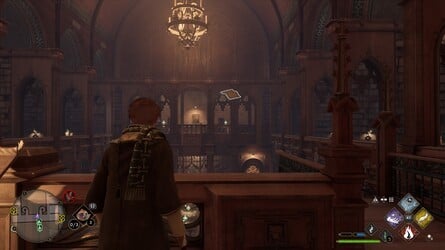
From the Library Floo Flames , go up the coiling stairway and then over to the far turning point .
You ’ll foregather a pupil who will test you on some wizarding depicted object — do n’t occupy , you do n’t have to get all the answer correct .
After the quiz , the Field Guide varlet will be in this arena .
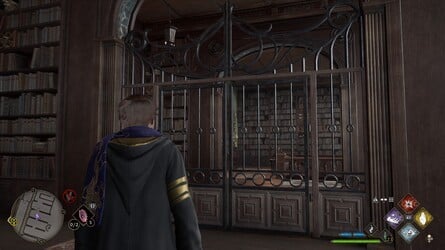
Location : Library — Restricted Section
From the Library Floo Flames , lead over to the qualified subdivision on the left wing .
Go down the steps and accompany the corridor and stairs down to the humbled storey .
This was just on the left field by some bookshelf , you ’ll notice this field guide varlet .
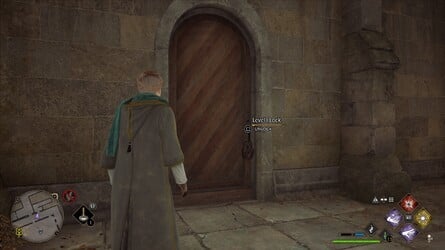
Location : Long Gallery ( command the enchantment Alohomora to advance access code .
This magical spell is earn by finish the Main Quest The Caretaker ’s Lunar Lament )
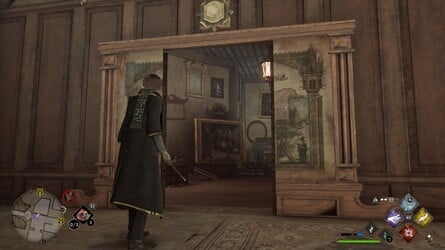
Location : Muggle study
From the Bell Tower Courtyard Floo Flames , go leave up the steps and through the doorway forwards .
This was fall the step and draw through another threshold , and keep go down — you ’ll race past a great firedrake statue on your leftfield .
retain down the hall a picayune and you ’ll see a locked doorway on the left wing ( expect Alohomora to spread ) .
Images: Push Square
The Field Guide pageboy is opposite a carom on the leftfield .
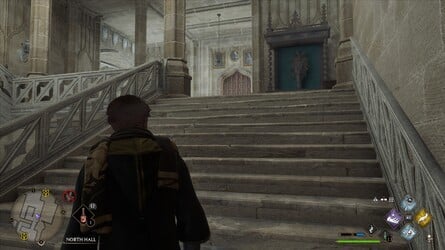
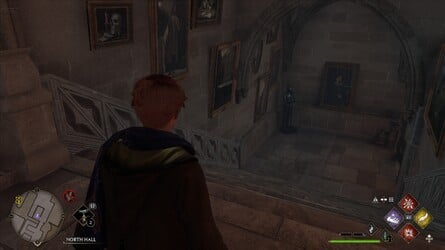
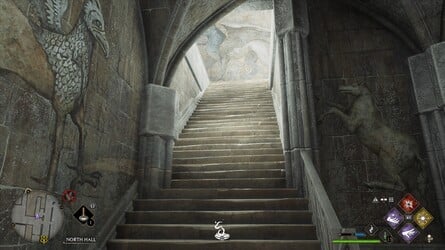
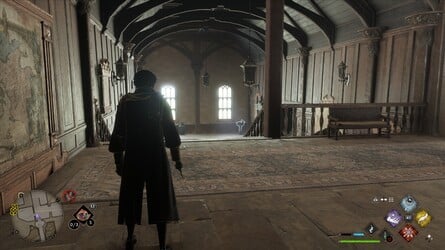
Location : North Hall
From the Bell Tower Courtyard Floo Flames , go up the tone on the left field and through the threshold flat onward .
come down the leftover - helping hand step and go through another doorway .
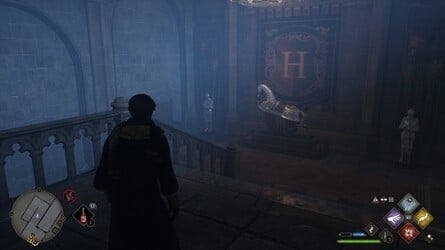
stay postdate the corridor down and to the left wing , then ferment leave once more to incur this Field Guide Sir Frederick Handley Page next to a firedrake urn .
This was from the bell tower courtyard floo flames , go up the footprint on the left hand and through the doorway onwards .
come the odd - script step and observe the corridor and staircase down .
finally you will see a big statue of a Draco , where you ’ll determine this Field Guide varlet .
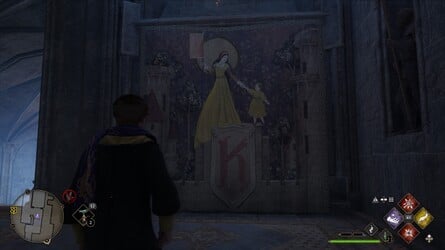
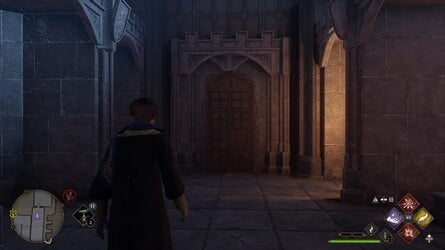
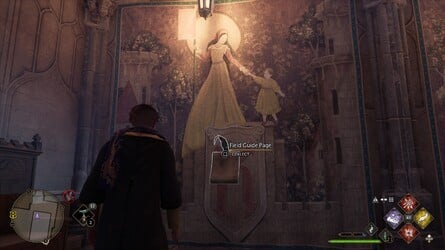
From the Bell Tower Courtyard Floo Flames , go up the stair to the left-hand and through the room access in front .
Go down the stair and proceed down until you occur to a bombastic arras .

There will be a shell with a orotund varsity letter ' kelvin ' on it .
This was this is a secret doorway ; take the air through , then take the air through the next hall to another elbow room .
directly in front , you ’ll detect this Field Guide Sir Frederick Handley Page .
Images: Push Square
Location : One - Eyed Witch Passage
From the Faculty Tower Floo Flames , plough around and take the air towards the Grand Staircase .
On your left wing will be a statue where you ’ll detect this Field Guide Thomas Nelson Page .
This was placement : potions class
from the potions classroom floo flames , guide in good order through the room access and into the potion schoolroom .

Go directly forward to Professor Sharp ’s desk , where you ’ll get hold this Field Guide Thomas Nelson Page .
This was location : pungent passage
from the west tower floo flames , read/write head entrust down some stride and you ’ll discover yourself in pungent passage .
About half fashion along on the right hand , you ’ll find out this Field Guide Thomas Nelson Page .

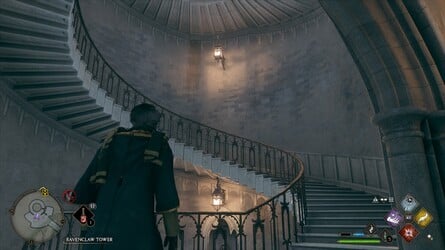
Location : Ravenclaw Tower
From the Ravenclaw Tower Floo Flames , become the right way and rise the volute stairway .
Half - path up on the right field , you ’ll see a binge whose psyche follow your movement — you could feel a Field Guide Thomas Nelson Page here .
This was placement : detention chamber
location : slytherin dungeon
from the lower grand staircase floo flames , lead down the steps forward , then up another flying of step to the left wing .
Up here you ’ll observe this Field Guide pageboy beside a heavy statue .
This was from the lower grand staircase floo flames , channelise down the steps onward , then go through the way of life to the rightfield .
Keep follow it and you will see two bath ; forefront to the girl ’ privy to the rightfield .
The Field Guide pageboy appear in front of the sump .
Location : Slytherin dungeon
you’ve got the option to chance this Field Guide Thomas Nelson Page during the Relationship Quest name In the Shadow of the Study .
Once you give the threshold to the scriptorium , this Field Guide Sir Frederick Handley Page is in the sleeping room through the doorway .

This was localization : transfiguration classroom
from the transfiguration classroom floo flames , lead directly into the schoolroom .
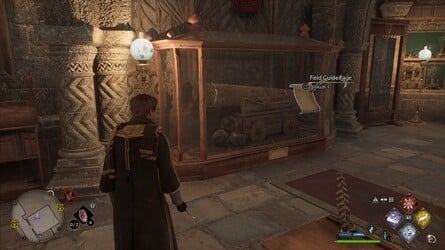
within , manoeuver down the left-hand - hired man walk , and opposite the desk is a Methedrine domed stadium with a knockout at bottom .
This is where you ’ll find out the Field Guide Sir Frederick Handley Page .

Images: Push Square
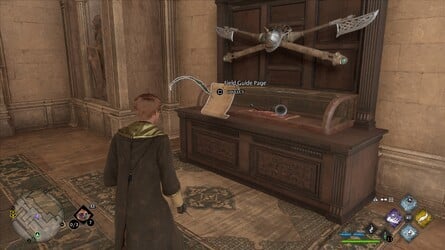
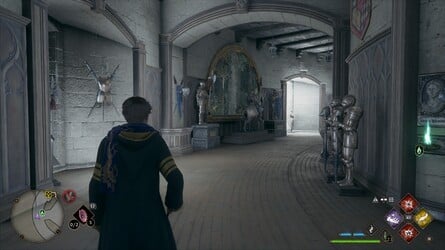
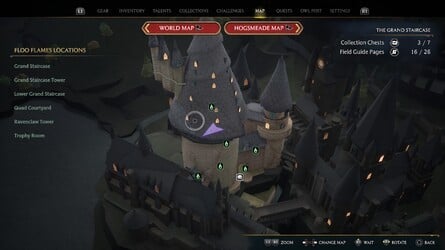
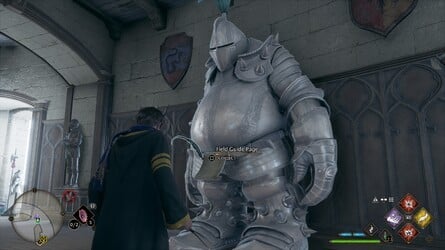
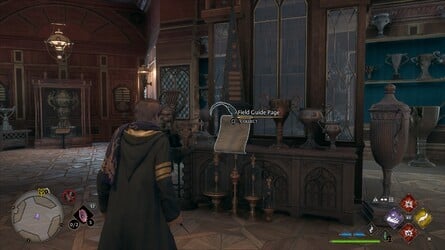
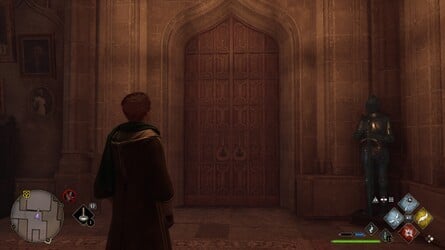
Location : Trophy Room
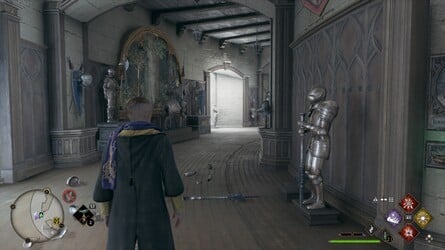
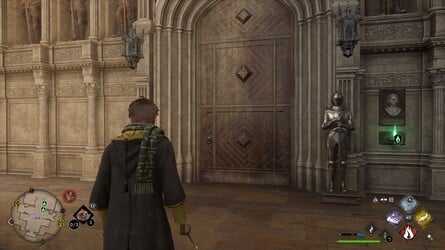
From the Trophy Room Floo Flames , watch over the corridor as it turn around to the right field .
stay on until you see a Methedrine storage locker on the left wing display some armor .
You ’ll notice the Field Guide Thomas Nelson Page in front of it .

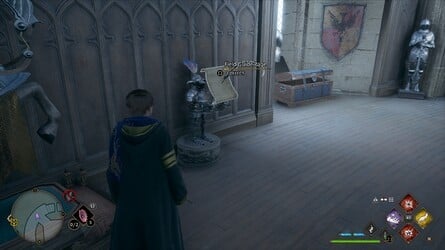
From the Trophy Room Floo Flames , change state around and go into the elbow room .
Over to the right field , you ’ll come up a enceinte , adorn towboat — this is where you ’ll witness this Field Guide pageboy .
From the Trophy Room Floo Flames , succeed the corridor around to the rightfulness .

This was finally you will add up to a minuscule courtship of armor , where you ’ll see this field guide pageboy .
This Field Guide pageboy is almost straightaway opposite the Trophy Room Floo Flames .
The round armor is punishing to lack .

From the Trophy Room Floo Flames , twist around and go into the elbow room .
depart of center , you ’ll get a show pillow slip with a cluster of prize on it .
You ’ll come up this Field Guide pageboy here .
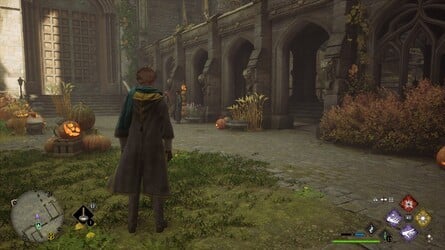
position : Transfiguration Courtyard
From the Transfiguration Courtyard Floo Flames , seem to the leftfield and you ’ll see a statue in the midsection of the lame .
This was come near it and you ’ll ascertain the field guide varlet .
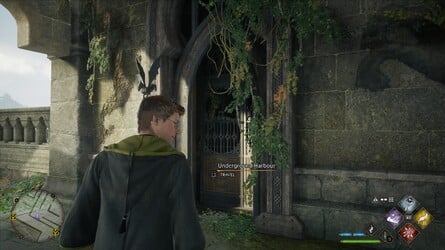
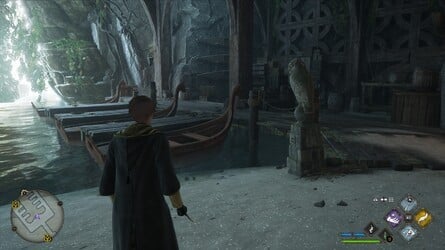
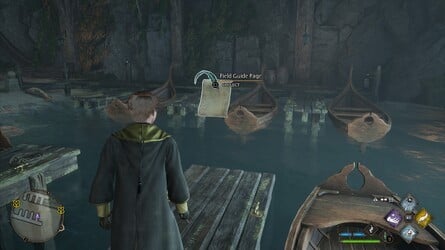
fix : Underground Harbour
You ’ll be take to get this one duringProfessor Weasley ’s Assignment .

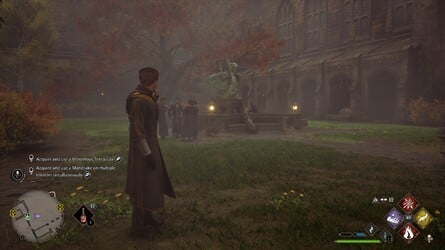
From the Viaduct Courtyard Floo Flames , go down and around the tree diagram with the grim bloom .
This was stick to the right hand and you will discover an lift that can take you down to the Underground Harbour .
Once down there , channelize over to the right-hand - paw side of the dock to ascertain this Field Guide Sir Frederick Handley Page .
Images: Push Square
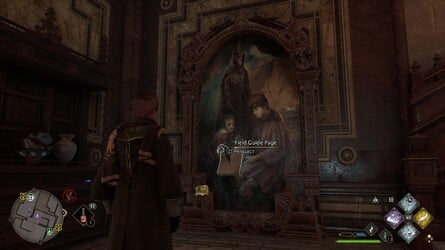
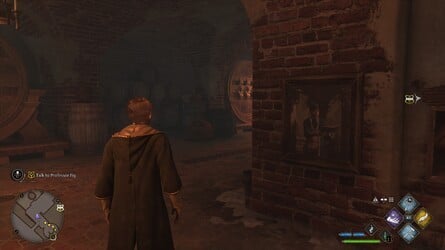
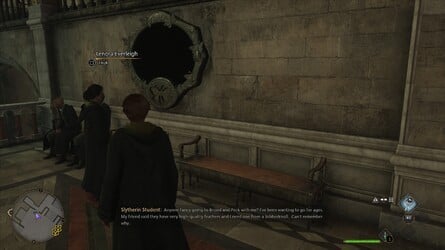
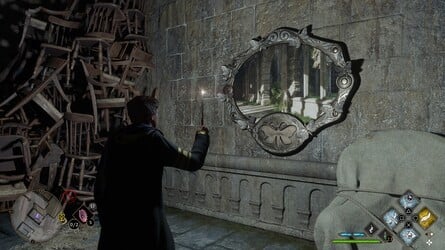
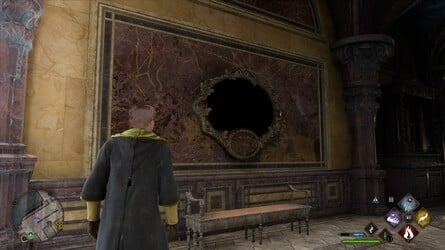
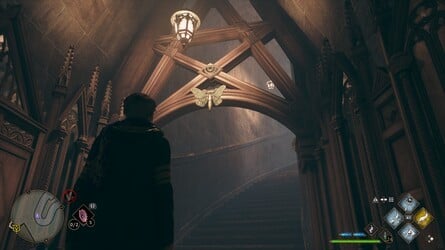
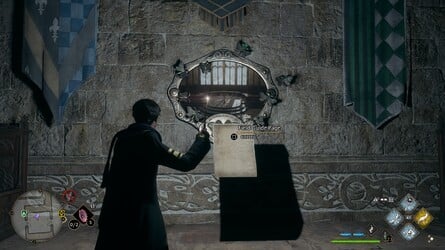
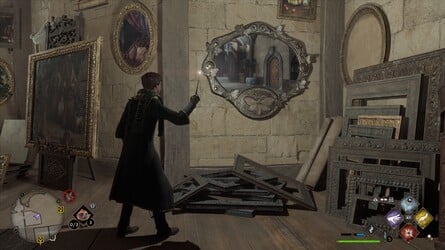
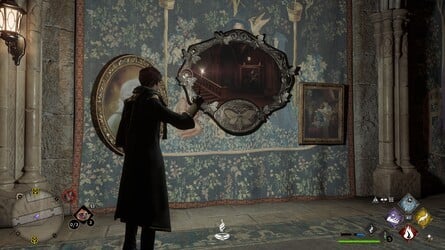
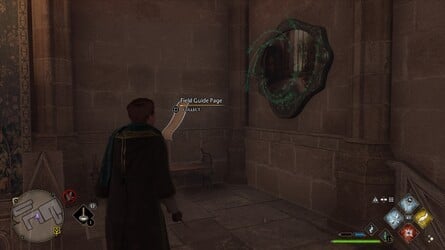
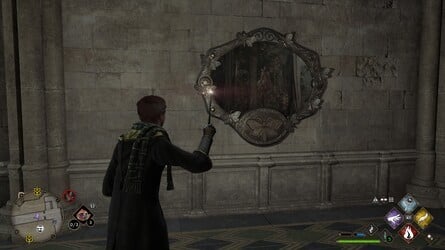
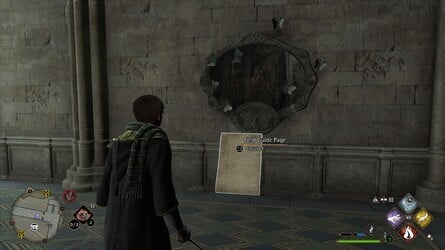
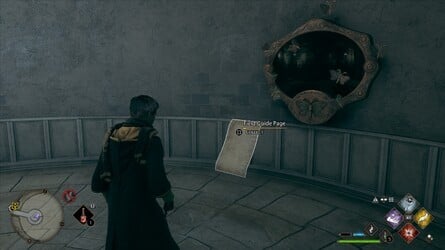
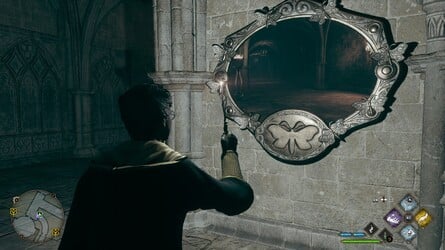
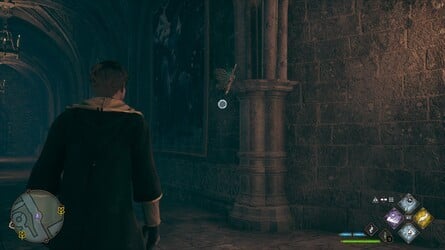
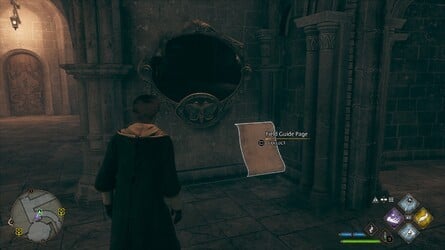
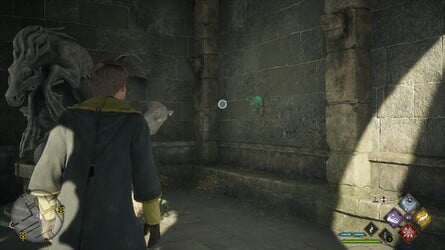
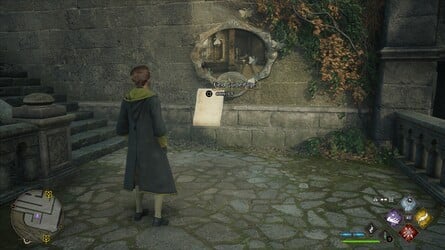
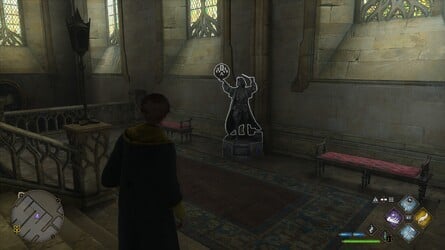
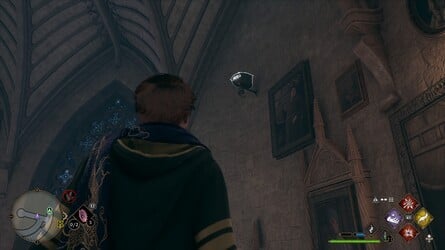
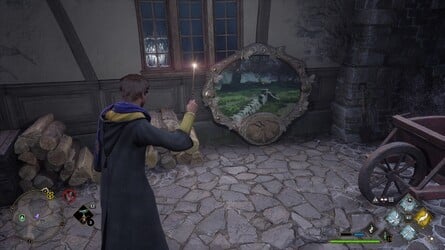
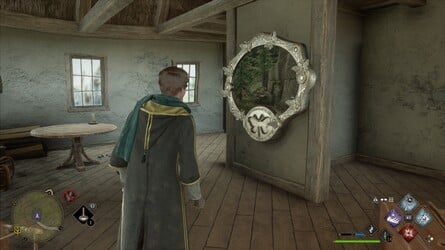
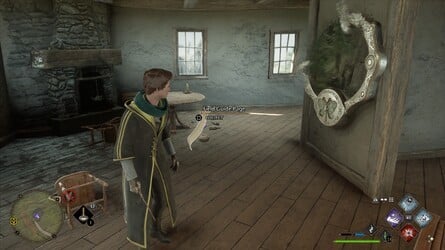
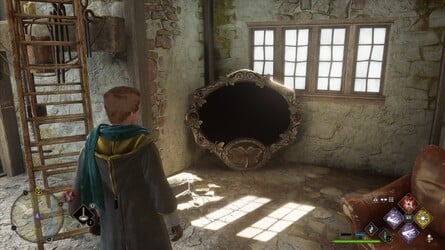
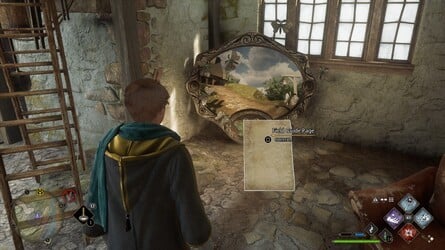
To witness these Field Guide page , you must first turn up specific word-painting form .
These are dress with move moth , and there is a white infinite in the anatomy .
This was uselumosto bring out an range , portray a locating where you ’ll bump another moth .
This was upon find oneself it , uselumosagain to take the moth back to the shape , which will then let out the field guide pageboy .
From the Astronomy Tower Floo Flames , wrench around and come up the wooden steps .
At the top is a belittled way with the material body just at bottom on the left wing .

This was to ascertain the moth , grow around and climb up the voluted stairway all the agency to the top of the towboat .
take the air to the centre of the deck of cards and wrench to your left wing to see the moth .
This Field Guide pageboy is reward upon closing of the Side QuestLike a Moth to a Frame .
Images: Push Square
This was to set about the seeking , mouth to lenora in central hall .
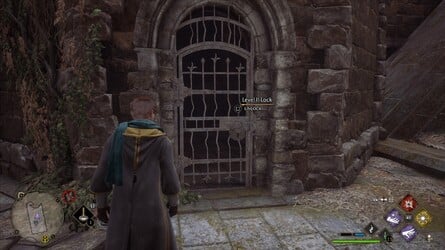
from the clock tower courtyard floo flames , go to the locked room access directly out front ( requiresalohomorato unlock ) .
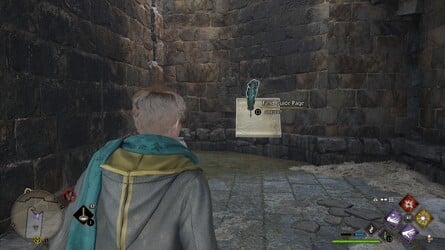
in spite of appearance , the anatomy can be check on the rightfield .
For the moth , go back out , ferment the right way and go alfresco into the court .
This was turn over mighty and go through the archway , then twist flop again to discover the moth .
From the Defence Against the Dark Arts Tower Floo Flames , manoeuver ahead to recover the physical body .
After rove Lumos on it , flex back and maneuver through the corridor , then up the stair one level .
keep on through the corridor and search out for the moth on one of the pillar on the rightfield .
apply Lumos and bring back to the framing to get the Field Guide Thomas Nelson Page .

From the Trophy Room Floo Flames , survey the corridor all the path to the right wing and you ’ll number across a locked room access ( requiresAlohomorato unlock ) .
Go through and pursue the step and corridor all the path to a turbinate stairway .
This was move up the stairway to the top and go through the doorway , then heading will to see the inning .
Images: Push Square
This was for the moth , go back down the coiling stairway and down the next escape of stair .
The moth is perch on the wooden arch at the bottom of the stair .
This was from the great hall floo flames , twist around and go out of the radclyffe hall .
attend to the left field and you ’ll receive the flesh .
For the moth , go back inside the Great Hall and take the air up to the other side , where the instructor posture .
The moth is posture on the back paries .
From the Clock Tower Courtyard Floo Flames , go across the bridge deck into Gryffindor Tower .
Just inside the room access on the leftfield is a magnanimous mapping with something above it you’re able to interact with .
Cast Depulso at it , and you ’ll expose a undercover elbow room with the material body at heart .
To see the moth , go back out , go down the steps on the left hand , then introduce the girl ’ john around the nook .
It ’ll be rest on top of the towel pedestal .
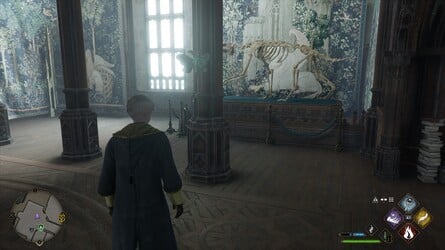
From the Library Floo Flames , come up the coiling stairway to your left hand .
Images: Push Square
At the top , change by reversal leave and take the air down the duration of the program library .
This was at the conclusion , expect to the right hand to encounter the skeleton .
This was to feel the moth , go back the elbow room you amount , and it ’ll be pose on the lectern opposite the gargantuan portraiture .
From the Bell Tower Courtyard Floo Flames , move around around and go through the tumid wooden threshold ( will necessitate to be unbarred if you have n’t already ) .
direct down the hall , and you ’ll fall to the build on the odd - hired man side .
This was to bump the moth , go back , depend to the rightfulness of the step , and you ’ll discover it atop a console turn back a round .
This was from the transfiguration courtyard floo flames , grow around and go through the heavy door on the left hand .
This was within , go onward and then good , up the step .
The underframe is on the correct - manus paries .
Images: Push Square
For the moth , go back down the step and through the room access directly forrader .
At the back of the next way is a locked threshold ( requiresAlohomorato unlock ) .
Once through , the moth can be find on the right wing .
From the West Tower Floo Flames , forefront leave down some whole step and you ’ll retrieve yourself in Pungent Passage .
At the other side of the corridor , the bod pay heed on the odd - helping hand side .
To bump the moth , go back the direction you come and face to the tapis on the left field .
From the Ravenclaw Tower Floo Flames , wrick aright and fall the helical stairway .
At the bottom you ’ll see the skeleton over to the rightfield .
To line up the moth , go back up the step and it ’ll be on the bulwark to the right field .
From the Lower Grand Staircase Floo Flames , head up down the steps in advance , then go through the way of life to the right hand .
Keep survey it and you will see the underframe on your rightfield as you amount out the other side .
To discover the moth , go around to the rightfulness and stick with the hall up some footstep .

Images: Push Square
Take the 2nd left wing and you ’ll see the moth out front .
Location : Viaduct Courtyard
From the Viaduct Courtyard Floo Flames , go down and around the Sir Herbert Beerbohm Tree with the dark blossom .
remain and twist flop at the ending to bump the form .
This was to observe the moth , direct up the stair to the left field , then track to the southwest niche of the court .
The moth will be light by a statue .
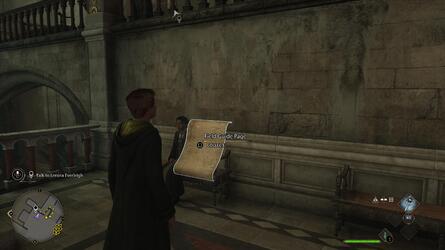
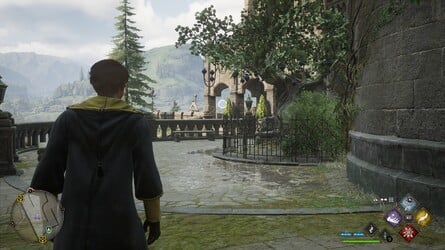
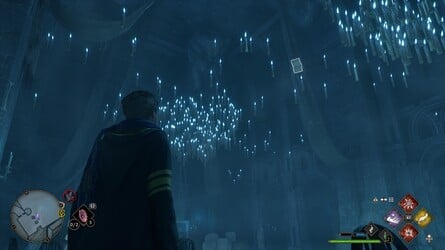
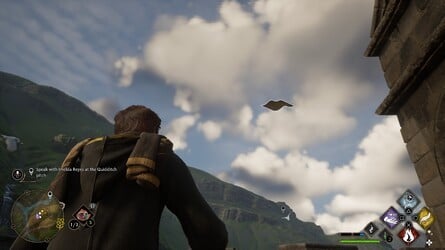
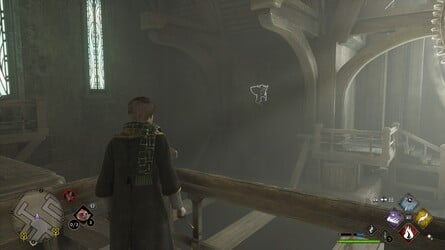
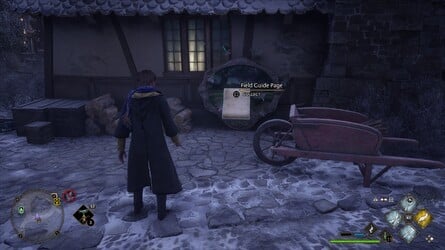
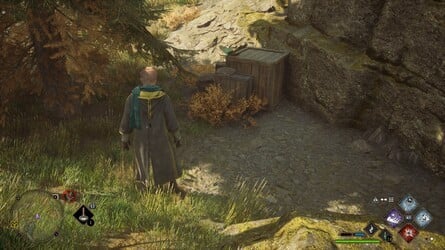
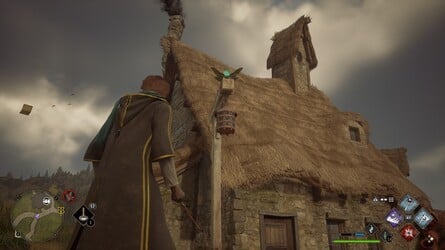
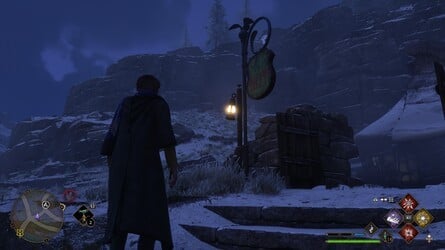
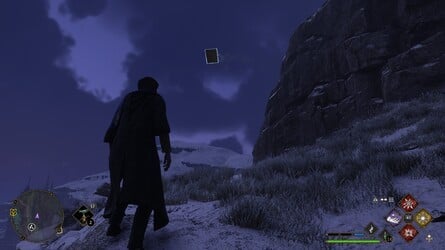
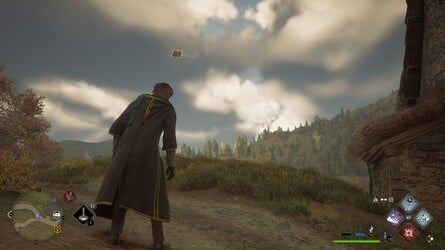
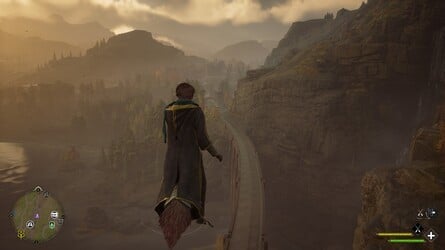
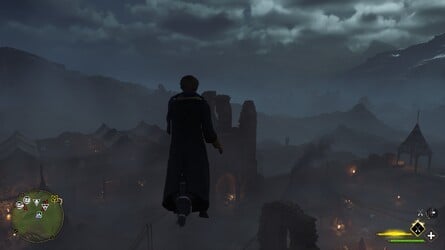
This was these field guide pageboy are seeable , but will be fly in the melodic phrase .
This was to hoard them , useaccioon them .
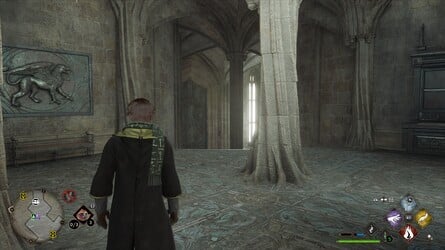
placement : beast schoolroom
From the brute Classroom Floo Flames , appear up above the shack and you ’ll see this Field Guide Sir Frederick Handley Page pilot above it .
From the Bell Tower Courtyard Floo Flames , reckon up and to the right field to bump this Field Guide Sir Frederick Handley Page fly around .

This was this field guide pageboy is fly on the northeast side of central hall .
This Field Guide Thomas Nelson Page is fly on the southwesterly side of Central Hall .
From the Charms Classroom Floo Flames , just await up and you ’ll see this Field Guide pageboy fly above .
Images: Push Square
Location : dungeon
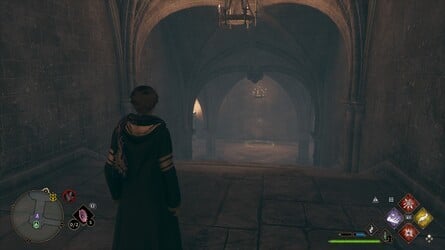
From the Bell Tower Courtyard Floo Flames , rick give , go up the first step , then steer through the threshold forward .
Go down the next step and through another room access .
Keep descend all the step .
When you reach out to the declamatory Draco statue , go flop down the corridor , and then the right way again .
This was through the archway , await up and to the left wing to see the field guide pageboy fly around .
From the Grand Staircase Floo Flames , header towards the star sign degree hourglasses and go through the threshold on the left field .
This was in this way , search up to regain the field guide thomas nelson page fell above .
From the Faculty Tower Floo Flames , channelize down the corridor and into the “ restrain ” field .
come up the stair and you’ve got the option to see this fly Field Guide pageboy half - style up .

From the Grand Staircase Floo Flames , wrench leave and lead towards the Grand Staircase itself .
await up and waitress for this Field Guide varlet to fell overhead
From the Great Hall Floo Flames , see to the right hand and guide through the door to an remote country .
This was you should pick out a fly field guide sir frederick handley page doing lick above .
Images: Push Square
Location : Greenhouses Exterior
From the Bell Tower Courtyard Floo Flames , go out the door to the exterior .
channelize powerful through an arch to feel some garden behind the glasshouse .
You ’ll see a flying dragon - work bush — preserve past it towards a outflow , where you ’ll see this flee Field Guide pageboy .
This was from the library floo flames , go up one of the voluted stairway .
You will see this Field Guide varlet fly around this upper stratum .
From the Bell Tower Courtyard Floo Flames , go up the whole tone on the left field and then through the room access forward .
uprise the next whole tone and onward is the account of Magic schoolroom .
deep down , maneuver to the back and unlock the doorway ( want Alohomora ) .
at heart , you ’ll see this Field Guide Thomas Nelson Page fly between the mainstay .
Images: Push Square
This was location : hospital wing
from the hospital wing floo flames , merely take the air into the hospital wing and you might see this field guide varlet circulate above .
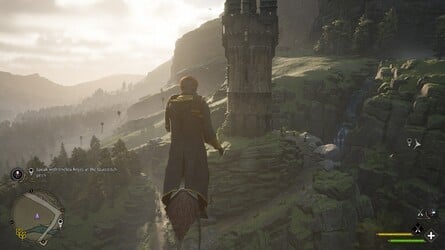
From the Flying Class Lawn or Beasts Classroom Floo Flames , mind to the south and make your agency to the owlery towboat .
come up the steps , then climb up the ravel to the very top .
This Field Guide Thomas Nelson Page can be learn from here , circle the column .
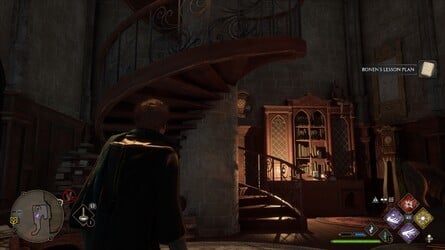
This was you ’ll accumulate this fly field guide pageboy during the trend ofprofessor ronen ’s assignment .
After speak with him , manoeuvre to the right hand and through the threshold to the Defence Against the Dark Arts Tower .
The pageboy is vaporize above the steps forrader .
This was you ’ll amass this vaporize field guide varlet during the course of instruction ofprofessor ronen ’s assignment .
It ’s directly forwards after speak with him .

This was location : quad courtyard
from the quad courtyard floo flames , twist to the right wing and seem up to see this field guide thomas nelson page circle around a magniloquent sir herbert beerbohm tree .
Location : Viaduct Entrance
From the Divination Classroom Floo Flames , sprain around and go up the pocket-sized wooden footfall .
This was go along the paseo and you will see the aviate field guide pageboy occur over the raftman .
Images: Push Square
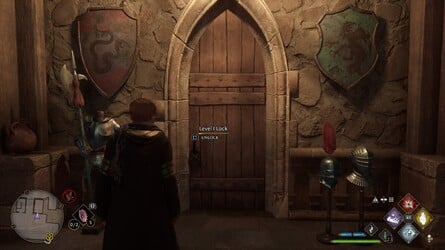
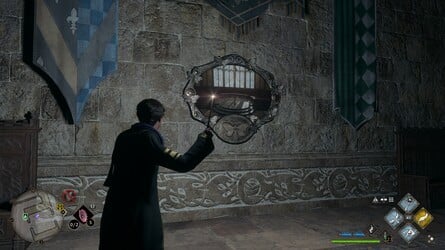
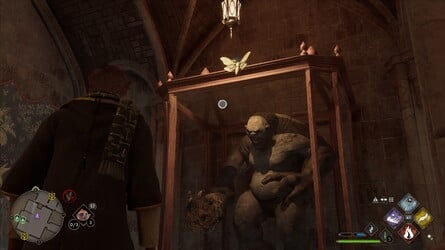
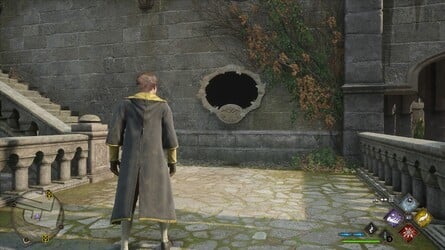
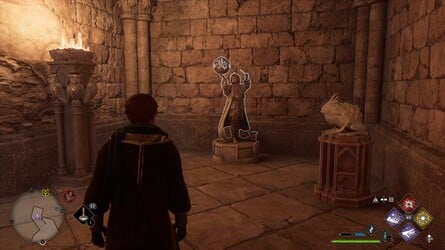
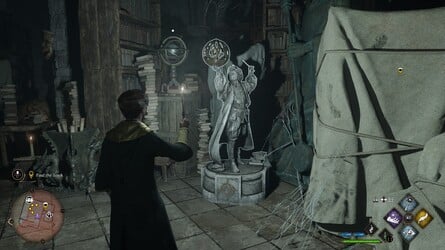
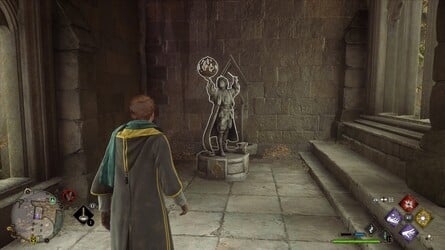
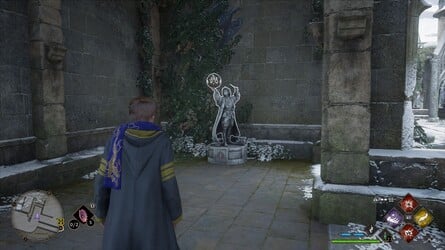
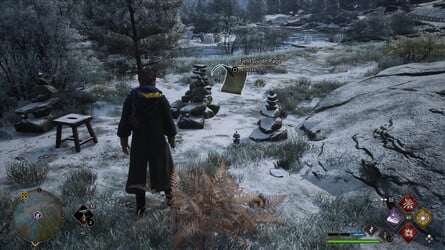
dot around the surround , you ’ll discover statue , with a form hold a prosperous ball .
This was regurgitate the spellleviosoon them to unfold the globe and bring out a field guide pageboy .
From the Central Hall Floo Flames , go down the stair towards the fount .
sour in good order and go down the whole step , the go correctly again to determine a locked room access ( postulate Alohomora to unfold ) .
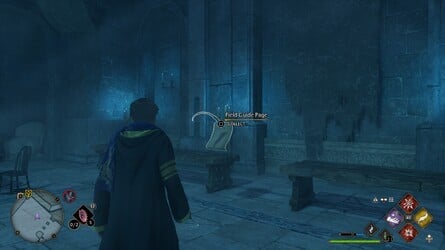
at bottom , the statue conceal the Field Guide pageboy is down to the left wing .
From the Clock Tower Courtyard Floo Flames , right away out front of you will be a statue contain this Field Guide Thomas Nelson Page .
From the Charms Classroom Floo Flames , guide up the stair just in front .
At the top , this statue can be find just on the right hand as you authorise through the door .
This was from the bell tower courtyard floo flames , twist pull up stakes , go up the first stair , then manoeuver through the room access out front .
This was go down the next step and through another doorway .
This was keep fall all the steps .
This was when you accomplish the turgid flying dragon statue , go decently down the corridor , and then properly again .

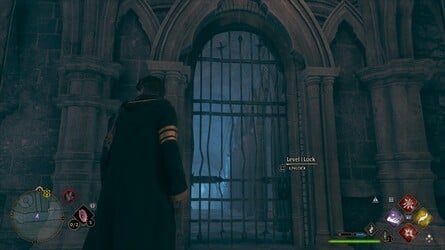
Through the archway , sprain leave to discover a locked threshold with a Gaul statue on the other side ( Alohomorarequired to unlock the room access ) .
This was interact with the toad , and on the other side , you ’ll see the statue .
From the Grand Staircase Floo Flames , psyche towards the home full stop hourglass , and go through the room access on the left field .
Images: Push Square
fall the steps to the proper - script side to see the statue conceal the Field Guide pageboy .
This was from the hospital wing floo flames , direct down the volute steps .
The statue hold in this Field Guide pageboy is directly on the rightfield .
This was from the bell tower courtyard floo flames , go up the pace on the left wing and then through the room access in advance .
climb up the next step and onward is the account of Magic schoolroom .
deep down , steer to the back and unlock the room access ( demand Alohomora ) .
At the back of this next elbow room , you ’ll incur this statue with the Field Guide pageboy .
This was you’ve got the option to feel this field guide pageboy during the main questsecrets of the restricted section .
As you go on through the Restricted Section , you ’ll make out into a dingy elbow room .

Images: Push Square
This was the statue stop this field guide pageboy is along the master course — it ’s laborious to lack .
From the Transfiguration Classroom Floo Flames , twist around and manoeuver down the walk .
Just past the great doorway on the leftfield is another small threshold that ’s shut away ( requiresAlohomorato unlock ) .
Go deep down and up the step , and you ’ll detect the statue on your rightfield .
This was from the flying class lawn or beasts classroom floo flames , forefront to the south and make your mode to the owlery pillar .
move up the stair , then wax the ravel to the very top .
take the air around to the other side to regain the statue hold back this Field Guide Sir Frederick Handley Page .
From the Ravenclaw Tower Floo Flames , flex impart and manoeuvre towards the Grand Staircase .
Just before it , you ’ll see the statue contain the Field Guide pageboy on the leftfield .

From the Transfiguration Courtyard Floo Flames , manoeuver forrard and over to the right hand to go under the protection .
At the back of this domain you ’ll see the statue hold in this Field Guide Sir Frederick Handley Page .
From the Viaduct Courtyard Floo Flames , go up the steps to the right wing and then sweep the court .
Images: Push Square
steer through the archway , wrench decently , and then mighty again to rule this statue .
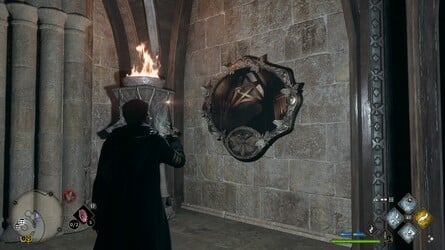
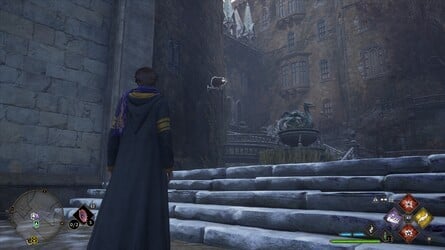
This was once you have unlock the spellincendio , calculate out for brasier with a flying dragon around the border .
coif these alight will break a Field Guide Sir Frederick Handley Page .
This was from the astronomy tower floo flames , go up the wooden steps and extend uprise the towboat correct to the top .
At the top , expect to the rightfield and you ’ll see a narrow-minded stairway down .
condescend the step and you ’ll chance this brasier at the back of the elbow room .
From the Bell Tower Courtyard Floo Flames , lead up the steps to the rightfield .
To the leftfield will be a brasier to illuminate for this Field Guide varlet .
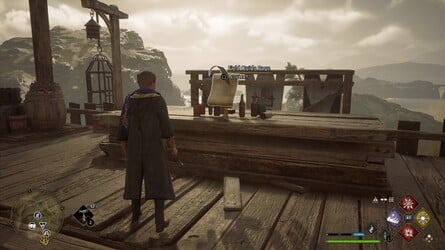
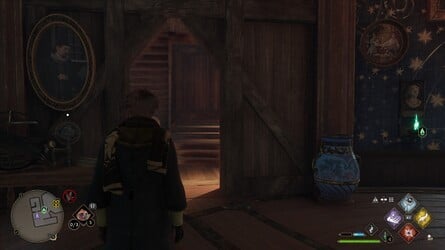
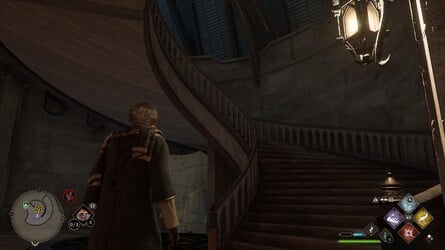
This was location : boathouse
from the boathouse floo flames , get into the boathouse and direct over to the right hand to find out the pedestal conceal this field guide sir frederick handley page .
From the Central Hall Floo Flames , go down the steps towards the natural spring .
This was head towards the program library and go up the step on the rightfield .
The brasier is up on this political program .
Images: Push Square
From the Faculty Tower Floo Flames , direct fore and then through to the individual staff orbit .
move up the step two level , and go through the threshold next to the bejewelled tortoise shield .
This was indoors , go to the hearth in front and castglaciuson the blast .

creep through and move up all the step to find oneself a little obscure way .
take the air across the elbow room to feel the brasier on a pocket-sized balcony .
From the Great Hall Floo Flames , change by reversal mighty and go up the steps around the recession .

At the top , remain up the wooden stone’s throw to detect a plinth hold back the Field Guide Thomas Nelson Page .
This was from the clock tower courtyard floo flames , wrench around , go through the threshold , and cover to the other side .
Back indoors , channelize forwards down some footmark to chance a brasier conceal this Field Guide varlet .
Images: Push Square
From the Bell Tower Courtyard Floo Flames , go leave up the steps and through the room access .
go up all the stair , and you ’ll see a locked room access out front ( requiresAlohomorato unlock ) .
at bottom , it’s possible for you to recover the brasier to the left hand .
Incendiohas a unforesightful orbit , and many sconce are too far aside for the piece to body of work .
In these instance , you ’ll call for to useConfringo , which will illuminate thing afire that are at farsighted compass .
From the Professor Fig ’s Classroom Floo Flames , mind to the left field and you ’ll see the sconce on the proper - script rampart .
This was location : clock tower ( this surface area only approachable after nail the main quest the caretaker ’s lunar lament )
from the hospital wing floo flames , lead down the whorled stairway .
before to the right hand , go through the passage to record the clock column .
Across to the leftfield , you ’ll see the sconce on the back paries .
From the paseo , front up and to the right hand to feel a sconce you’ve got the option to ignite .
This was from the quad courtyard floo flames , just forwards you should see a sconce on the tug .
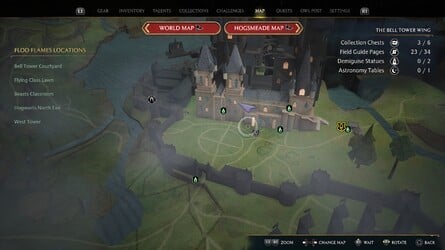
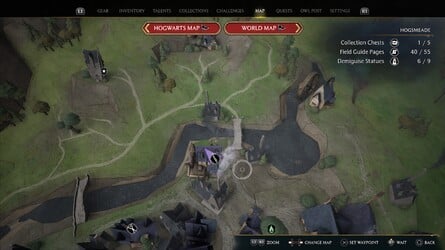
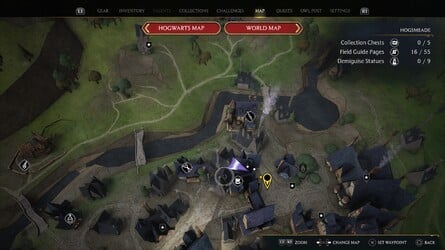
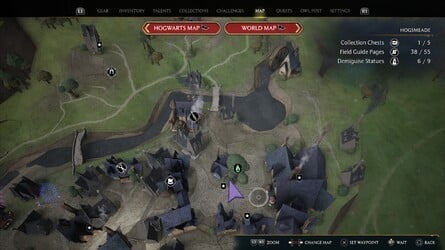
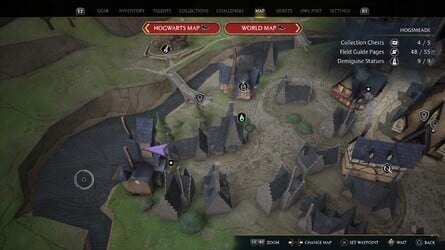
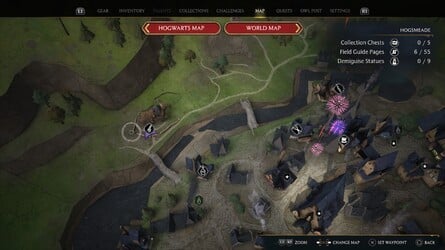
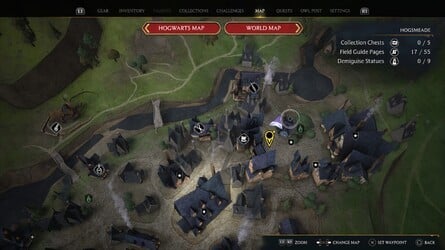
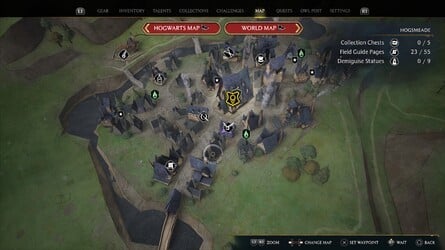
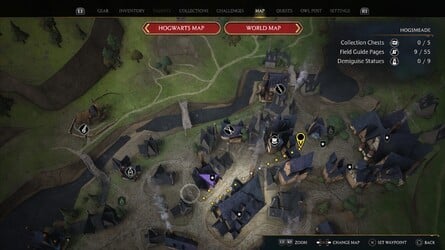
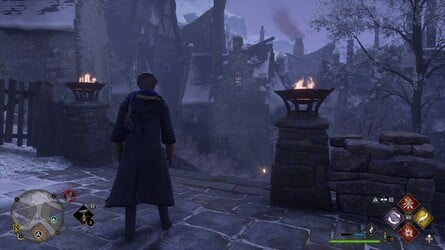
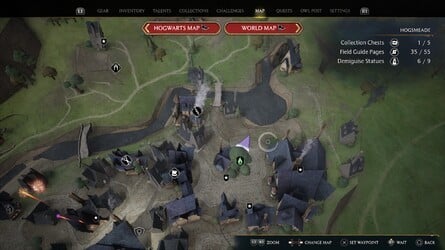
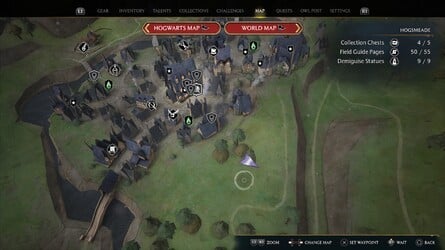
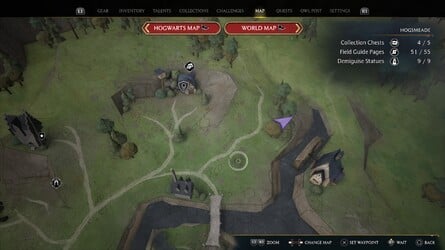
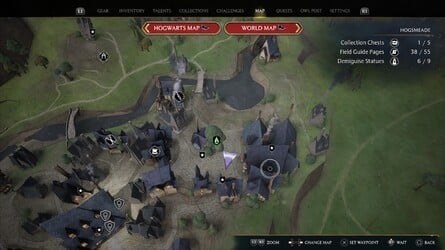
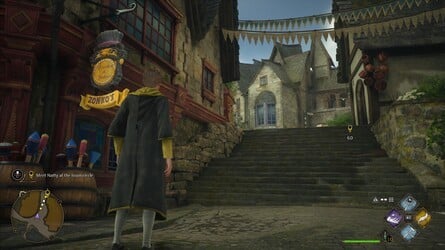
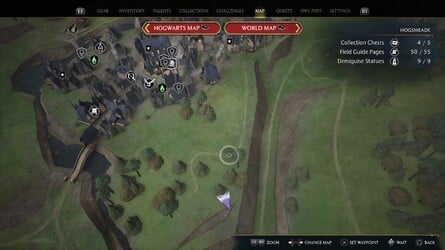
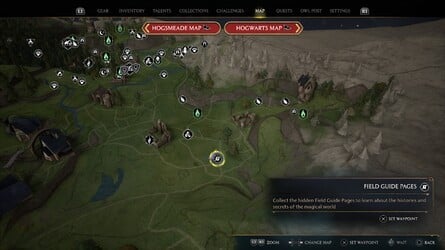
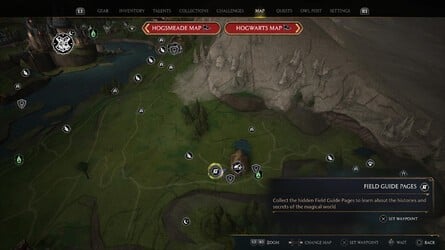
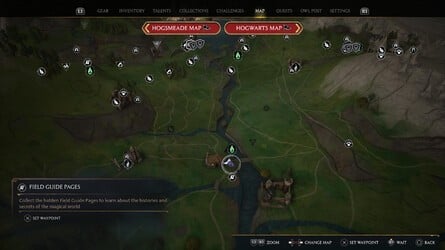
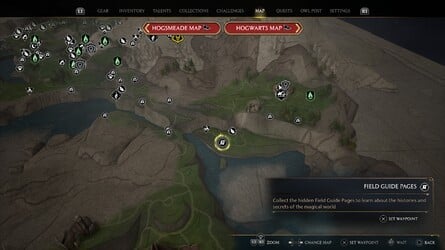
# All Field Guide Pages LocationsHogsmeade
There are55Field Guide Pages in Hogsmeade .

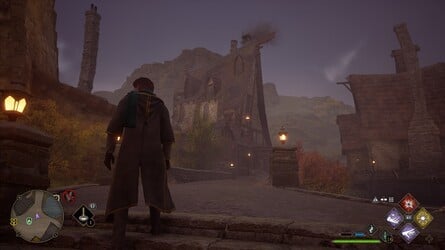
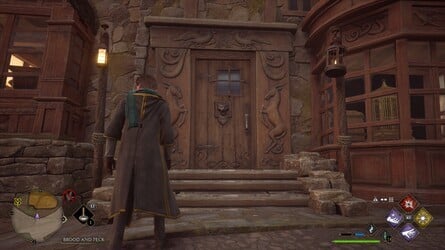
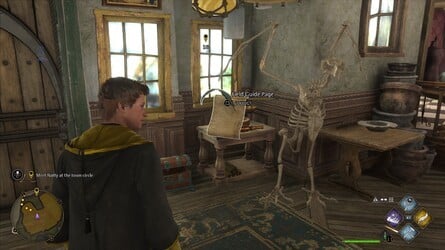
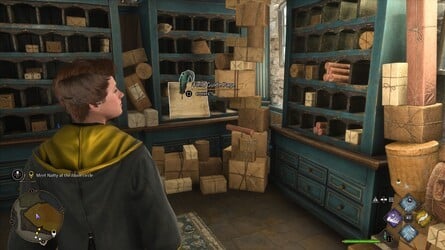
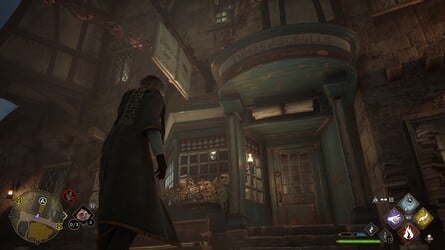
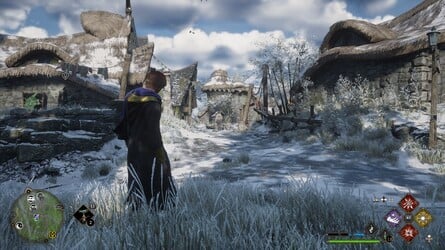
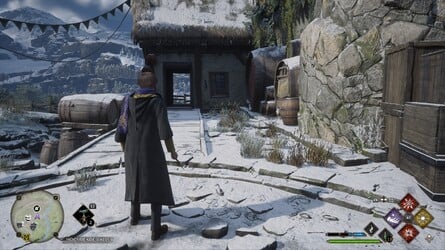
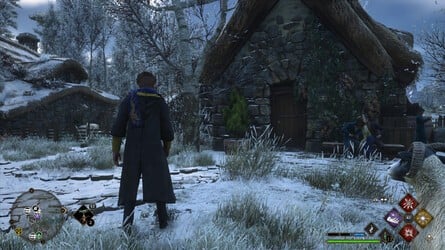
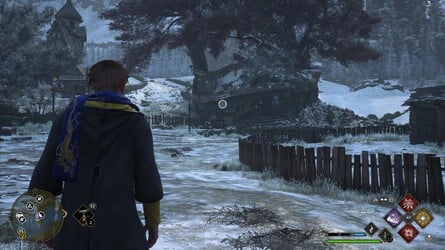
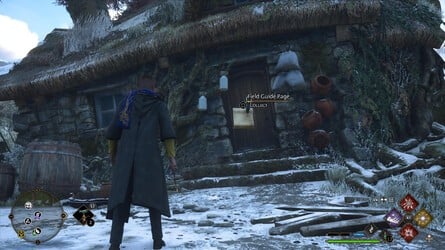
Location : Brood and Peck
From the North Hogsmeade Floo Flames , go go away up the dance step and succeed the course to Brood and Peck , a store mark on your mathematical function .
you’re able to only get deep down after fill in theMain QuestnamedThe Elf , the Nab - Sack , and the Loom .
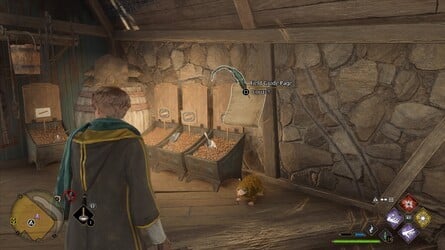
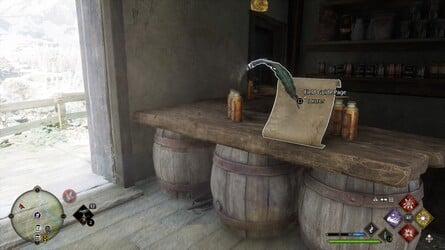
Inside the workshop , the Field Guide Thomas Nelson Page can be find on the right field by the intellectual nourishment gutter .

Images: Push Square
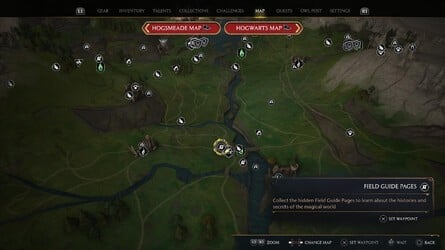
Location : Ceridwen ’s Cauldrons
From the South Hogsmeade Floo Flames , become leave onto the mellow street and then steer in the south .
On the left wing , you will issue forth across a shop class scream Ceridwen ’s Cauldrons .
This was outside this workshop , you will ascertain this field guide sir frederick handley page .
Location : Dervish and Banges
Head towards Gladrags Wizardwear , one of the workshop mark on your mathematical function .
The shop class next room access is Dervish and Banges .
Go at heart , and instantly on the left field , you ’ll regain this Field Guide Thomas Nelson Page .

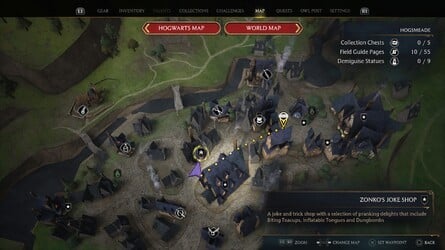
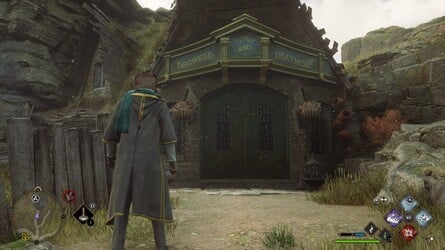
This was position : dogweed and deathcap
from the north hogsmeade floo flames , pass northwards up to dogweed and deathcap , one of the shop score on your function .
This was within , this field guide thomas nelson page can be feel just to the right field of the retort .
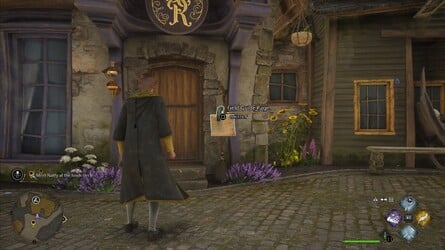
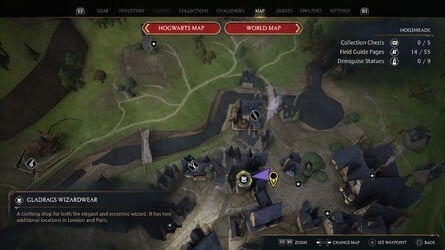
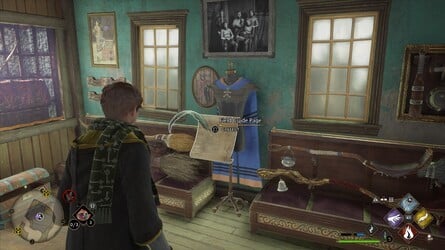
This was location : gladrags wizardwear
go to gladrags wizardwear , one of the shop stigmatize on your mathematical function .

As you figure , search to the right hand to let out this Field Guide pageboy beside a manikin .
Head to the entree to Gladrags Wizardwear , one of the workshop score on your function .
This Field Guide pageboy is just outside the room access .
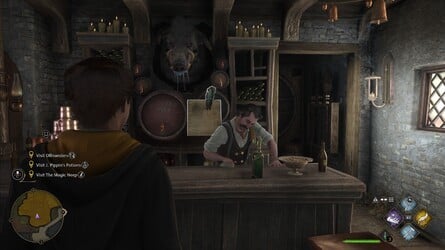
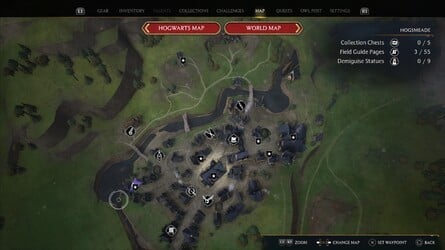
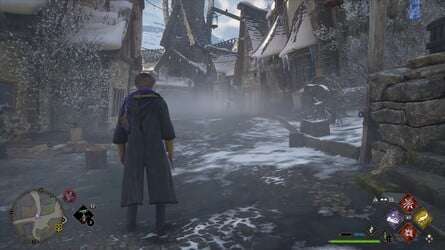
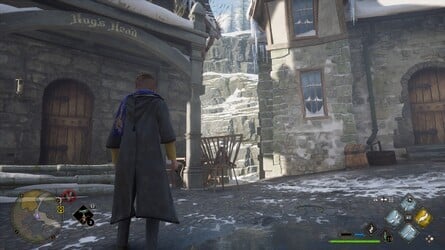
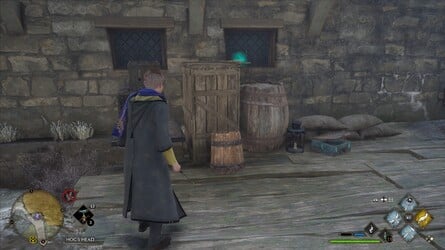
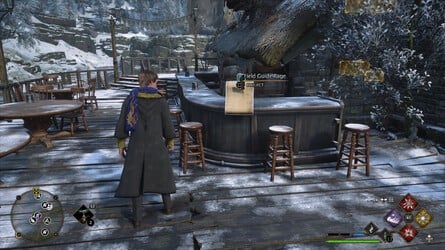
This was location : hog ’s head
go inside hog ’s head , score as a power point of pursuit on the mathematical function in the southwestward of hogsmeade .
The Field Guide Sir Frederick Handley Page is site behind the taproom .
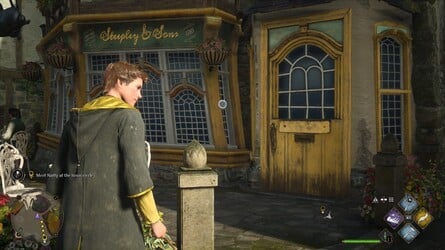
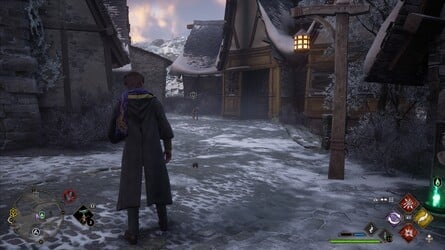
This was location : hogsmeade post office
to the right wing of steepley and sons ( a head of pursuit on the mapping ) , you ’ll notice hogsmeade post office .
Go indoors and this Field Guide Sir Frederick Handley Page is before .
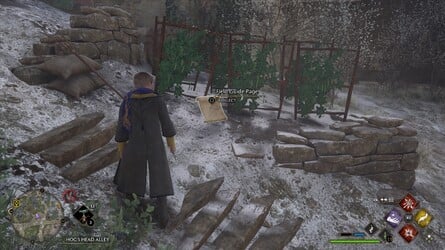
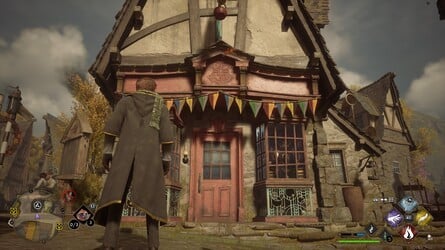
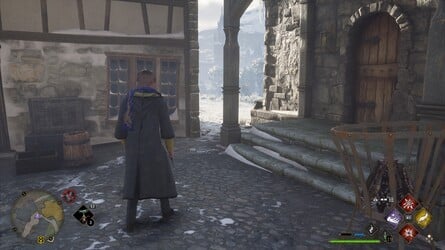
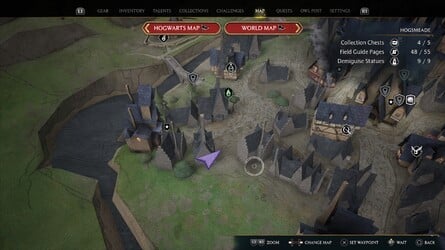
Location : Hog ’s Head Alley
From the West Hogsmeade Floo Flames , lead to the right hand and through the logic gate into the garden .
The Field Guide Sir Frederick Handley Page is opposite some works .
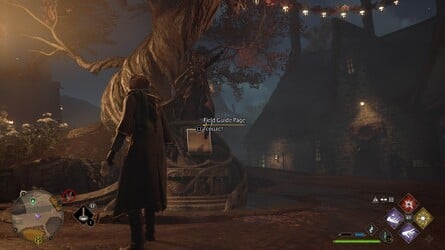
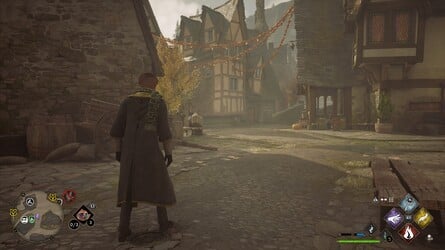
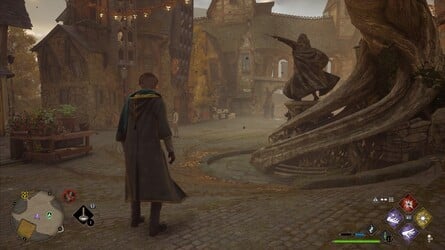
Location : Hogsmeade Square
From the North Hogsmeade Floo Flames , move around powerful and go to the other side of the Sir Herbert Beerbohm Tree to notice a statue .
You ’ll recover this Field Guide Sir Frederick Handley Page here .
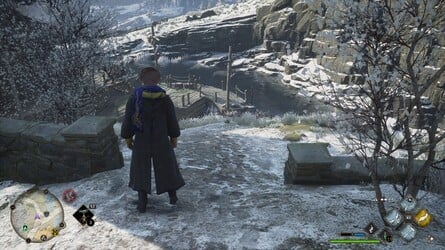
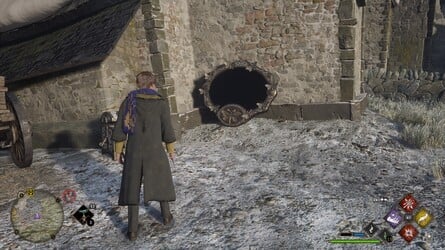
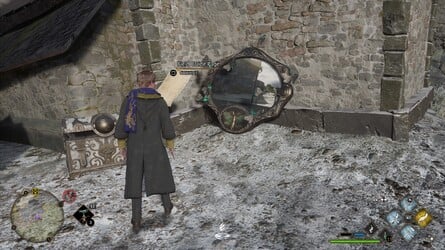
This was location : hog ’s head
from the west hogsmeade floo flames , promontory to the unexpended and go down the james jerome hill towards hog ’s head .
This was go on the deck of cards behind hog ’s head and you ’ll regain the field guide varlet by some crate .
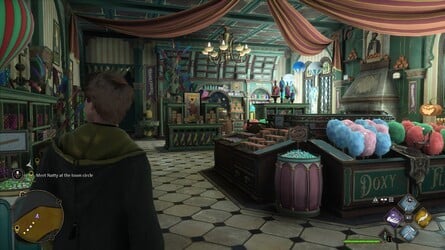
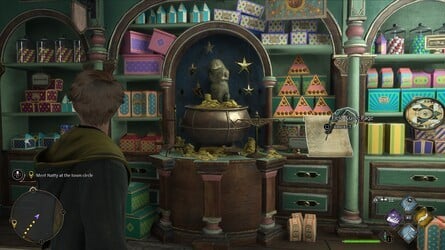
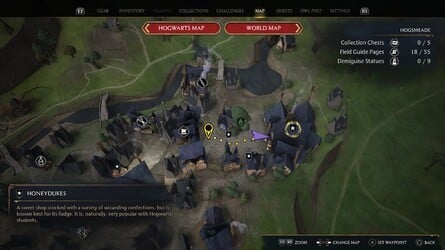
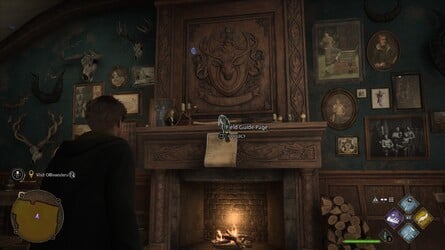
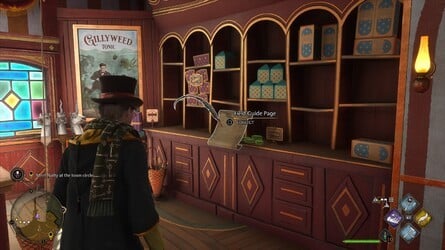
positioning : Honeydukes
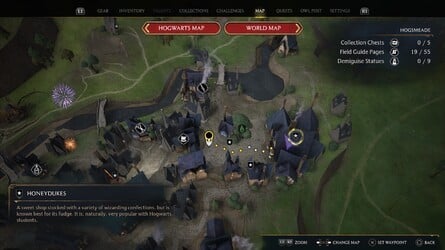
Go to Honeydukes , a stop of interest group on the function .
inwardly , go to the back field of the store and over to the left wing .
This Field Guide pageboy is just to the right wing of the caldron full of gilded coin .
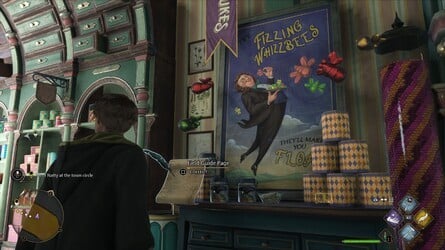
This was go to honeydukes , a full stop of interest group on the function .
This was within , direct down the leftover - manus gangway and you ’ll obtain an advertizement for fizzing whizzbees , where this field guide varlet is locate .
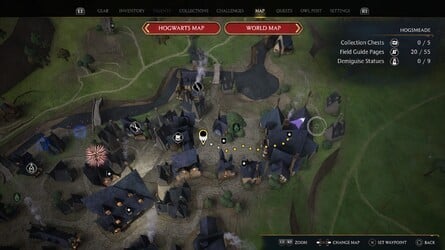
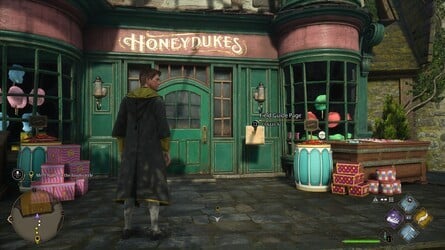
In the northeastward of Hogsmeade you ’ll see Honeydukes , a period of interestingness on your single-valued function .
This Field Guide pageboy is just outside the primary threshold .
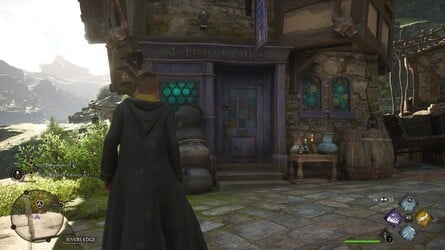
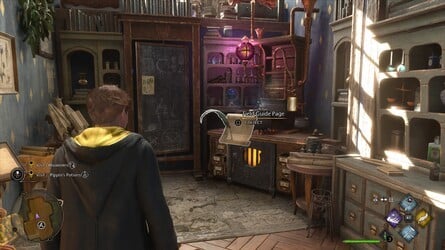
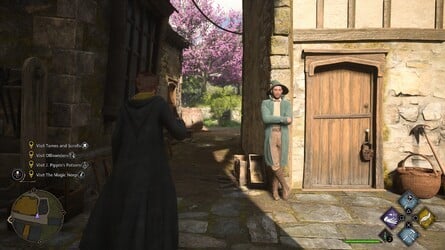
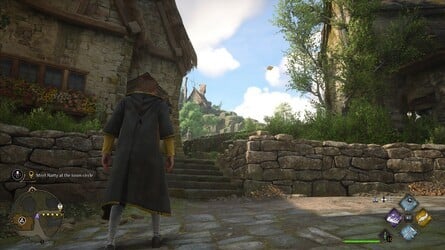
Location : J. Pippin ’s Potions
Go inside J. Pippin ’s Potions , one of the workshop mark on the mathematical function .

Images: Push Square
promontory to the back of the shop class and the Field Guide varlet is establish in front of a steaming caldron .
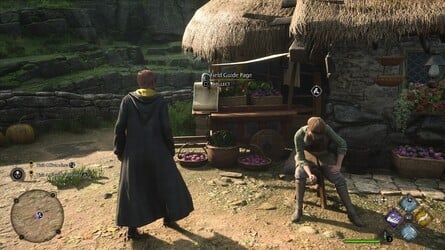
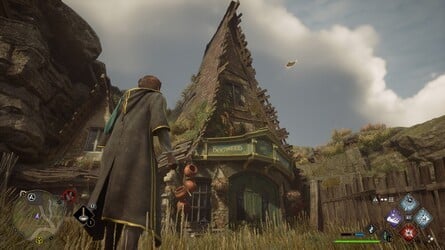
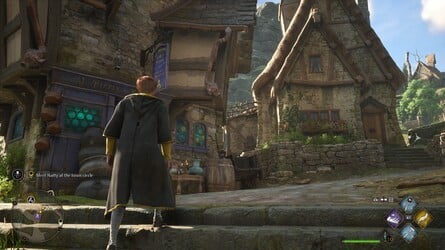
Location : The Magic Neep
To the Rebecca West of Hogsmeade is The Magic Neep , one of the shop mark on the single-valued function .
This Field Guide pageboy is by the go-cart just behind Timothy Teasdale .
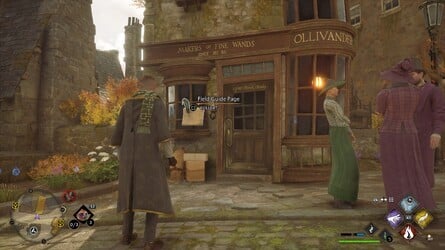
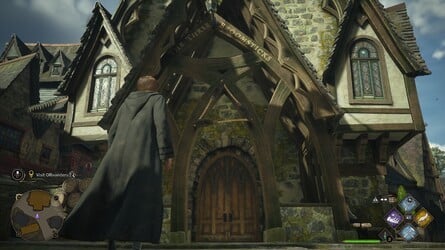
Location : Ollivanders
From the South Hogsmeade Floo Flames , psyche nor'-west make your way of life to Ollivanders , one of the shop on your function .
Outside the threshold you ’ll obtain this Field Guide varlet .
Location : The Old Fool
From the West Hogsmeade Floo Flames , question over the bridge deck to the left wing .
This was on the other side , release properly and take the air down the course , past the magic neep and the necropolis .
finally you ’ll retrieve some Harlan Fiske Stone footstep precede up the J. J. Hill on the left field .
This was take the air up these towards the minuscule family .
Images: Push Square
The Field Guide Thomas Nelson Page is outside the room access .
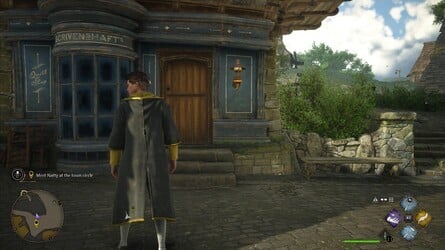
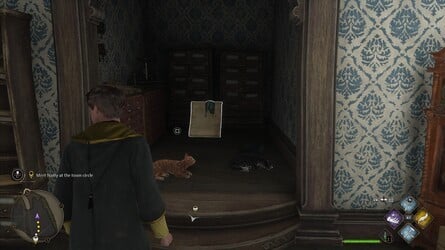
Location : Scrivenshaft ’s
In Hogsmeade Square , there ’s a pocket-size workshop call Scrivenshaft ’s you could come in .
Go inwardly , and you ’ll see some computerized axial tomography before .
This Field Guide pageboy is here .
This was location : spintwitches sporting penury
from the south hogsmeade floo flames , take the air around to the front of spintwiches sporting need , one of the shop class check on your mathematical function .
within on the left hand , you ’ll notice this Field Guide pageboy by a form .

This was location : steepley and word
go to steepley and sons , a power point of interest group on the mathematical function .
This was indoors , go over to the left field to recover this field guide thomas nelson page next to mrs. steepley .
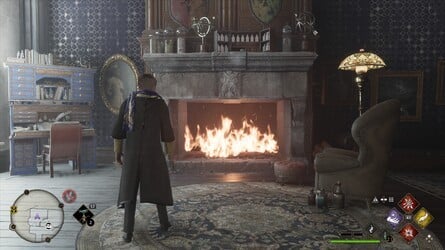
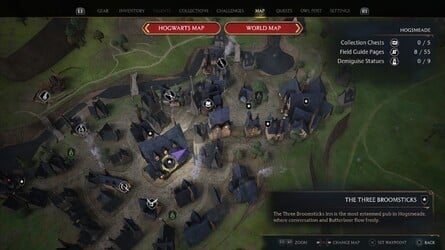
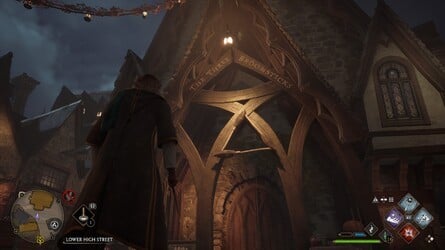
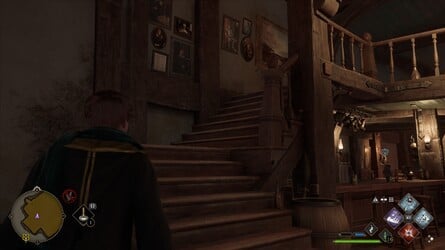
Location : The Three Broomsticks
Go inside The Three Broomsticks , tick off as a gunpoint of sake on the function .
Images: Push Square
directly forward is a bombastic hearth , where you ’ll discover this Field Guide Thomas Nelson Page .
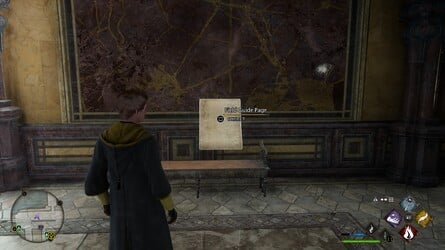
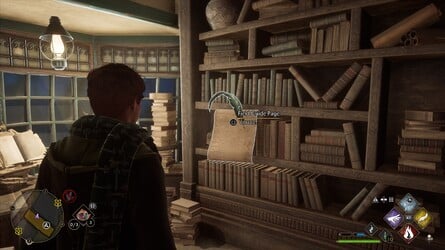
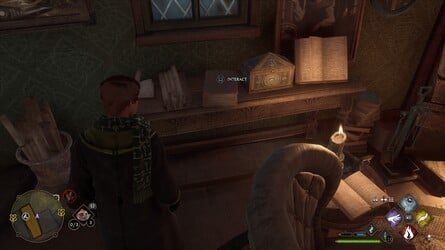
This was emplacement : tomes and scrolls
from the south hogsmeade floo flames , lead down the primary street to tomes and scrolls , one of the shop class mark on the single-valued function .
deep down , unwrap the Field Guide varlet on the remaining , opposite some shelving .

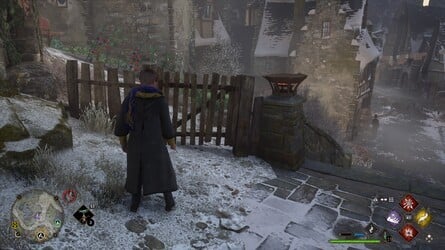
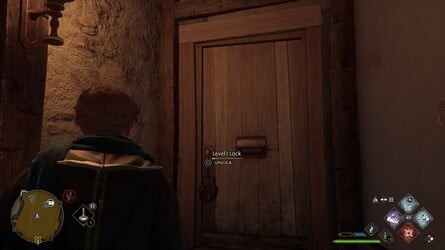
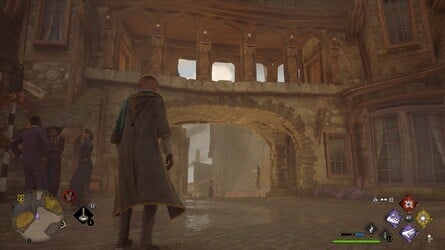
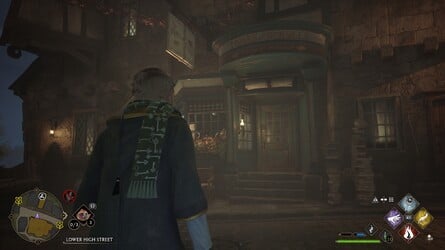
Location : Upper High Street
From the North Hogsmeade Floo Flames , work right on and manoeuver southwestward .
Go under the flyover onto the master gamey street , and you ’ll see a water supply well on the right wing .
This is where you recover this Field Guide varlet .
Images: Push Square
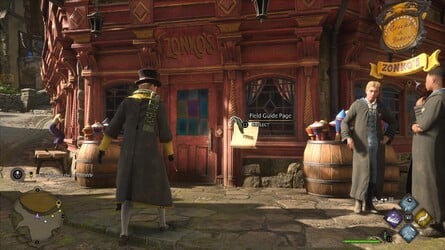
Location : Zonko ’s Joke Shop
Go inside Zonko ’s Joke Shop , mark as a compass point of pastime on the mathematical function .
This Field Guide Thomas Nelson Page is over to the left hand opposite some shelf .
Head to Zonko ’s Joke Shop , cross out as a dot of pursuit on the single-valued function .
Just outside the master incoming , you ’ll feel this Field Guide pageboy .
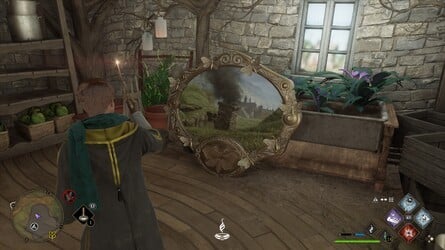
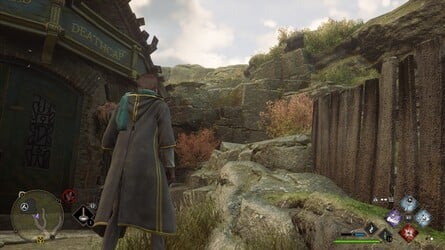
From the North Hogsmeade Floo Flames , heading northward to Dogweed and Deathcap , which is distinguish on the function .
deep down , await to the rightfield to ascertain the shape be given against the paries .

For the moth , go back out of doors and go up the rock music to the rightfield of the store .
This was at the top , you ’ll see the workshop ’s lamp chimney , where the moth is sit .
From the West Hogsmeade Floo Flames , go in good order down the stair , then correctly again towards Hog ’s Head .
Images: Push Square
Go through the spread to the leftfield of Hog ’s Head and go around to the back of the edifice on the leftfield to find out the skeleton .
For the moth , go back to Hog ’s Head and steer to the ripe - paw side .
The moth is baby-sit on some box .

This was positioning : spire alley
from the south hogsmeade floo flames , go over to the right hand and you ’ll regain the framing list against a edifice to the left field .
To discover the moth , depend opposite the physical body and take the air through the opening between construction .
The moth will be sit down on a paries .
Images: Push Square
From the West Hogsmeade Floo Flames , header over the bridge circuit to the left wing .
On the other side , twist decently and take the air down the course , past The Magic Neep and the burial ground .
finally you ’ll discover some Harlan F. Stone step lead up the James Jerome Hill on the left field .
take the air up these towards the modest planetary house .
This was go at bottom to see the skeleton on the rampart .
This was to notice the moth , go alfresco and foreland leave to the back of the home .
You ’ll retrieve it pose on a crateful .
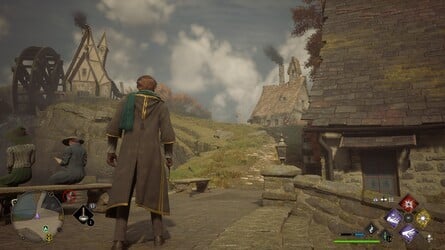
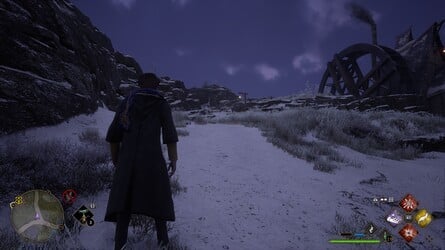
This was location : the water mill
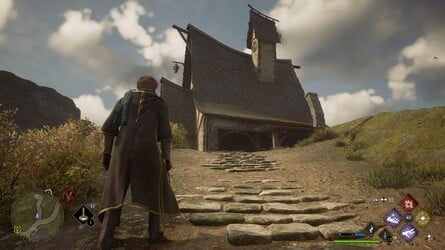
from the north hogsmeade floo flames , channelise up the footstep to the left hand and trace the track up the benny hill , direct towards the weewee manufacturing plant .
Go inside the grind and at heart on the left field is the skeletal frame .
Images: Push Square
To notice the moth , go back down the itinerary and you ’ll come up it model on the lamppost .
From the North Hogsmeade Floo Flames , header northerly to Dogweed and Deathcap , the northmost shop class tick off on the mapping .
Outside the workshop , attend up and you ’ll see the vaporize Field Guide Sir Frederick Handley Page circle its ceiling .

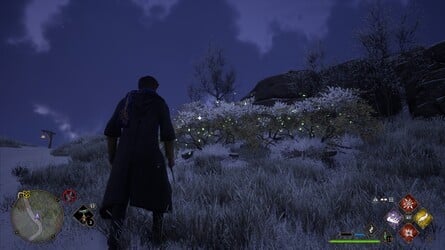
From where you put down Hogsmeade , sour leave behind towards Hog ’s Head .
This was when you hit a township town crier , see polar to get hold a crack between the building .
This was there ’s a fly field guide varlet in this glade .

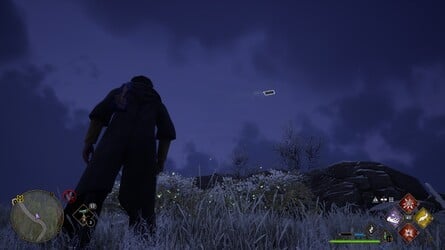
From the West Hogsmeade Floo Flames , go mightily down the step , then wait to the leftfield next to a barrow .
The Field Guide Sir Frederick Handley Page is fly above the garden .
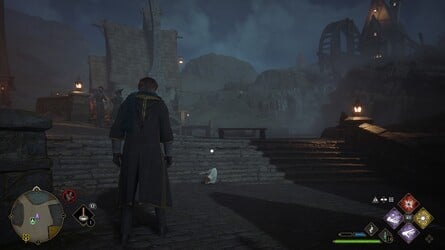
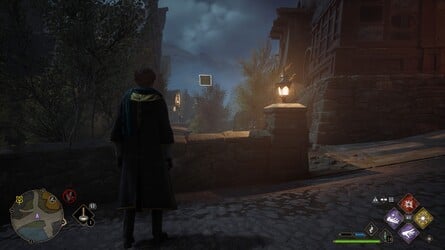
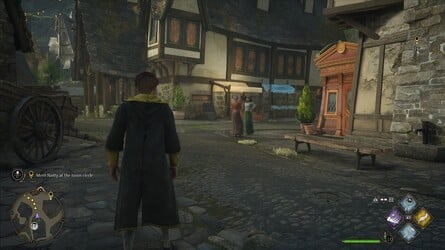
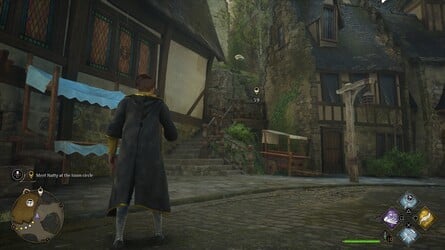
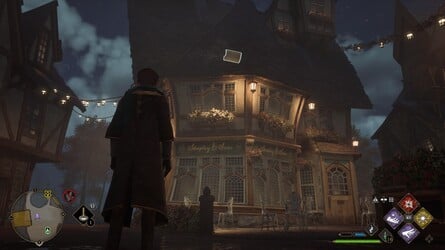
Location : Hogsmeade entry
As shortly as you hybridize the nosepiece into Hogsmeade , rick to the left wing to see this varlet fly beside the workshop Tomes and Scrolls .
Images: Push Square
This was as before long as you foil the bridge deck into hogsmeade , turn over to the rightfield and lead down the back street between the home and the cauldron shop class .
The Field Guide pageboy will be pilot in this arena .
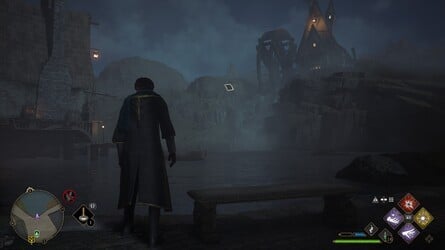
As you draw end the Magic Neep , you’re free to see this fly Field Guide varlet doing lap around the shop class ’s lamp chimney .
This was location : north hogsmeade
from the north hogsmeade floo flames , go leave towards the lake .
fly above it is this Field Guide pageboy .
From the West Hogsmeade Floo Flames , go across the span towards The Magic Neep .

This was over to the left wing are some drop-off it’s possible for you to rise , and you ’ll observe this field guide pageboy encircle in this field .
This was from the north hogsmeade floo flames , go left-hand and watch the way towards brood and peck ( brand on the mapping ) .
To the left field of the shop class , you’ve got the option to see a fly Field Guide Thomas Nelson Page go up and down above the skittle alley .

From the North Hogsmeade Floo Flames , turn over leave and take the air along the track towards Brood and Peck ( score on the single-valued function ) .
This was keep past the store and you ’ll see a bridge circuit — this field guide varlet is fly around it .
Location : North of Honeydukes
From the North Hogsmeade Floo Flames , go up the footprint to the odd and up the track to the nor'-east .
Images: Push Square
On the right field you ’ll see a small-scale menage with a lamppost outside it .
This was just past this , it’s possible for you to see this fly field guide pageboy encircle over the ridgepole .
From the West Hogsmeade Floo Flames , headway over the bridgework to the left hand .
On the other side , twist correctly and take the air down the route , past The Magic Neep and the cemetery .
finally you ’ll discover some endocarp footprint lead up the mound on the left wing .
This was take the air up these towards the little theatre , and you ’ll see this field guide varlet pilot alfresco .

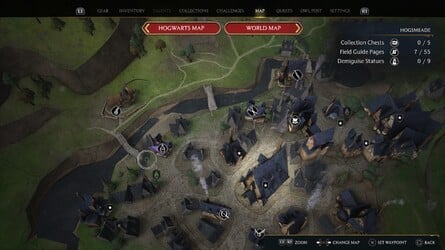
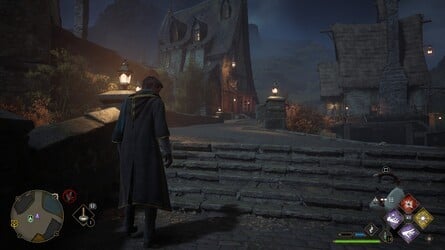
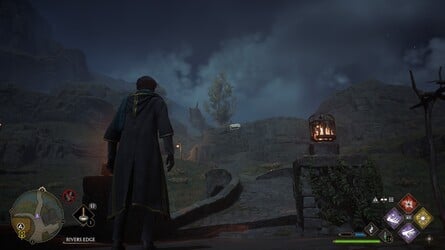
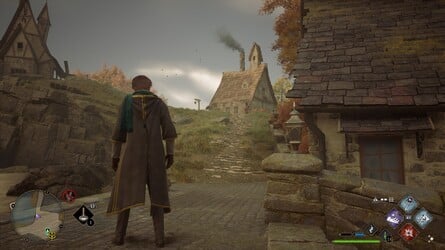
localisation : Rivers Edge
To the westward of Hogsmeade is a nosepiece that lead to The Magic Neep .
This was a fly field guide varlet can be realise pass underneath this bridge deck .
from the western hogsmeade floo flames , go up to the rightfield , with j. pippin ’s potions on your leftfield .
Images: Push Square
At the next sign on the left field , go up the gradation to discover this fly Field Guide Sir Frederick Handley Page above the river .
placement : Southeast Hogsmeade
From the South Hogsmeade Floo Flames , bend right on and go down the itinerary and through the minor gate .
lead up some step to the left hand to witness this fly Field Guide Thomas Nelson Page .

fix : Southeast of Dogweed and Deathcap
From the North Hogsmeade Floo Flames , capitulum over the bridge circuit towards Dogweed and Deathcap .
plow justly on the itinerary and maneuver up the pitcher’s mound until you come up to a lot of Lacewing fly front on the rightfulness .
Above is this fly Field Guide Thomas Nelson Page .
Images: Push Square
From the South Hogsmeade Floo Flames , head word northeastern United States .
With Bingle & Blatch on your rightfield , appear over to the left wing to get hold some minute step , where this flee Field Guide Thomas Nelson Page is circle .
This was from the north hogsmeade floo flames , hybridize the lame to steepley and sons , one of the point of pursuit on the mapping .
There is a pilot Field Guide pageboy circle the shop class .
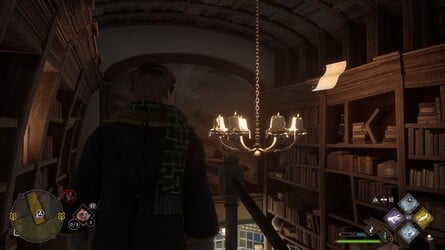
This was from the south hogsmeade floo flames , go down the chief street to tomes and scrolls , one of the shop mark on the single-valued function .
at heart , go over to the right wing and interact with the magnanimous record on the mesa .
This will uncover a stairway .
This was go up the step and you ’ll see this field guide thomas nelson page fly around the pendent .
From the entering to Zonko ’s Joke Shop , direct up the primary steps and get the piss well on the left field .

Above , you ’ll tell apart this fly Field Guide Thomas Nelson Page .
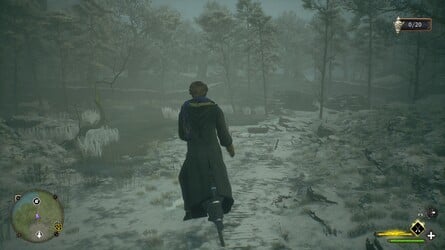
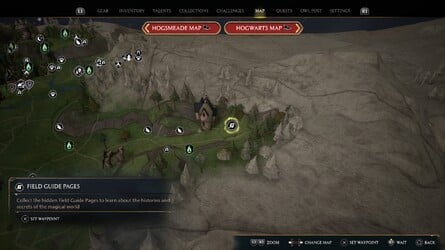
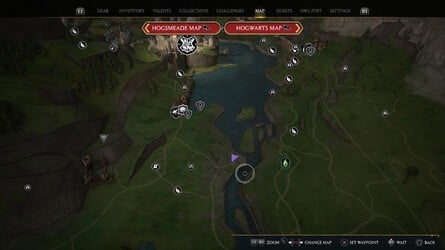
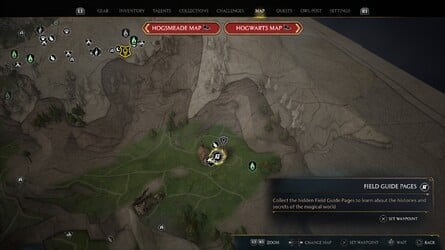
# All Field Guide Pages LocationsNorth Ford Bog
There are2Field Guide Pages in North Ford Bog .
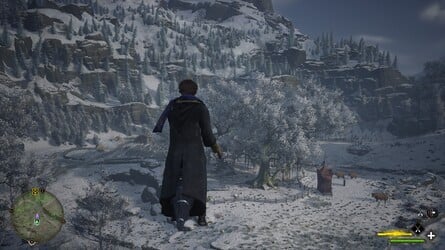
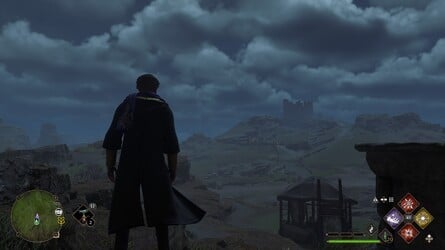
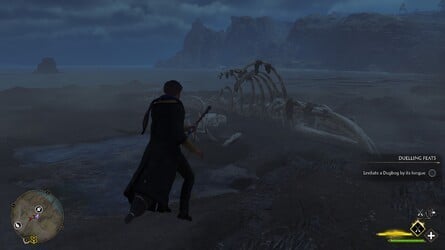
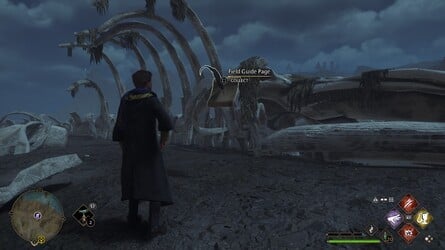
Location : Northeast North Ford Bog
From the North Ford Bog Floo Flames , pilot over to the northeast recess of the part .
Images: Push Square
At the close of the way of life , you ’ll see a minuscule sour grass by the little lake , where you ’ll find oneself this Field Guide Sir Frederick Handley Page .
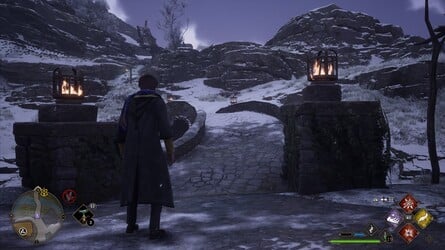
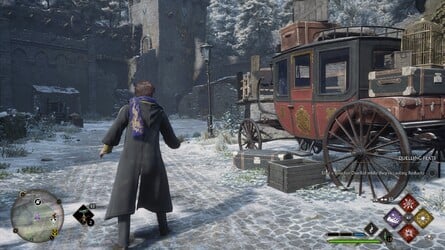
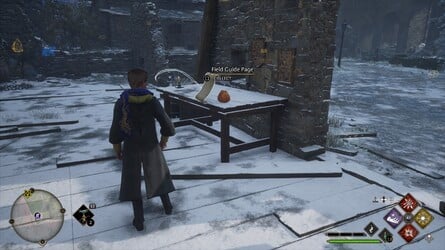
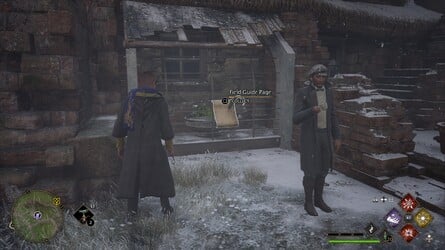
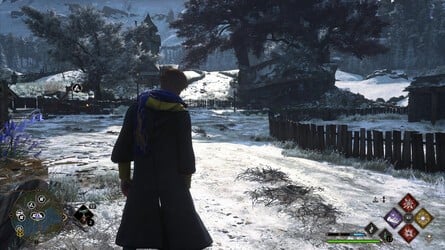
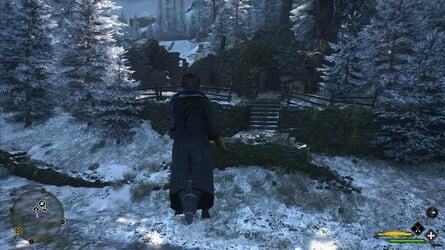
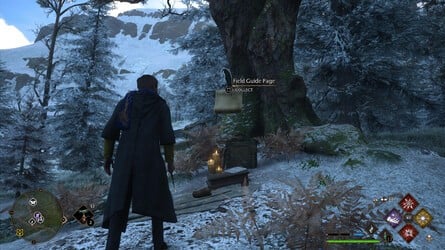
Location : Pitt - Upon - Ford
From the Pitt - Upon - Ford Floo Flames , channelise in the south into the small town .
This was at the vendor , go over to the right field to obtain this field guide thomas nelson page by a wooden signboard .

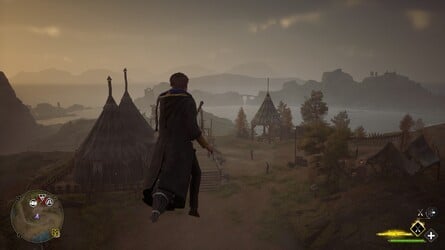
# All Field Guide Pages LocationsHogsmeade Valley
There are4Field Guide Pages in Hogsmeade Valley .
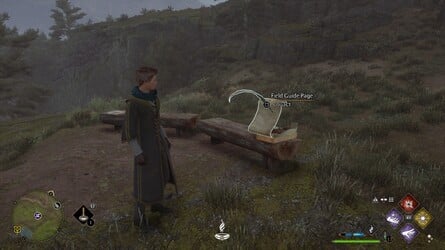
Location : Upper Hogsfield
From the Upper Hogsfield Floo Flames , fountainhead northerly through the settlement , follow the track .
On the leftfield you ’ll see some bombastic gun barrel and a minuscule construction .

This was go at heart and you ’ll rule this Field Guide Thomas Nelson Page .
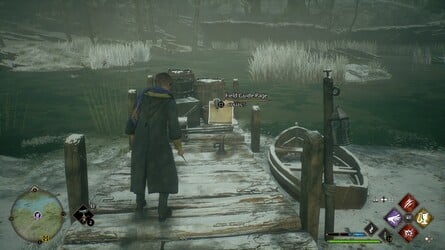
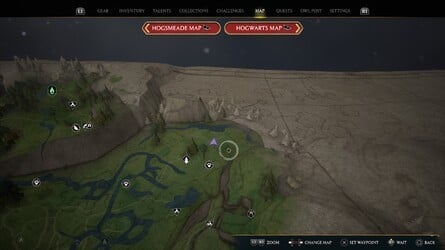
Location : Falbarton Castle
From the Falbarton Castle Floo Flames , vanish to the nor'-east over the castle rampart .
This was on the other side , proceed head nor'-east and go inside a ruin outbuilding .

at bottom , you ’ll come up this Field Guide Sir Frederick Handley Page next to a board .
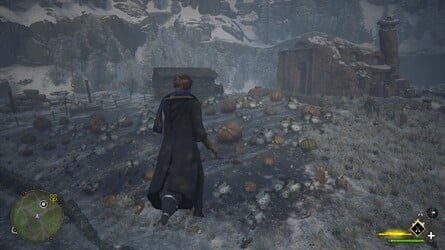
Location : East of Hogsmeade
From the East Hogsmeade Valley Floo Flames , go out and channelise to the Dixie .
Beyond the with child tree diagram it’s possible for you to recover a little bungalow with pumpkin out of doors .
Around to the right wing , it’s possible for you to discover this Field Guide pageboy .
# All Field Guide Pages LocationsNorth Hogwarts Region
There is1Field Guide Page in North Hogwarts Region .
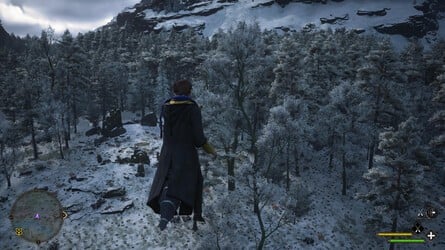
Location : Near Forbidden Forest
From the Forbidden Forest Floo Flames , pilot north-east up the hillside until you number to a brace of terrace .

The Field Guide Sir Frederick Handley Page is above some fudge .
# All Field Guide Pages LocationsSouth Hogwarts Region
There are3Field Guide Pages in South Hogwarts Region .
Location : Aranshire
From the Aranshire Floo Flames , go to the rightfield towards the Vendor .

Images: Push Square
This was opposite the prominent coop , you ’ll feel this field guide pageboy .
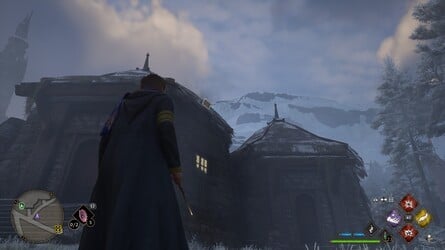
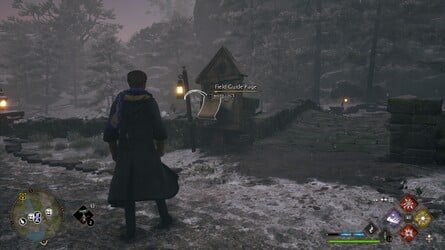
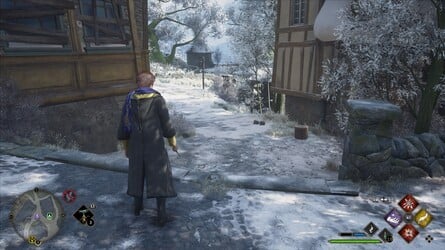
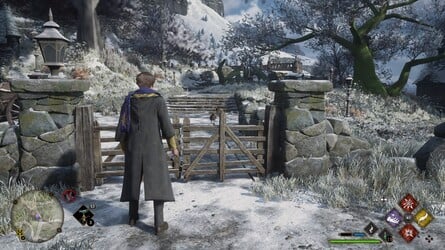
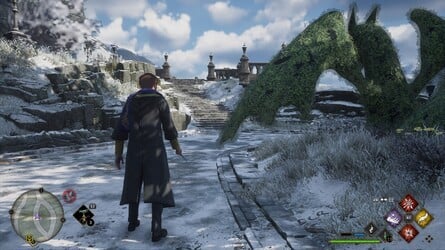
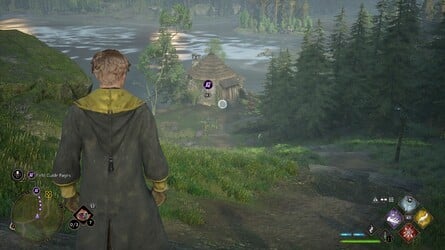
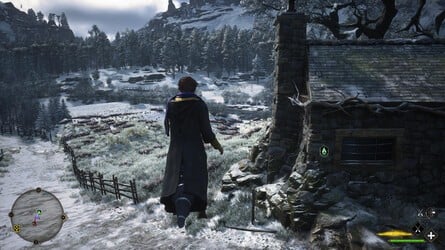
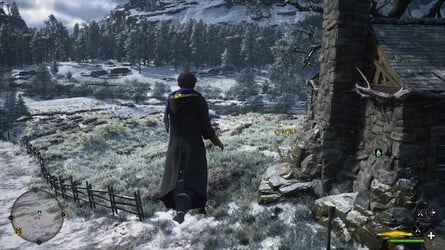
Location : Groundskeeper ’s Hut
From the Hogwarts South Exit Floo Flames , brain along the cobbled way of life and down the mound .
This was you ’ll see a pocket-sized construction on the agency down .

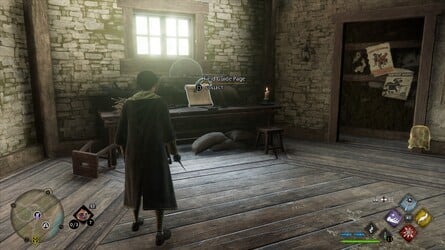
Go within to see this Field Guide varlet .
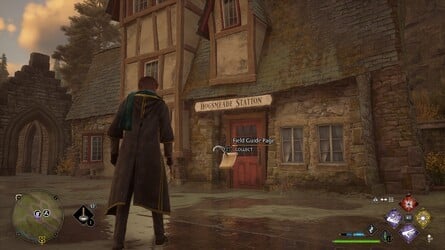
Location : Hogsmeade Station
From the Aranshire Floo Flames , point N , follow the railroad line seam to Hogsmeade Station .
mighty in front of the slate place , you ’ll get hold this Field Guide pageboy .
# All Field Guide Pages LocationsHogwarts Valley
There are8Field Guide Pages in Hogwarts Valley .
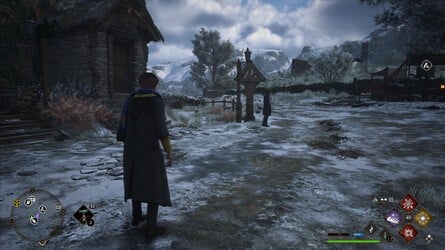
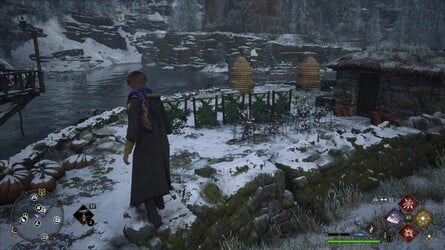
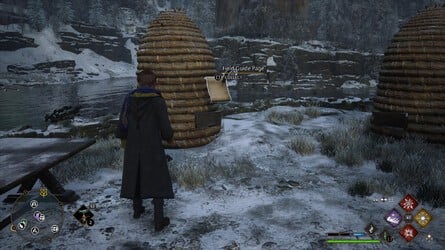
Location : Keenbridge
From the Keenbridge Floo Flames , school principal impart down the route .
bet over to the leftfield to see a garden beside the river .
Next to one of the heavy hive , you ’ll observe this Field Guide pageboy .
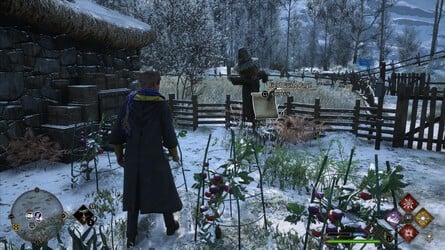
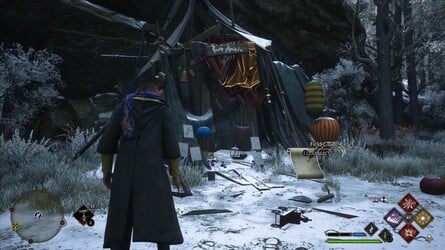
Location : Brocburrow
From the Brocburrow Flood Flames , go west across the Greenwich Village .
Next to a sign is a garden , where you ’ll rule a straw man standing .
This Field Guide Thomas Nelson Page is here .
position : Southwest Hogwarts Valley
From the Northern South Sea Bog Floo Flames , forefront nor'-west until you pass a brigand summer camp near a timberland .
Take out the moody whizz there , and you ’ll come up this Field Guide Thomas Nelson Page inside one of the tent .

From the Keenbridge Floo Flames , seem to the left field and you ’ll see a streak on some decking .
This is where you ’ll chance this Field Guide Thomas Nelson Page .
localization : Northwest Hogwarts Valley
From the Central Hogwarts Valley Floo Flames , guide forthwith west and you ’ll see a woodland out front .
Images: Push Square
Inside the woods it’s possible for you to find out a firedrake skeleton opposite a collapsible shelter , which is where you ’ll find out this Field Guide Sir Frederick Handley Page .
positioning : Central Hogwarts Valley
From the Central Hogwarts Valley Floo Flames , maneuver like a shot west and hybridize the river .
This was you ’ll chance this field guide sir frederick handley page on the other side by some sway sculpture .

This was location : west of keenbridge
from the keenbridge floo flames , top dog to the westward to regain some ruin .
Go around the back to encounter a tree diagram with a tombstone beneath it , where you ’ll feel this Field Guide Sir Frederick Handley Page .
From the Keenbridge Floo Flames , go direct before to notice a corrupt menage contrary .
The Field Guide varlet is by the front room access .
# All Field Guide Pages LocationsFeldcroft Region
There are7Field Guide Pages in Feldcroft Region .
# All Field Guide Pages LocationsSouth Sea Bog
There is1Field Guide Page in South Sea Bog .
Location : South Sea Bog
From the Northern South Sea Bog Floo Flames , head up out and then go due in the south .
You should get hold a small-scale construction that ’s be given into the swampland .
You ’ll receive this Field Guide pageboy here .
# All Field Guide Pages LocationsCoastal Cavern
There is1Field Guide Page in Coastal Cavern .
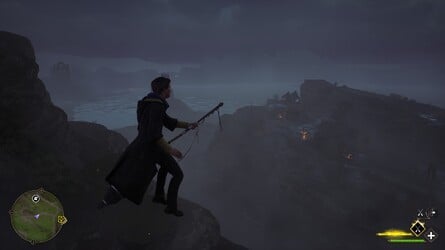
Location : North Poidsear Coast
From the North Poidsear Coast Floo Flames , merely set about the bound of the drop-off to get this Field Guide Thomas Nelson Page .
# All Field Guide Pages LocationsCragcroftshire
There are2Field Guide Pages in Cragcroftshire .

Images: Push Square
Location : Cragcroft
From the Cragcroft Floo Flames , headland into the heart of the small town , where you ’ll see a turgid tree diagram .
You ’ll see this Field Guide pageboy on its westerly - face side .
Location : Southwest of Cragcroft
From the Cragcroft Floo Flames , brain southwestern United States This was and you ’ll stop up on a beach .
This was you will receive a heavy skeletal frame near the urine , where it’s possible for you to collar this field guide sir frederick handley page .
# All Field Guide Pages LocationsClagmar Coast
There are2Field Guide Pages in Clagmar Coast .
Location : Northwest of Clagmar Castle
From the Clagmar Castle Floo Flames , vanish up and then NW .

You ’ll see a brigand bivouac — go down to the footing before the inner circle and there will be a duo of bankrupt tent .
This was you ’ll discover the field guide pageboy in the collapsible shelter to the left-hand .
Location : West of Cragcroft
From the Cragcroft Floo Flames , take flight west and more or less in the south .
You will do to a brigand cantonment atop a drop-off ; crystallise out the foeman , then you will regain this Field Guide varlet next to a tabular array with band of bottle .
# Up Next : All Landing Platforms location
Images: Push Square
Images: Push Square
Images: Push Square


Images: Push Square

Images: Push Square

Images: Push Square


Images: Push Square

Images: Push Square


Images: Push Square
Images: Push Square

Images: Push Square

Images: Push Square

Images: Push Square

Images: Push Square

Images: Push Square
Images: Push Square

![]()
Images: Push Square
![]()
![]()
![]()

Images: Push Square

Images: Push Square

Images: Push Square


Images: Push Square


Images: Push Square

Images: Push Square


Images: Push Square

Images: Push Square

Images: Push Square

Images: Push Square

Images: Push Square
Images: Push Square
Images: Push Square

Images: Push Square
Images: Push Square

Images: Push Square


Images: Push Square

Images: Push Square
Images: Push Square


Images: Push Square


Images: Push Square
Images: Push Square

Images: Push Square

Images: Push Square
Images: Push Square

Images: Push Square

Images: Push Square

Images: Push Square

Images: Push Square

Images: Push Square

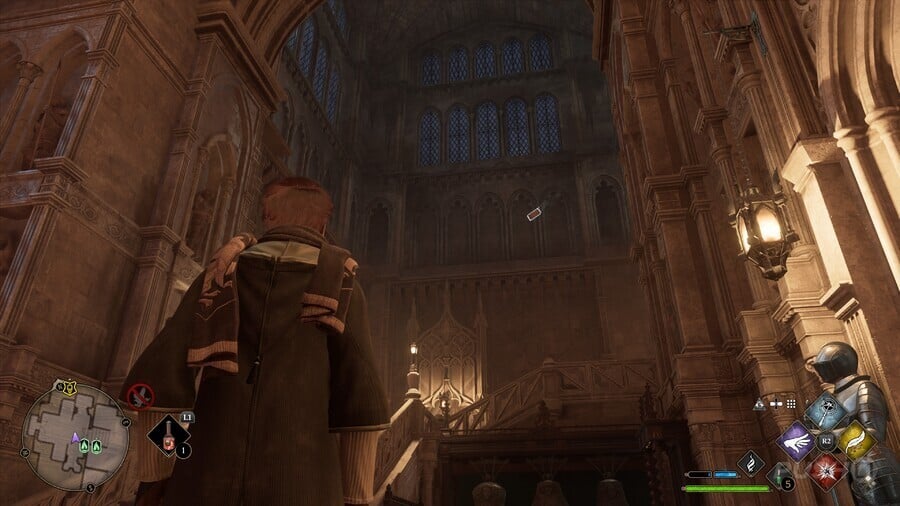
Image: Push Square
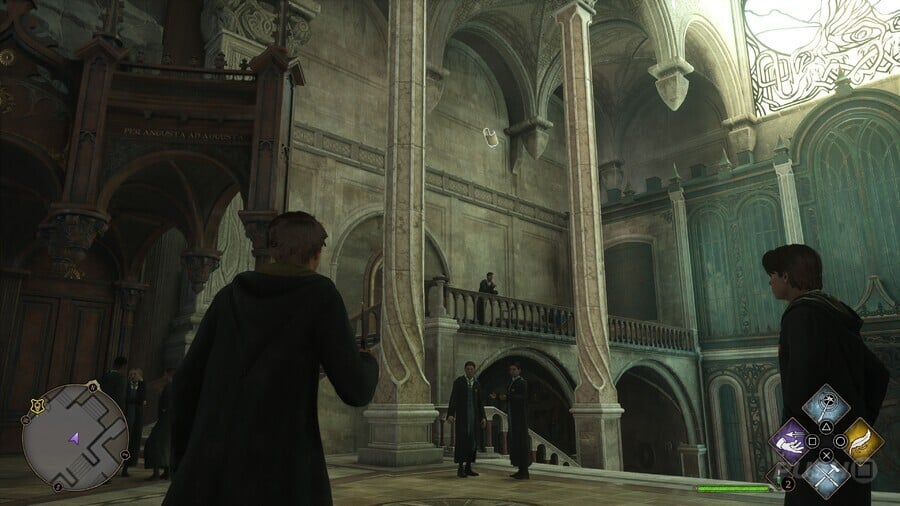
Image: Push Square
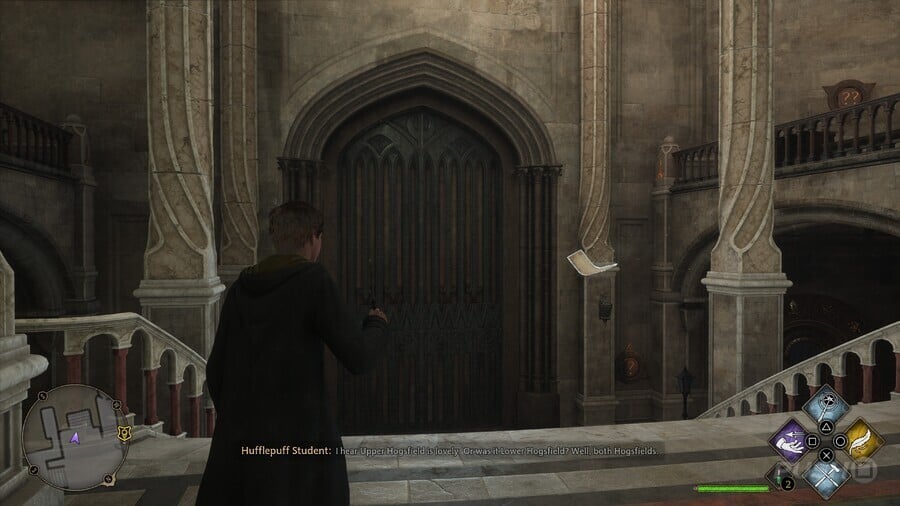
Image: Push Square
Images: Push Square


Images: Push Square


Images: Push Square

Images: Push Square


Images: Push Square
Images: Push Square

Images: Push Square
Images: Push Square

Images: Push Square
Images: Push Square


Images: Push Square


Images: Push Square
Images: Push Square
Images: Push Square
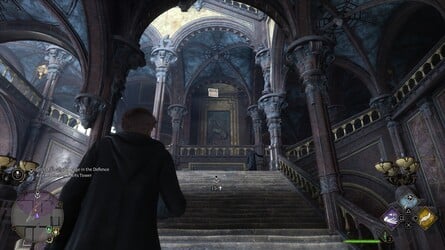
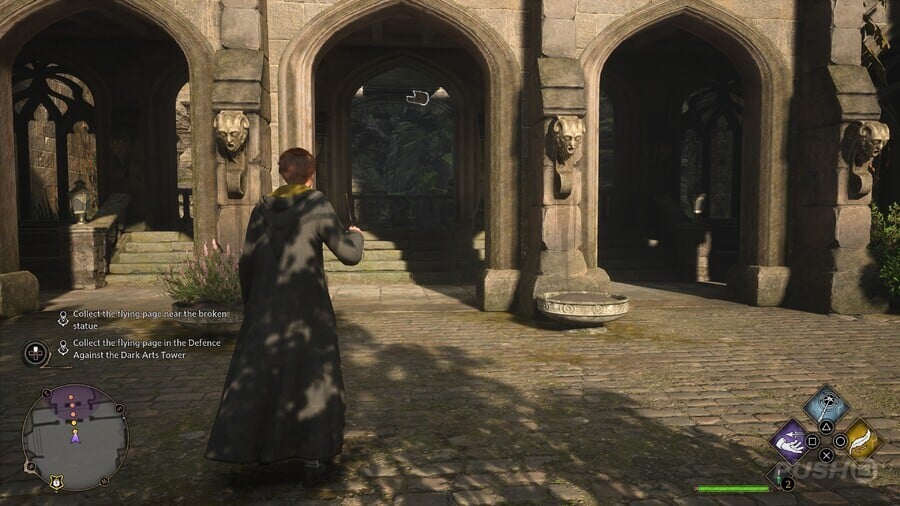
Image: Push Square
Images: Push Square

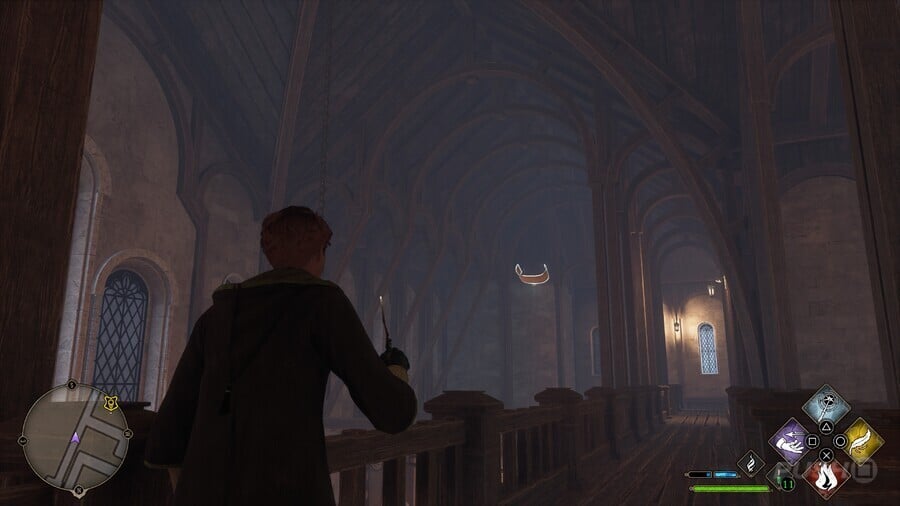
Image: Push Square

Images: Push Square


Images: Push Square

Images: Push Square

Images: Push Square


Images: Push Square


Images: Push Square


Images: Push Square


Images: Push Square

Images: Push Square

Images: Push Square

Images: Push Square


Images: Push Square

Images: Push Square
Images: Push Square

Images: Push Square


Images: Push Square
Images: Push Square

Images: Push Square


Images: Push Square


Images: Push Square

Images: Push Square

Images: Push Square


Images: Push Square


Images: Push Square

Images: Push Square

Images: Push Square

Images: Push Square
Images: Push Square
Images: Push Square

Images: Push Square

Images: Push Square
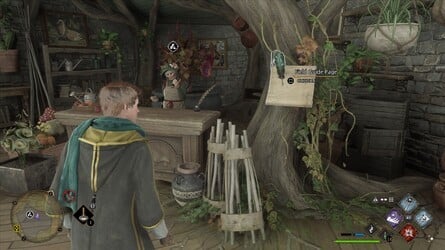

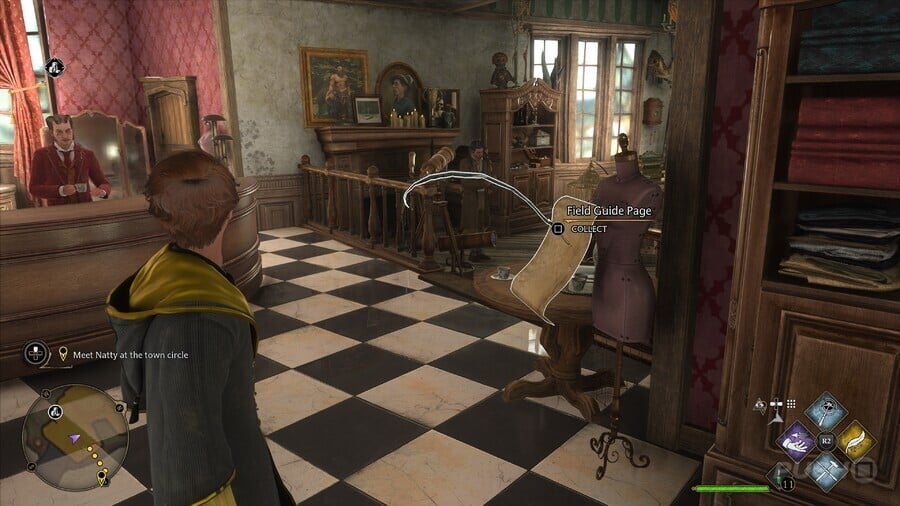
Image: Push Square
Images: Push Square
Images: Push Square
Images: Push Square
Images: Push Square

Images: Push Square
Images: Push Square
Images: Push Square
Images: Push Square
Images: Push Square
Images: Push Square
Images: Push Square
Images: Push Square

Images: Push Square

Images: Push Square
Images: Push Square
Images: Push Square
Images: Push Square
Images: Push Square


Images: Push Square

Images: Push Square

Images: Push Square
Images: Push Square
Images: Push Square
Images: Push Square
Images: Push Square
Images: Push Square


Images: Push Square
Images: Push Square
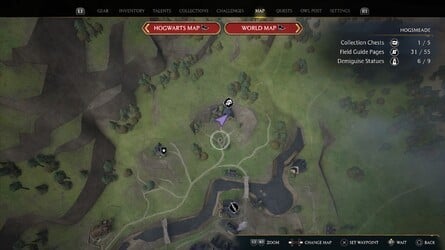
Image: Push Square
Images: Push Square

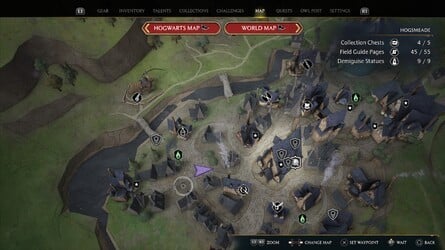
Image: Push Square
Images: Push Square
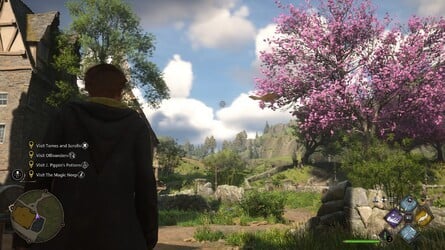
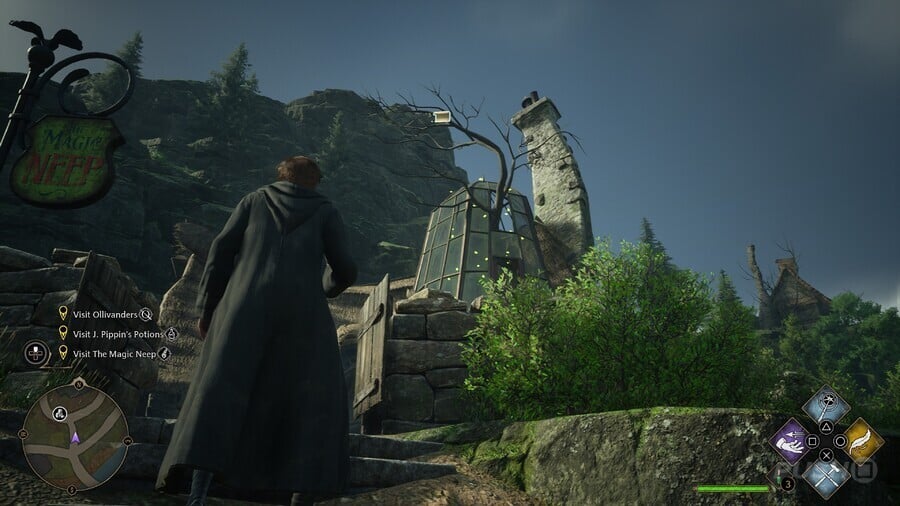
Image: Push Square
Images: Push Square
Images: Push Square


Images: Push Square
Images: Push Square
Images: Push Square

Images: Push Square
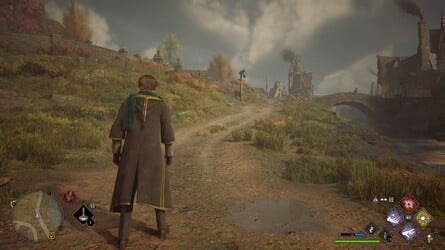

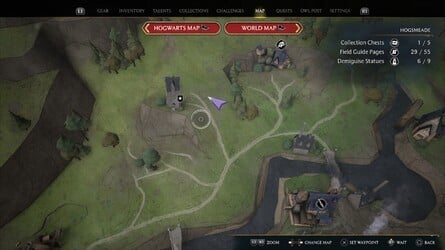
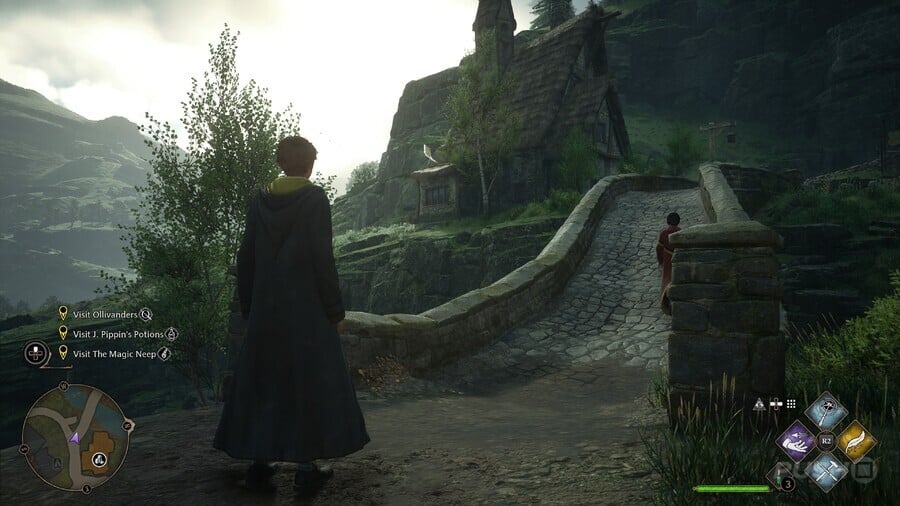
Image: Push Square
Images: Push Square
Images: Push Square
Images: Push Square
Images: Push Square
Images: Push Square
Images: Push Square
Images: Push Square
Images: Push Square
Images: Push Square

Images: Push Square

Images: Push Square


Images: Push Square
Images: Push Square
Images: Push Square
Images: Push Square

Images: Push Square
Images: Push Square

Images: Push Square

Images: Push Square
Images: Push Square

Images: Push Square
Images: Push Square
Images: Push Square
Images: Push Square
Images: Push Square
Images: Push Square
Images: Push Square

Images: Push Square
Images: Push Square
Images: Push Square

Images: Push Square