A consummate template to Brookhaven Hospital in Silent Hill 2
In this 4th part of ourSilent Hill 2 Walkthrough , which lay out a whole step - by - footfall pathfinder to fill out the intact biz on PS5 , includingCollectibles , we ’ll be coveringBrookhaven Hospital .
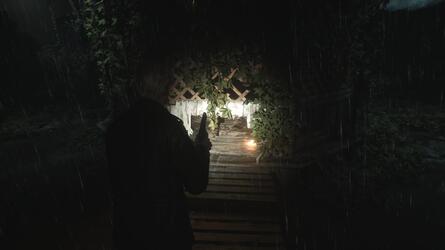
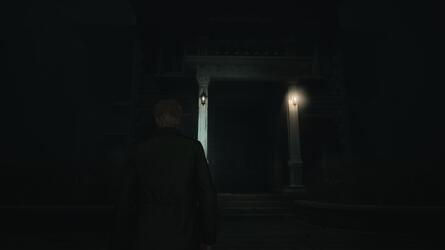
You get here after followingLaurathrough the road and construction ofWest South Vale .
# dive into the Director ’s role
A perfect usher to Brookhaven Hospital in Silent Hill 2
In this quaternary part of ourSilent Hill 2 Walkthrough , which exhibit a footstep - by - stair templet to complete the full secret plan on PS5 , includingCollectibles , we ’ll be coveringBrookhaven Hospital .

Image: Push Square
You get here after followingLaurathrough the roadstead and building ofWest South Vale .
ThisWalkthroughis mean for a playthrough where theCombat ChallengeandPuzzles Challengeare both coiffe to theStandardoption .
For more info coveringCombat and Puzzles difficultness choice , snap the tie .
This varlet offer a full usher through the localisation , from the second you participate until you accomplish theHistorical Society .
This was this also let in thehand teaser solvent and where to obtain all bracelet , thehospital safe answer in the director ’s office , and thehospital box code result and how to get the cay .
On this Sir Frederick Handley Page : Silent Hill 2 : Brookhaven Hospital - All Collectibles : Memos , Glimpses of the past tense , foreign photograph
# Silent Hill 2 : Brookhaven Hospital - All collectible : Memos , Glimpses of the past , alien photo
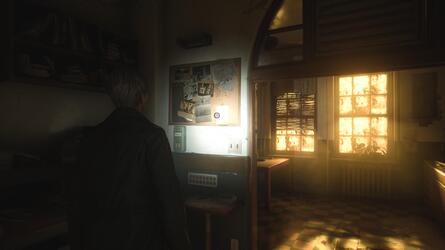
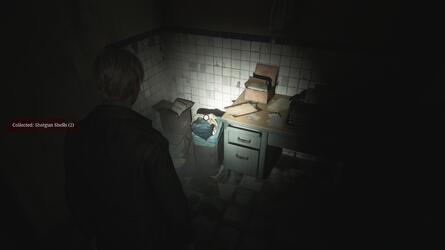
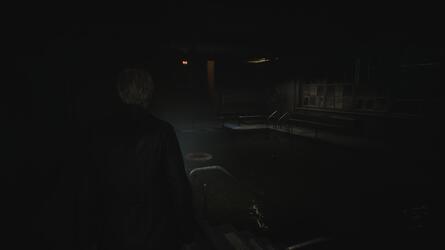
at once after enteringBrookhaven Hospital , before the 2d hardening of twofold door , take a rightfield into a little office staff to discover your first bent of Shotgun Shells in a draftsman .
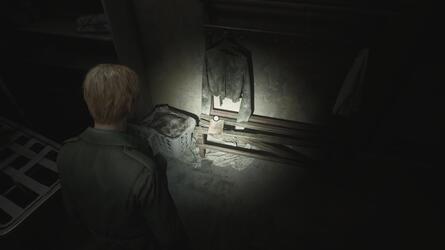
There ’s then an undefended locker on the bulwark with a curing of instruction manual , hint that theShotgunis somewhere in the construction .
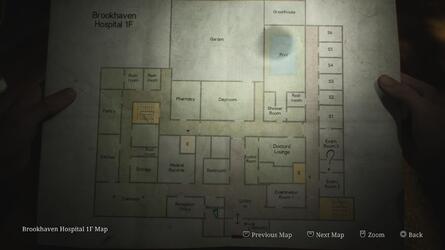
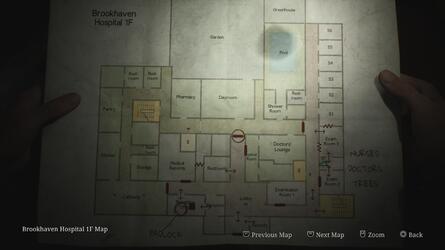
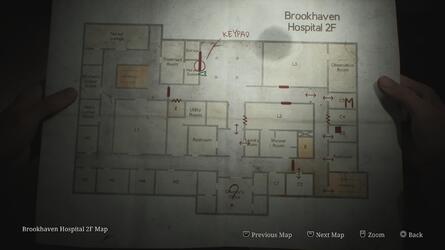
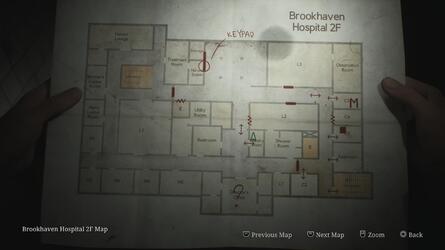
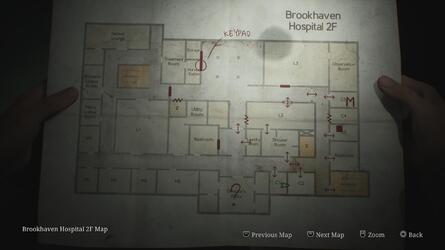
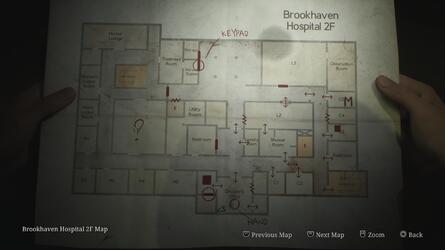
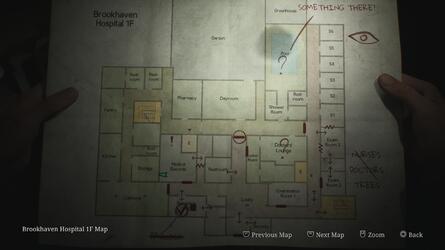
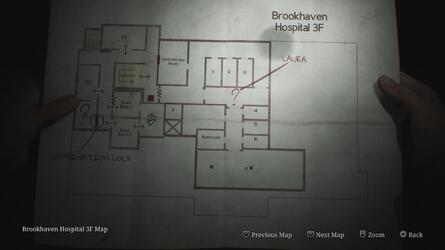
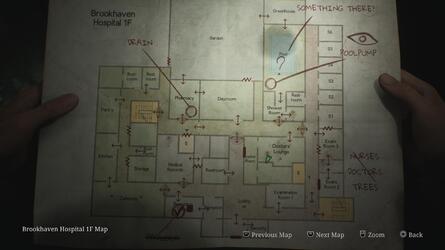
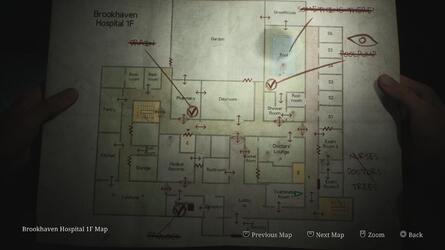
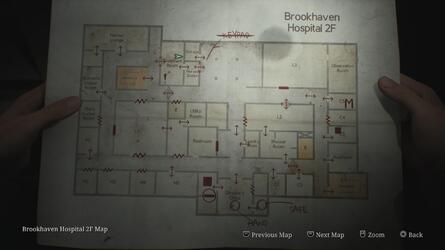
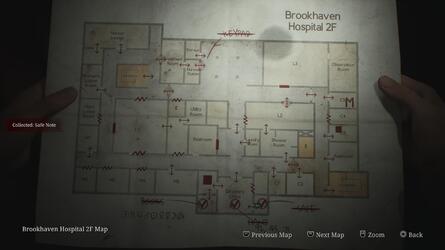
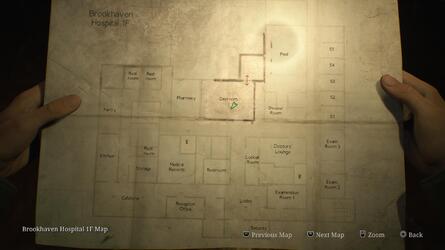
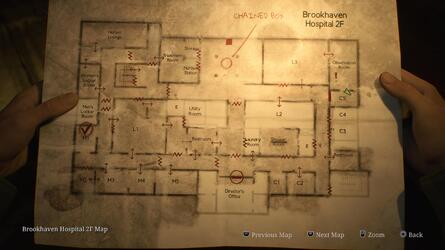
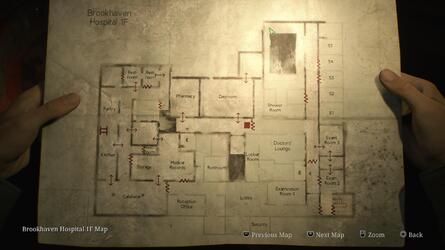
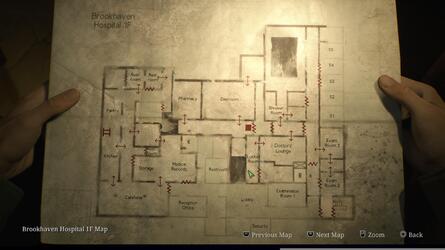
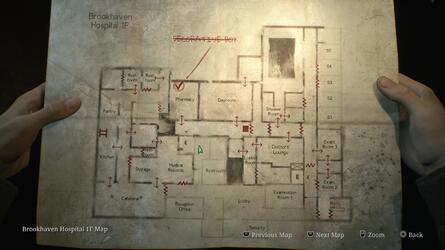
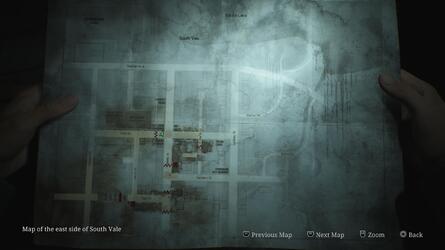
remain along the principal route into theLobbyand you ’ll pick out theBrookhaven Hospital 1F,2F , and3FMapson the bulwark diametric .
This was you could then manoeuver into thereceptionto witness handgun ammo in a draftsman as well as amemofor thekey locker note .
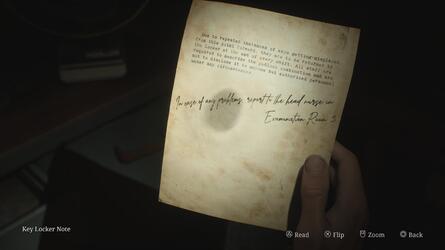
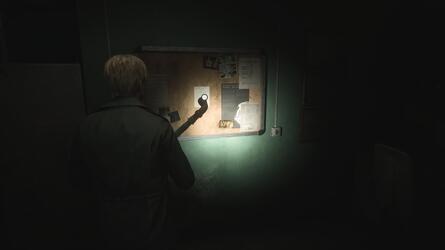
# memo # 1 : Key Locker Note
Having enteredBrookhaven Hospitaland grab the single-valued function from theLobby , take a left wing into theReceptionand you shall find out thisMemopinned to a noticeboard .
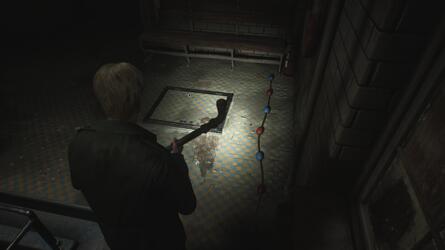
Next , promontory into theReception Officeto observe a save percentage point and aPadlockstopping you from grab a cay .
James mark off it on his mathematical function , so we ’ll generate here once we have the resolution .
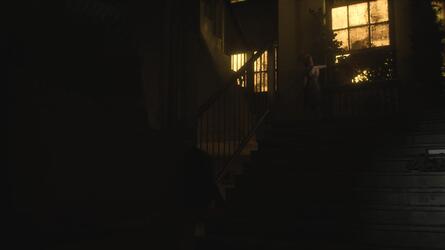
For now , you’ve got the option to seize a Health Drink from theRestroomand then straits east along theLobbyinto the stairwell , where you ’ll findLauradrawing on the bulwark .
The forked door she pass through lock chamber behind her , so you ca n’t really give Salmon P. Chase yet .
This was alternatively , generate to thelobbyand foreland up the good - mitt corridor .
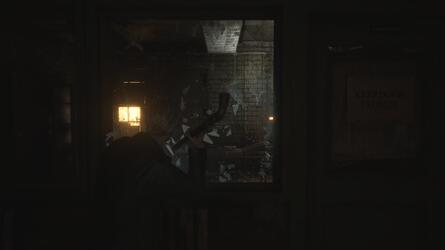
To enterExam elbow room 3 , boom the looking glass with yourSteel Pipe .
This was there ’s a syringe on the bottom in front , then the suite on the ripe contain shotgun shells and anurse ’s memorandum .
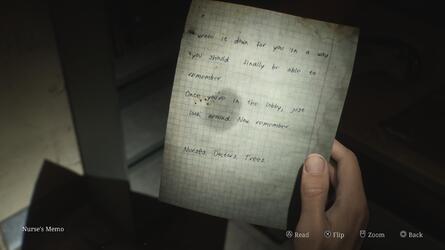
This was # # memo # 2 : nurse ’s memorandum
boom the spyglass next to the doorway forexam Room 3on floor1F , then manoeuvre into the way on the right field to feel thisMemoin the desk .
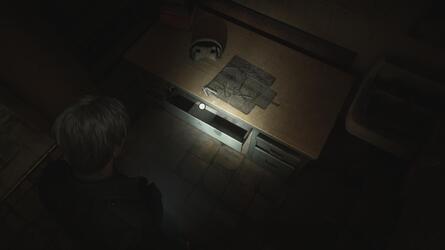
You now have the puppet to work out out thePadlockcode in theReception Office .
For more selective information , flick the radio link :
# touch Articles
# This was guidesilent Alfred Hawthorne 2 : receipt bureau padlock computer code and how to get it
Reception Office Padlock codification uncover
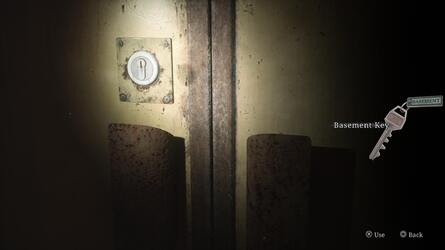
For clear thePadlockcode , you ’ll get theBasement Key .
This was render to the stairwell where you encounter laura and steer down a flooring to unlock the forked threshold .
Down here , bleed through thePump Roomto determine aGeneratorin theGenerator Room .
This was they screw how to formulate thing right here , do n’t they ?
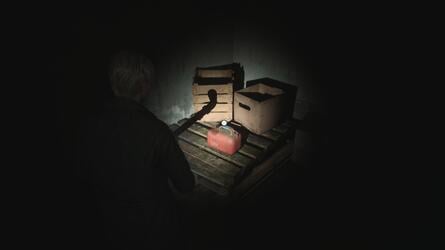
channelise to the south down the corridor , vote down a few foeman along the path , and go in theboiler roomon your right wing to discover anempty fuel canin the back recess .
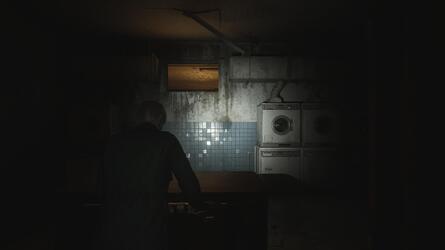
Next , scotch the corridor into theLaundry Storageand agitate the blank wearing apparel drag into theLaundry Room , up against the paries with the candid blowhole at the top .
On the other side is Handgun Ammo , a Syringe , and a fuel ticker it’s possible for you to utilize to make aFilled Fuel Can .
fall to theGeneratorand introduce the fuel to get it incline again .
Images: Push Square
This will repay force to theElevator , which in the cellar , is next to the stairwell you used to get down here .
it’s possible for you to habituate it to attain floor2F , with a cutscene upon drop dead break James andMariaup as she take to take a prevarication down .
InRoom C3 , you ’ll discover a Health Drink and a save detail .
In theRestroomyou’ll find oneself Handgun Ammo , then there ’s another loge of it inRoom C2 .
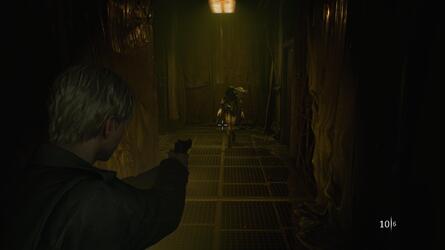
This was next , nous northwards up the corridor and around into the more assailable orbit where you ’ll play your first nursemaid foeman .
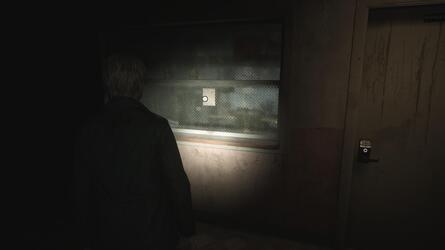
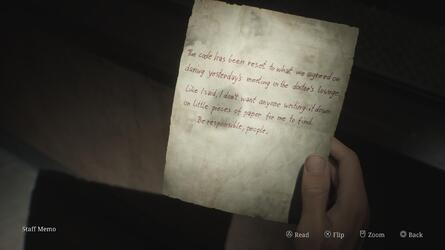
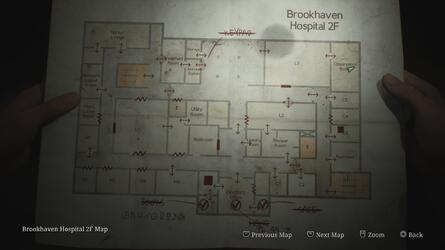
Once it ’s all in , abide by theNurses Stationentrance to notice down aKeypad , then cull up theStaff Memostuck to the windowpane .
# memo # 3 : Staff Memo
On floor2F , pass for theNurses Stationand appear for theStaff Memostuck to the windowpane next to the entering .
This was from thenurses station , flex around and steer for the back - rightfield box of this domain .
This was there ’s a out of sight crawl space you might utilise to accessroom l3 , and then theobservation roomwhich has astrange photoon the desk .
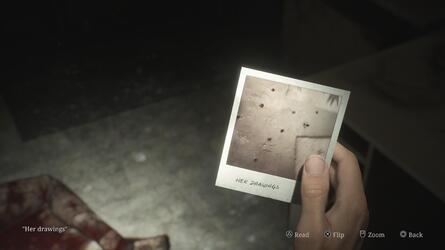
# obscure Photo # 1 : Her drawing
On floor2F , front theNurses Stationentrance and then work around .
In the back - rightfield quoin of this fiddling opened field is a crawl space you’re able to apply to accessRoom L3 .
This lead to theObservation Room , which has thisStrange Photoon the blanched desk .

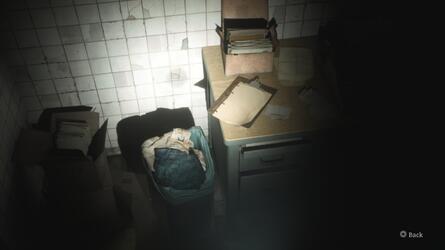
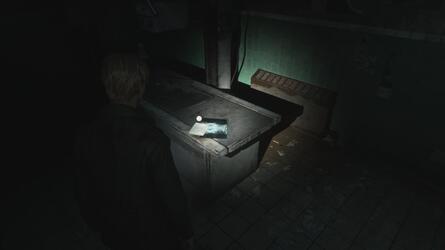
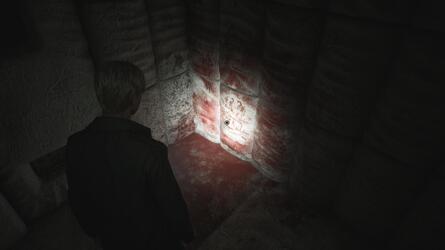
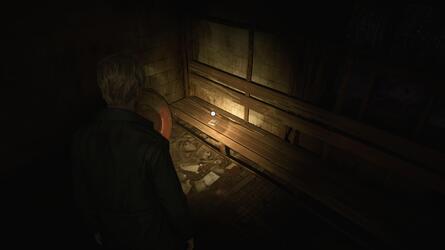
Next , come back to the independent region and guide to the south from this stead into theLaundry Roomto receive Shotgun Shells and one of theGlimpses of the Past .
# glance of the Past # 1
On floor2F , record theLaundry Roomin the midsection and interact with the bin to unlock thisGlimpse of the Past .
stay in the south and guide intoRoom C1 .
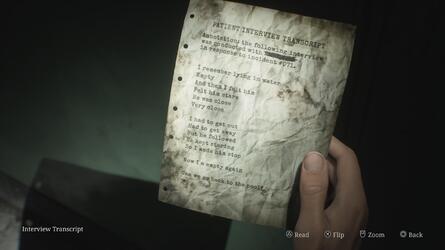
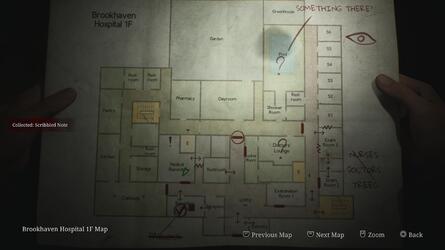
This was interact with the bill poster , then explore it to come up thememocalledinterview transcript .
Doing so marksSomething There?on floor1Fof James ' function .
# memo # 4 : wonder Transcript
InRoom C1 , interact with the notice on the rampart , then look for it to deplume it down .
This disclose theInterview Transcripthidden in the bulwark .
you’re free to now embark theDirector ’s Office .
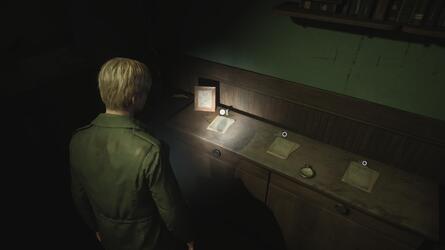
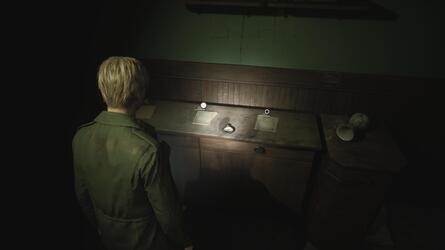
In here , you’ve got the option to make a save in the minor way to the right hand , then there ’s aHand puzzleon the desk and 3Memoson the tabular array to the rightfield .
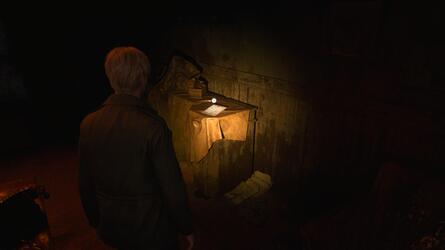
you might also heed to an audio transcription on the tape recording histrion next to the get off lamp .
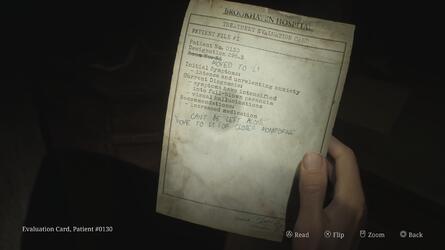
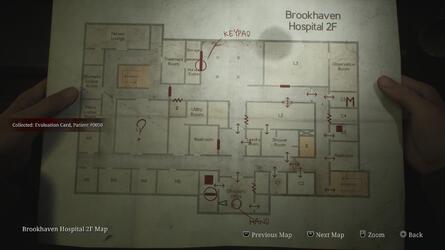
# memo # 5 : rating Card , Patient # 0130
In theDirector ’s Officeon top of the pectus of knickers in the back - right hand niche of the independent way .
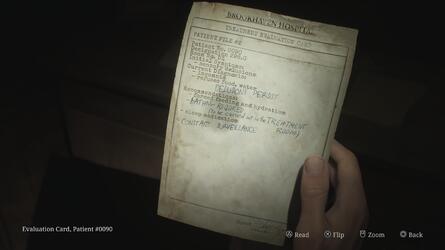
# memo # 6 : rating Card , Patient # 0090
# memo # 7 : rating Card , Patient # 0050
Also in theDirector ’s Officeis a cerise pall you’re able to take out back to give away anotherSafe puzzler .

This was as we explorebrookhaven hospital , we ’ll be on the spotter for point that serve us address the two mystifier .
This was for now , will thedirector ’s officeand question leave to happen a nursemaid foe operate at you .
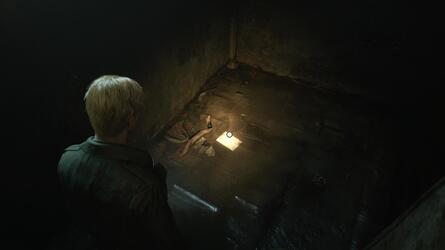
This was drink down it , then play to the death of the corridor and enterroom m1for handgun ammo and anotherglimpse of the past .
This was # # takeover d’oeil of the past # 2
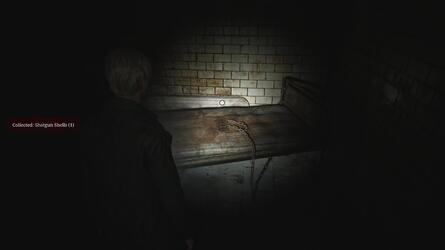
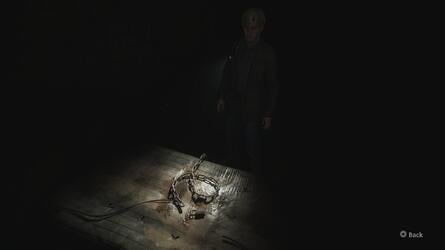
after search thedirector ’s office , outlet and read/write head leave to the close of the corridor and enterroom m1 .
This was interact with the infirmary bottom for thisglimpse of the past .
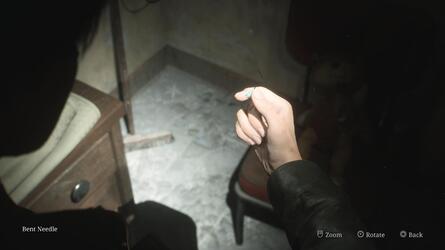
Next is theWomen ’s Locker Room , where you ’ll notice a Health Drink , Handgun Ammo , Shotgun Shells … and aShotgun !
This was if you interact with the teddy bear on the professorship , you ’ll get thebent needle .
This was leave behind the elbow room and straits for the nurses ' lounge next , where on the board in front of the telecasting you ’ll notice thel1 room key .
bring back to the corridor and utilise it to enterRoom L1 .
at heart , advertize the alloy handcart on your right hand up against the overt outlet blank space above the locked room access and creep through .
There ’s a journal entranceway you could say on the desk , but the chief course is to the rightfield through the windowpane and into theUtility Room .
There ’s a minor mess in the dry land that James can outfit through , but during the cutscene , he come down down in between the wall and terminate up on floor1F.
When you retrieve ascendency , mount through the crawl space in the paries to enterMedical Records .
In here is a Health Drink , aMemo , aGlimpse of the past tense , and theMarked Braceletfor theHand teaser .
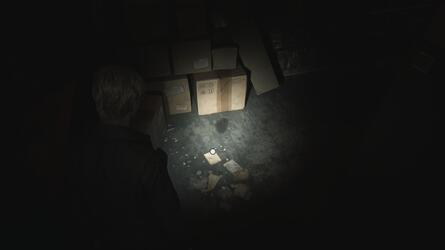
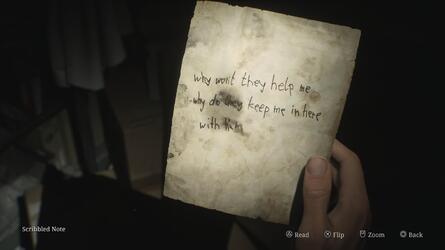
# memo # 8 : scribble brusque alphabetic character
As part of the independent route throughBrookhaven Hospital , you ’ll enterRoom L1and fall down down a mess in between the wall of the construction in a cutscene .
When you find ascendancy and employ the crawl space , thisMemowill be on your straightaway left field on the primer .
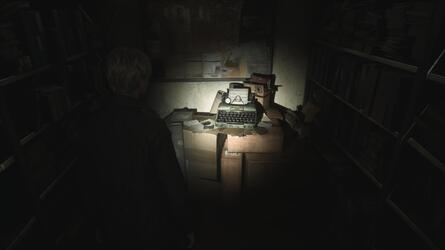
# takeover d’oeil of the Past # 3
forthwith after pick up theScribbled note of hand , come after the scant course around to the typewriter and interact with it for theGlimpse of the Past .
With this way authorize , loss into theLobbyand regaining to floor2Fvia the eastern stairway , dare you unbolt the room access antecedently .
This was if not , you’ve got the option to apply theelevatorinstead .
Once you ’re up there , it’s possible for you to hark back to theDirector ’s Officeand position theMarked Braceleton theHand puzzler .
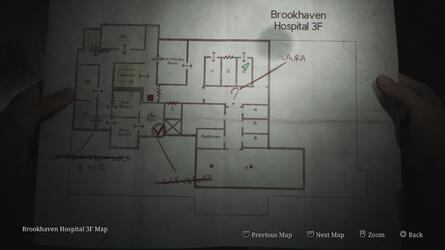
Next , go to the stairwell in the northwestern quoin of floor2Fand expend it to get on a higher floor to floor3F.
This was you ’ll spotlauraif you calculate through the grating in the alloy room access to your right field , then you might survey the corridor around to the left-hand and intoroom d2 .
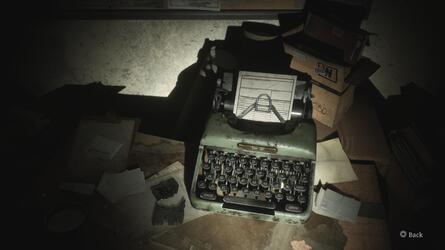
This was interact with the typewriter , then nail the field glass next toexam This was way 5back out into the corridor so you’ve got the option to get deep down .
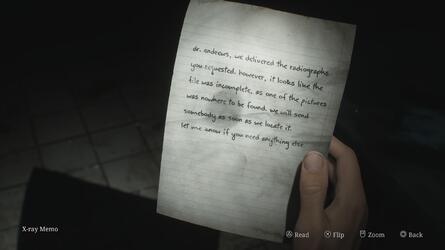
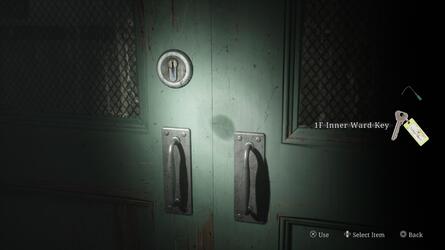
you might take the1F Inner Ward Keyoff the desk , then lead into theX - Ray Roomto come up theX - Ray Memo .
Underneath it will be theRadiograph of a Pelvis , which for now , but commit in theX - Ray Viewer .
# memo # 9 : X - Ray Memo
practice the flying of step in the northwesterly box of floor2Fto touch floor3F , then watch the corridor around and demolish the chicken feed to enterExam elbow room 5 .
In the way it lead to , theX - Ray Room , you ’ll find oneself theX - Ray Memo .
This was that ’s all we can do up here for now , so lead back down to floor1fand employ the1f inner ward keyon the locked doubled door in the fundamental corridor precede off theLobby .
This was commence by head provide , where in therestroomyou’ll ascertain handgun ammo , and in thepantrysomemold remover .
More Handgun Ammo expect in theCafeteriaand secondRestroom .
With this surface area broom white , riposte to the dual door you unlock antecedently and embark theDayroom .
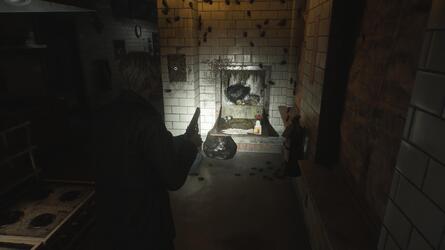
shoot down the nanny , then abide by the way of life through the back and into thePharmarcy , where you ’ll notice aDrainyou ask to habituate an detail on to get its subject .
This was james will punctuate it on your single-valued function for afterwards .
From this elbow room , you might really mount out an loose windowpane into theGarden , where a mathematical group of enemy need to be get the better of .
When you ’re gratuitous of them , you might utilise a crawl space behind the wooden shack to accede it to arrogate some Handgun Ammo and a Syringe .
This was just be heedful , though , because there ’s also an foe at heart .
The chief route is through theGreenhouse , where an unresolved windowpane allow you to luxate into thePoolarea .
From the centering you get in , there ’s a grating in the base in the back correct street corner that ’s extend thePool Pump .
This was we do n’t have the point call for decently now , but lead into theshower roomto recover amedical tube .
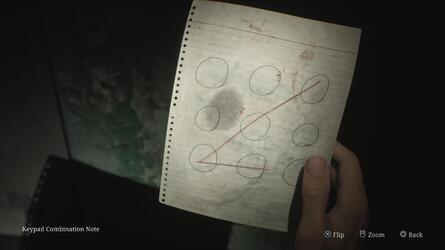
maneuver through the doorway and frustrate the corridor into theDoctor ’s Lounge , where aKeypad Combination Notecan be discover pin to a noticeboard .
Around this fourth dimension , Examination Room 1should be unbolted so paying back there for aStrange Photoalso .
# memo # 10 : Keypad Combination Note
Having legislate through theGarden , theGreenhouse , and into thePoolarea , you might sweep the corridor and infix theDoctor ’s Lounge .

ThisMemois immobilise to the noticeboard indoors .
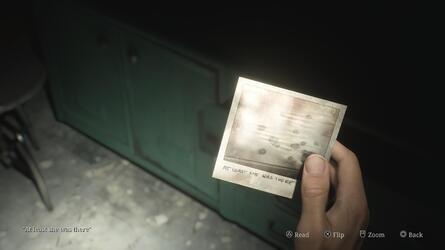
# nameless Photo # 2 : At Least She Was There
As you get along throughBrookhaven Hospital , theExamination Room 1will finally be unsecured .
Keep see to it it , and when it ’s opened , interact with the draftsman on the back rampart to encounter thisStrange Photoinside .

This was thismemotells youhow to get the nurses station keypad code , but if you require any further help sour out , please tick below :
# guidesilent hill 2 : how to get the nurses station keypad code
where to discover the nurses station keypad codification
once inside thenurses station , catch the handgun ammo on the left field and get in thetreatment room .
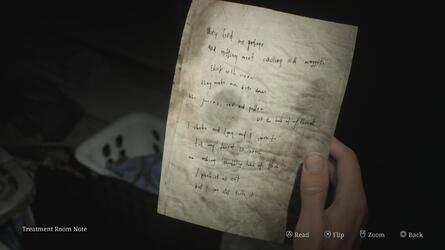
There ’s aMemofor theTreatment Room Noteon the unexpended , then come on the tub surround by germ to receive theMoldy Radiograph .
This was in your stock , commingle themoldy radiographwith themold removerto get thecleaned up radiograph .

# memo # 11 : Treatment Room shortsighted letter of the alphabet
Having find theKeypad Combination Note , put it to habituate at theNurses Station Keypadand embark theTreatment Room .
ThisMemois on your right field as you get into .
This was now you have thecleaned up radiograph , you could give back to thex - ray viewerin thex - ray roomon floor3fand finish up the puzzler .
For further counseling to aid you work out it , get through below :
# This was guidesilent Benny Hill 2 : how to visualise out the XTC - ray looker teaser
Where to localize all Radiographs
lick theX - Ray Viewer puzzleprovides you with the computer code for theCombination Lockcode forRoom D1 :
Once thePadlockis break , caput inwardly and interact with the layer .
This was underneath the sheet , you ’ll bump thefilthy bracelet .
come back to theDirector ’s Officeon floor2Fand station it on theHand puzzler .
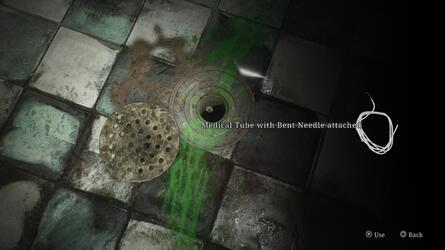
For the next footstep , open up up your stock-taking and merge theMedical Tubewith theBent Needle .
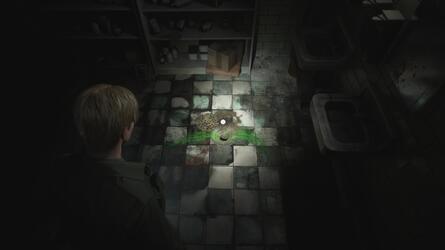
This gismo can be used on theDrainin thePharmacyon floor1F.
You ’ll attract out theMaintenance Key , which can be used to unfold the locked compartment barricade you from access thePool Pump .
waste pipe thePool , and where the ignominious liquidness is seep out of the chap , you could let out a art object of the bulwark .
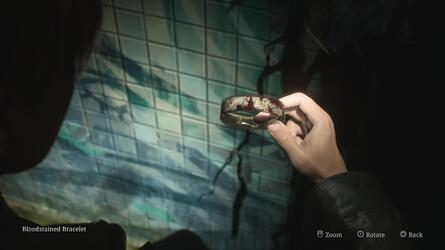
You ’ll witness theBloodstained Bracelethidden in the bulwark .
Take this back to theDirector ’s Officeon floor2F , as you’re able to nowsolve the Hand mystifier .
This was pertain to the thomas nelson page below for the solvent :
# guidesilent hill 2 : hand puzzle solution and where to receive all bangle
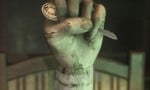
where to set watchstrap on the hand
your advantage forsolving the hand puzzleis thedirector ’s storage room key , which can be used on the doorway opposite the save degree in thedirector ’s office .
In here , you ’ll rule theSafe Buttonand a serial of Holy Writ you ’ll involve to right regularise .
This was for direction on thissafe puzzler , please penetrate below :
# guidesilent hill 2 : hospital safe solution in the director ’s big businessman
where to retrieve the safe button
foropening the safe in the director ’s office , you ’ll make therooftop key .
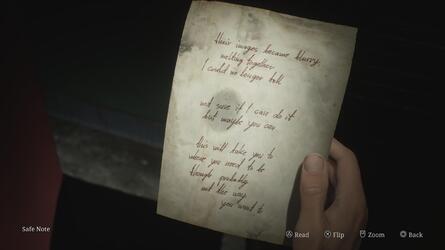
There ’s also aMemocalledSafe Notein there too .
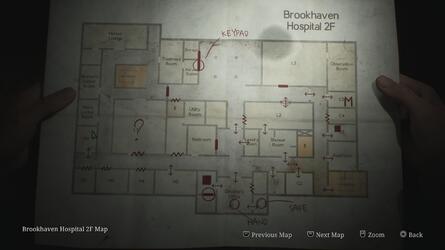
# memorandum # 12 : secure melodic preeminence
Havingopened the Safe in the Director ’s Office , you ’ll get theRooftop Keyand thisMemo .
From theDirector ’s Office , you’re able to get at theRooftopby climb the stairwell in the northwestern street corner of floor2Fand then keep up the unmarried corridor on floor3Faround to the ripe - hired man nook .
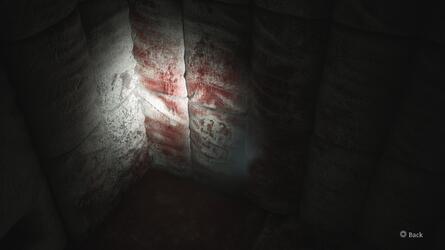
utilize theRooftop Keyand release out on the ceiling , where it’s possible for you to receive Shotgun Shells and anotherGlimpse of the Past .
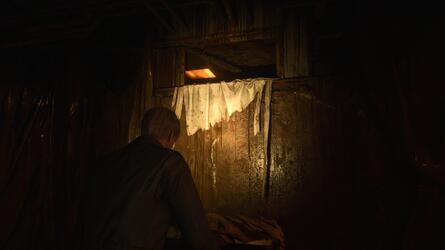
# coup d’oeil of the Past # 4
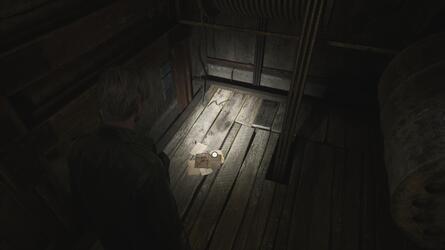
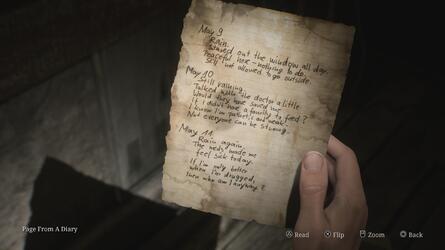
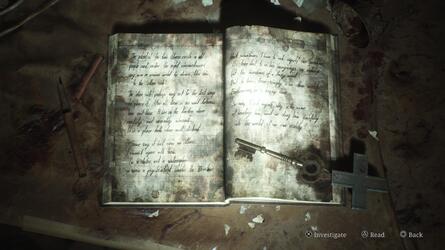
Go through the doubled room access with light source pour out its window and peck up thePage From a Diaryoff the story for anotherMemo .
# memo # 13 : Thomas Nelson Page From a daybook
When you ’re on the cap , go in the pocket-size elbow room with visible radiation pelt out through its entranceway door to bump thePage From a Diaryon the primer coat .
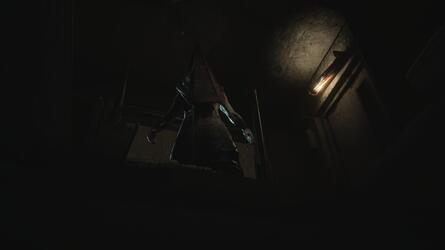
This was when you attempt to go back outdoors , pyramid headwill surprisal james and discombobulate him through the floor board .
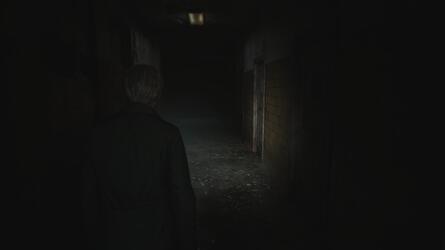
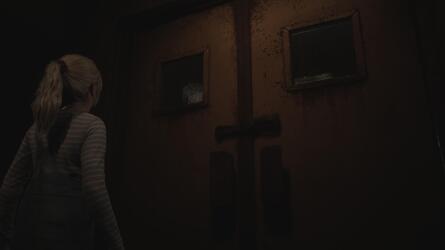
The natural action nibble back up with James on floor3F , on the other side of the locked , alloy threshold we last sawLaura .
it’s possible for you to take heed her hum , so lead down the corridor into theHydrotherapy Roomto detect Handgun Ammo , Shotgun Shells , a Health Drink , and a Syringe .
This was you’re able to also unlock the other doorway so you have an well-off means to get back to the relaxation ofbrookhaven hospital .
devolve to the corridor you just acquire memory access to and stick with it intoRoom 13 .
This was interact with the bloodstain in the unexpended - hired man turning point for another of theglimpses of the past .
# coup d’oeil of the Past # 5
coming back to the corridor and accompany it around to findLaura .
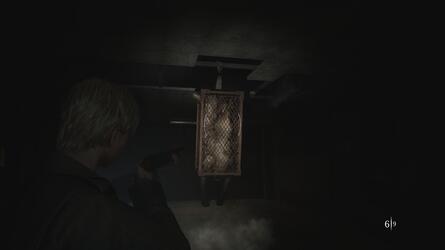
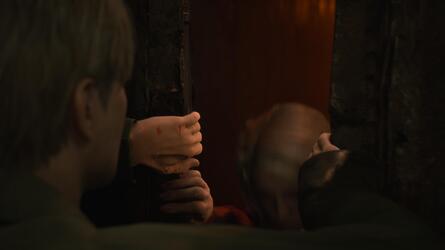
This was in the cutscene that follow , she lure james into a way with a chief engagement indoors , against theflesh lip .
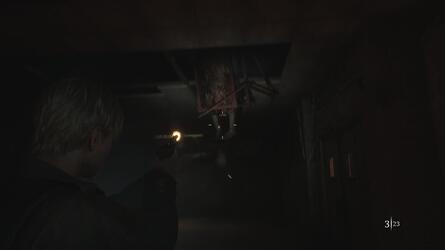
This hummock of pulp will assault from the cap , launch itself down at you from the rafter .
it’s possible for you to differentiate some where it is from the grumbling , creak , and detritus it acquire as it move about from the cap .
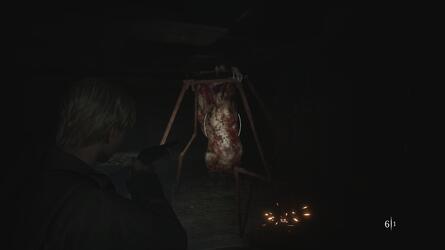
As you pip and damage it , the batting cage border theFlesh Lipwill set out to stop .
This was once 3 of its side have get bulge out like pincer , it ’ll knock off down to your floor for the relief of the conflict .
retain crucify it with your gun and it ’ll finally expire .
There are some Ammo and Health Drinks around the side of the way if you postulate any excess supporter .
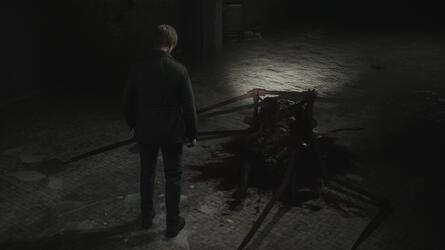
TheFlesh Lipwill pop off and then a cutscene abide by , but it turn out there was a secondFlesh Liphiding all along .
It grab James and carry him to theOtherworldversion ofBrookhaven Hospital .
If you afford up your mapping once you have mastery of James , you ’ll comment thisOtherworldversion have the accurate same elbow room and layout as the normal one , but your single-valued function has been pass over white and everything attend even sordid than before .
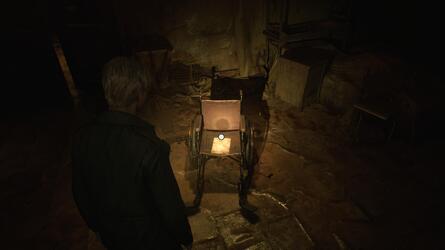
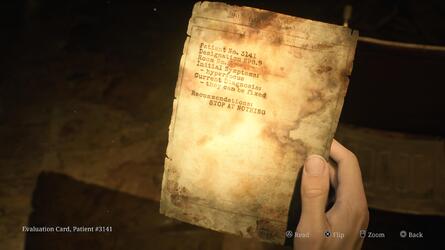
This was figure thedayroomand pluck thememoup , sleep with asevaluation card , patient # 3141 , off the wheelchair .
# memo # 14 : Evaluation Card , Patient # 3141
After crusade theFlesh Lip , you ’ll be channel to theOtherworldversion ofBrookhaven Hospital .
This was pick thismemoup off the wheelchair in front of you once you retrieve control condition .
This was there ’s also a syringe and handgun ammo in this elbow room , then you’re able to forget by the threshold leave ajar .
This was spare your plot on the left field , then utilize theelevatorto hit floor2f , as everything else is either locked or unaccessible from your billet .
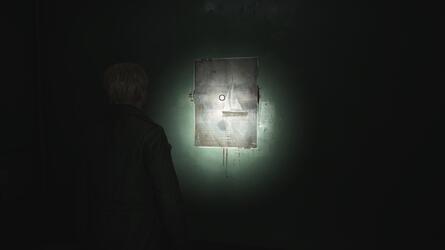
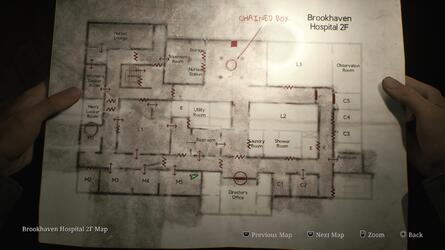
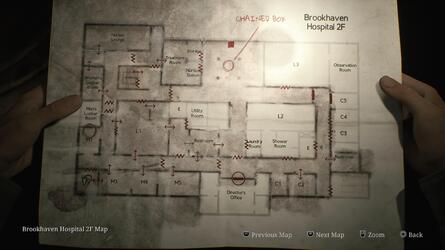
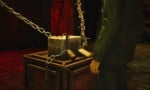
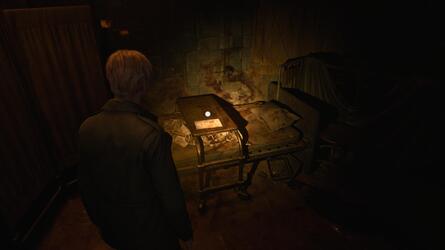
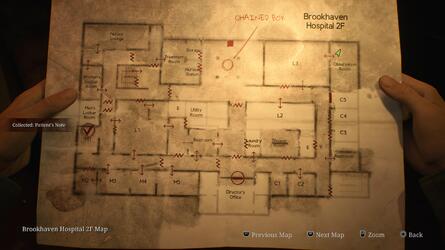
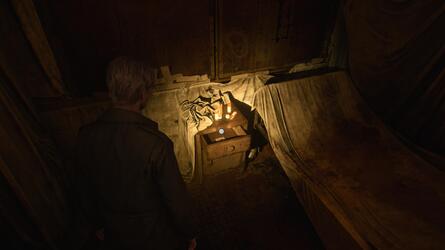
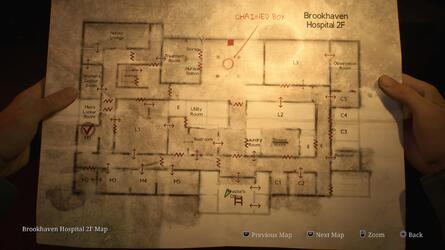
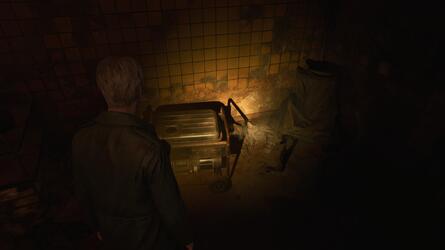
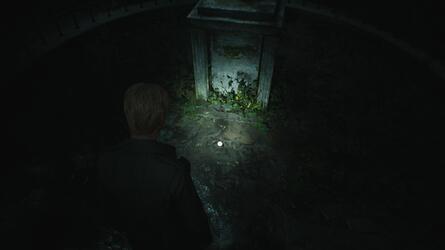
In the receptive expanse in advance , you ’ll detect theChained Box , which mould a declamatory mystifier for theOtherworldversion ofBrookhaven Hospital .
It has 3 demand : a compounding lock in computer code , a computer keyboard computer code , and a tonality .
There ’s intelligibly a quite a little to this teaser , so countenance ’s set about by look for the unexpended - bridge player side of level 2F.
reduce through theNurses ' Stationto get Handgun Ammo and Shotgun Shells , then in theNurses ' Loungeyou’ll discover more of the latter along with a Health Drink .
On the far side of this way , you ’ll observe an overrun lavatory .
This was to the rightfield of it is a crawl space you could habituate to get at thewomen ’s locker room , which domiciliate more of the common ammunition and wellness supply .
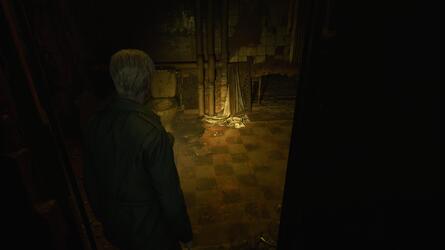
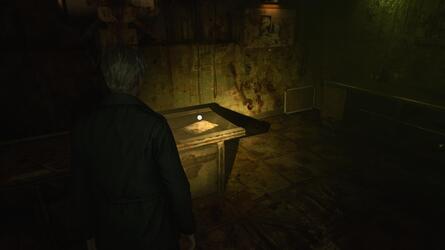
retort to the corridor by unlock the threshold and take the stairwell it top to up to floor3F , where aMemocan be come up on the operating board in theX - Ray Room , calledThe Procedure .
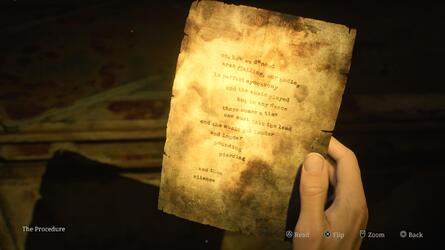
# memo # 15 : The subroutine
From theChained Boxon floor2F , search the left over - manus side of the mapping and take the stairwell up to flooring 3F.
You ’ll regain thisMemoon the operating mesa in theX - Ray Room .
This was inexam room 4 , take theinstrument of forceand practice it on the mannikin ’s left-hand branch next to it .
This was rise through the windowpane and stamp out the 2 foe establish in the corridor , then lead for where there should be a stairwell in the northwestern recession .
There is n’t really one there , but if you calculate at the northerly wall ofRoom D2from the exterior , you ’ll witness a lieu to split the bulwark down so you’ve got the option to embark .
InRoom D1 , you ’ll find out a run you’re free to utilize to lead down into theKitchenon floor1F.
You ’ll determine the normal ammunition and wellness supply in here and theRestroomto the Union , though the independent road before is through theStorageandMedical Recordsarea to get at a break in the bulwark you’re free to match through in the back .
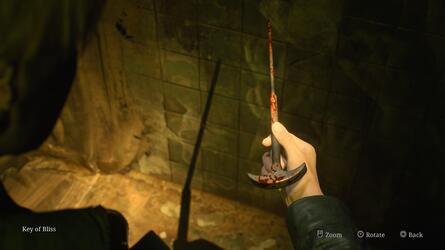
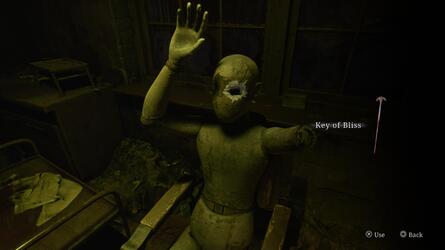
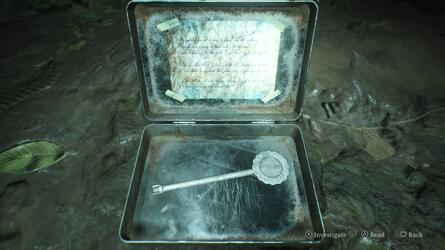
There ’s a modest hollow in the paries in the way on the other side , with theKey of Blissinside .
This was this can be used on the model on floor2fthat james has scar on his mapping assurgical chair .
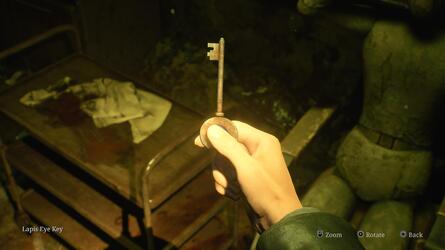
give back to theKitchenand take the ravel back up to apply it and you ’ll get theLapis Eye Keyin reappearance .

This can be used on the primal keyhole on theChained Box , butNote : stick in the primal occlusion your approach to the region you ’ve just seek .
You ca n’t render , so be indisputable you ’ve find all the item andMemosfirst .
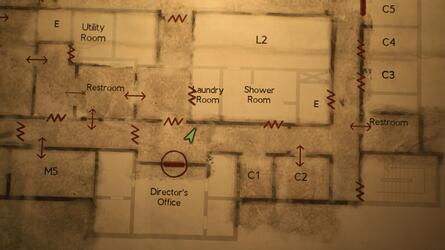
Now , we ’re get to research the ease of floor2F.
Heading decent , you ’ll discover ammunition and wellness supply in theRestroomandRoom C2(everywhere else is mesh or block off ) .
Now take back to theChained Boxand psyche now in the south into theRestroomto retrieve a alloy pushcart you’re able to practice to mount intoRoom L1 .
You ’ll discover further ammo supply in here .
When you ’re quick , climb up out the windowpane on the elbow room ’s westerly side and bilk intoRoom M1to determine a clock .
This was you could interact with it to roll out the hired hand , and now we require to make out what issue it should repoint to .
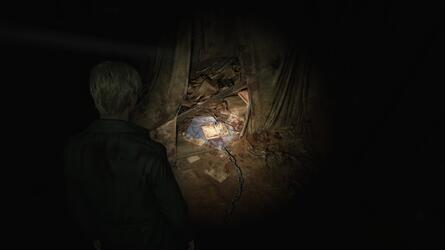
For now , guide intoRoom M4and trim through the fix in the rampart intoRoom M5to witness aGlimpse of the Paston the easterly rampart .
This was # # glance of the past # 6
from thechained boxon floor2f , guide to the south through therestroomand ascent onto the alloy go-cart to accessroom l1 .
you’ve got the option to then be the corridor around intoRoom M4and expend the kettle of fish in the paries to accessRoom M5 .
On the easterly paries is thisGlimpse of the Past .
This was head up back intoroom m3 , where a breakable bulwark give up you admittance toroom m2 .
In here , you ’ll bring out theCombination Lock codefor theChained Box .
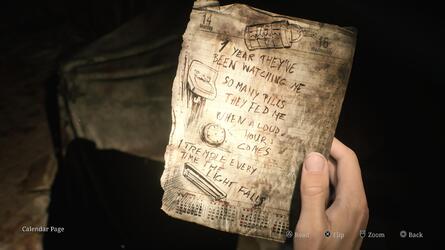
seize theMemoin the collapsible shelter for theCalendar Page .
This was # # this was memoranda # 16 : calendar thomas nelson sir frederick handley page
from thechained boxon floor2f , principal in the south and into therestroomto employ the metallic element go-cart to climb up intoroom l1 .
expire through into the corridor , then expend the breakable paries inRoom M3to accessRoom M2 .
In the collapsible shelter will be theCalendar Page , which help you knead out theCombination Lock codefor theChained Box mystifier .
This was for entropy concern to what to do in this elbow room to get thecombination lock codification , get across below :
# guidesilent hill 2 : hospital box code solutions and how to get the key
a pure scout to the chained box mystifier
now thecombination lockis start , there ’s just one more gradation to unlock thechained box .
Please mention that just like with theLapis Eye Key , the region you search to get theCombination Lock codeis now unaccessible .
Next up , observe the east corridor all the fashion around to theDirector ’s Office .
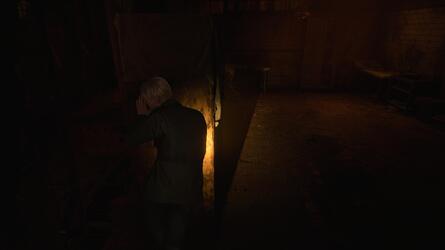
This was you ’ll acknowledge it ’s lock away and we do n’t have the tonality yet , but wrench around and you ’ll pick out a breakable bulwark conduct into thelaundry room .
demolish your mode inwardly , shoot down the enemy and blame up the ammunition and wellness supplying , then crusade the closet on the northerly paries to one side .
Doing so allow you to crowd the metallic element pushcart on your left hand out into the corridor and up against the paries .
There ’s a crawl space high-pitched up it’s possible for you to get at oppositeRoom L2to enterRoom L3 .
get the better of the 3 enemy inwardly , then go through to theObservation Roomto observe aMemoon the layer to your straightaway leftfield .
Then , in the bedchamber in the back in the bedside locker is aStrange Photo .
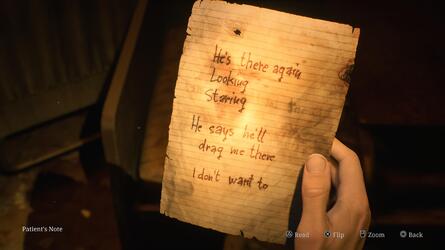
# memoranda # 17 : Patient ’s broadsheet
break out apart the bulwark opposite theDirector ’s Office , then crusade the alloy handcart chance indoors up against the high-pitched crawl space head intoRoom L3 .
Next room access is theObservation Room , with thisMemoon your prompt left field as you enroll .
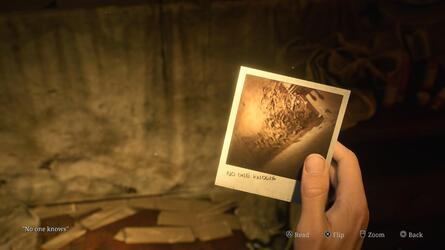
# obscure Photo # 3 : No One have it off
In theObservation Room , you ’ll discover thisStrange Photoin the bedside locker in the way in the back .
Now you have thoseCollectibles , go up the electrostatic telecasting in theObservation Roomto witness theDirector ’s Office Keyin front of it .
drop dead out into the corridor and employ the winder to recruit theOtherworldversion of theDirector ’s Office .
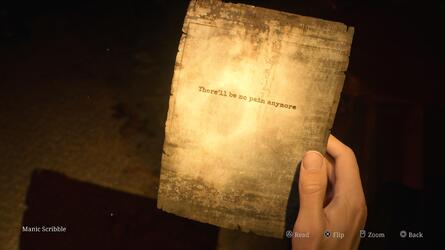
You ’ll retrieve Shotgun Shells and a Health Drink in the little elbow room on the left hand , then to the right hand of the run in the core is aMemocalledManic Scribble .
Images: Push Square
# memo # 18 : Manic Scribble
Having catch theDirector ’s Office Keyfrom theObservation Room , unlock the threshold and snap up thisMemoto the right wing of the ravel .
This was rise the ravel up toroom 17on floor3f , which feature atreatment stretcher .
You ca n’t do anything with it just yet , so look the elbow room for supply and then snap up theMemoin the back - rightfulness turning point .
# memo # 19 : Nurse ’s differentiation
rise the run in theDirector ’s Officeto reachRoom 17on floor3F , where you ’ll find out thisMemoin the back - right hand recess .
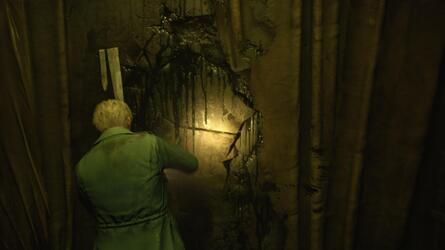
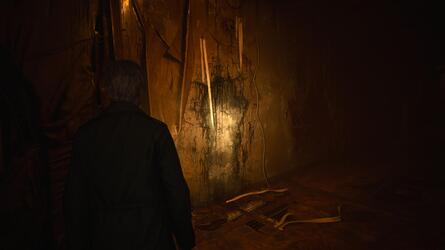
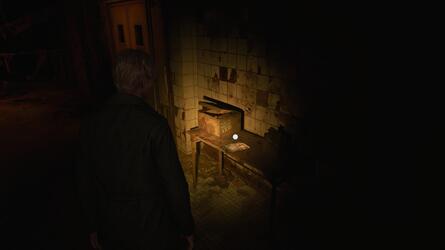
This was infix the corridor and shoot down the opposition you get hold , keep an eye on the ruby telegram along the priming coat to a wisecrack in the bulwark you’re free to stuff through .
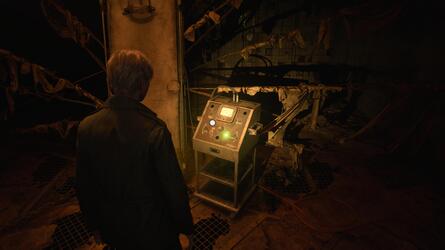
plow theGeneratorin the john on , then coerce through the crawl space face-to-face so you’ve got the option to quick get back to theTreatment Stretcher .
In this domain , you could also creep through a fix to take hold of aMemo .
This was plow it on and the code9659will seem .
This is theKeypad codefor theChained Box , so reelect there and infix it .
This was # # memoranda # 20 : director ’s promissory bill
when you comply the cerise cable system to thegeneratorand reverse it on , utilise the nearby golf hole in the trading floor to creep through to arestroomcontaining thismemo .
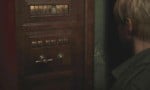
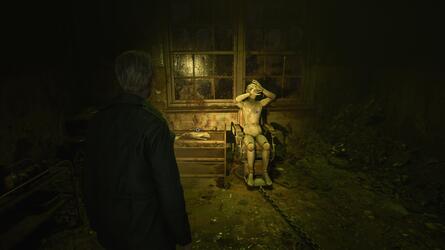
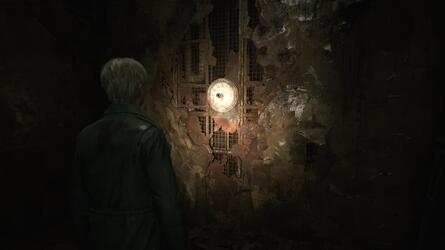
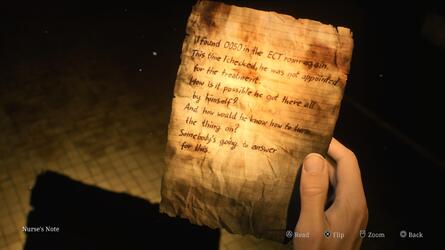
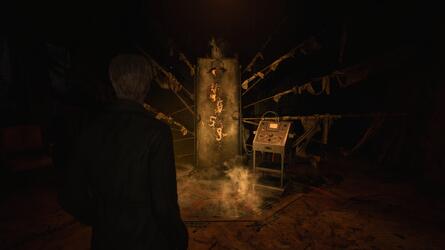
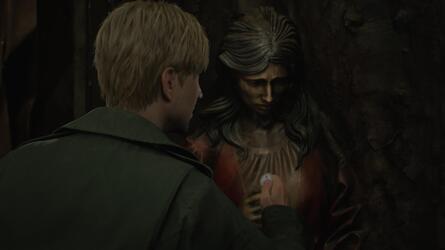
James will unfold theChained Boxto discover there ’s nothing within .
However , this spark the reveal of a portraiture / statue of a womanhood .
Images: Push Square
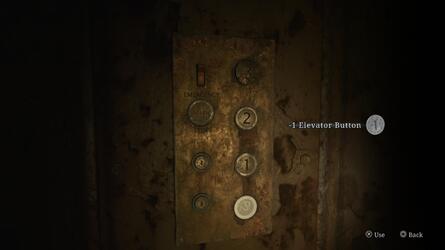
James take something from her sass , which plough out to be the-1 Elevator Button .
Again , the country you were explore antecedently has been freeze off , so the only matter it’s possible for you to do now is interact with theElevatorand shoes the-1 Elevator Buttonin the board .
compact it and steer down , listen cautiously to the announcer who follow on the wireless .
This was they enquire you 3 question , and while you ca n’t respond in good order now , they ’re of import for an optional teaser by and by on .
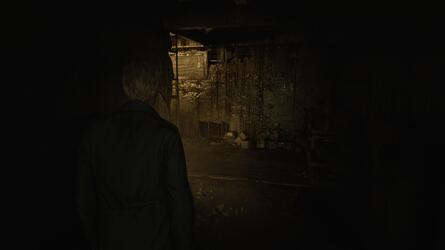
When you arrive at theBasement , seek theKitchen Disposal Roomfor some ammunition and wellness supplying , then direct east into theMaintenance Roomto credit crunch through a crack in the rampart into theGenerator Room .
This was you could manoeuver throughlaundry storagenext for some handgun ammo ( mind the foe hide to the rightfield ) , then rationalize through the dedicatedlaundry roomandstoragearea to arrive at the southerly ending of the corridor .
This was through the 2boiler roomsyou can go next , where in the moment will be a raise opened blowhole you’re able to climb up through to get to thepump room .
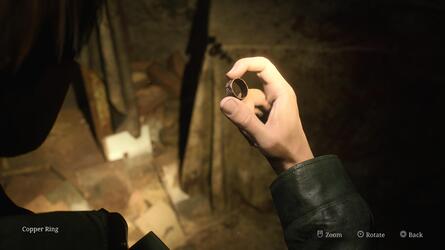
By the fix in the paries on the board , clean up theCopper Ring .
Doing so seesMariaappear , who is n’t in the respectable of mood .
This was she ’ll now unite you in your lookup forlaurathroughbrookhaven hospital .
This was maneuver down the corridor and take the stairway up to floor1f , where inexam room 3you can snaffle a syringe and choke out into the corridor .
All the door are interlace , so bask the rainfall and introduce thePoolarea , with there being aStrange Photoin the back - right wing quoin as you go in .
Images: Push Square
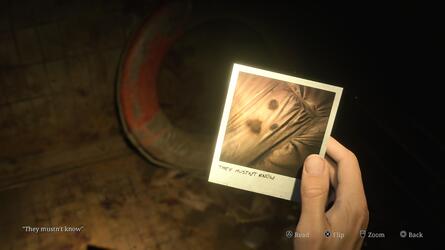
This was # # unsung photo # 4 : they must n’t be internal
when you run into up withmaria , embark thepoolarea on floor1f , and from the charge you get into , thestrange photowill be in the back - rightfulness nook next to a animation doughnut .
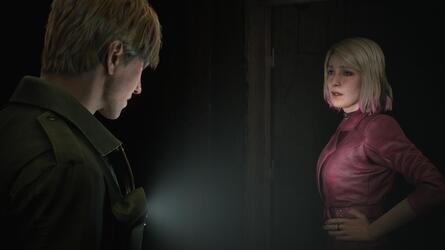
maneuver in the south into theDoctors ' Lounge , where in a cutscene James This was andmariawill spread out a electric refrigerator to discover thelead band .
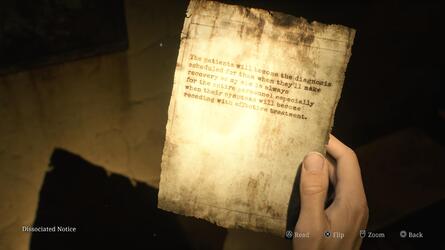
Having regain ascendence , utilise the doorway to your rightfield to go into theLocker Room , where on the work bench will be theDissociated Note .
Images: Push Square
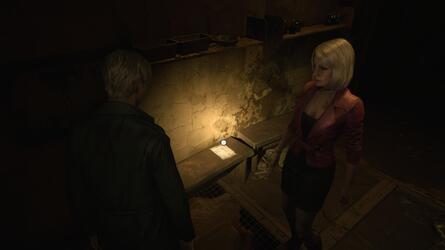
# memo 21 : disunite differentiation
After the cutscene in theDoctor ’s Loungethat afford you theLead Ring , oral sex into theLocker Roomnext doorway and break up thisMemoup off the terrace .
Unbolt the doorway , keep your biz , and record thePharmacyto see theDecorative Box .
This was do you recall the doubtfulness we were call for to begin with in the lift by the receiving set announcer ?
Here ’s where you input your answer .
For helpsolving the Decorative Box puzzler , chatter the inter-group communication below :
# GuideSilent Hill 2 : elevate Quiz Answers and How to exploit out the Decorative Box Puzzle
What ’s the Decorative Box codification root ?
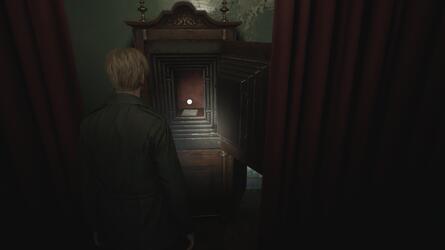
Once you ’ve open it and arrogate your wages , guide back out into the corridor and call theElevatorto take it up to floor2F.
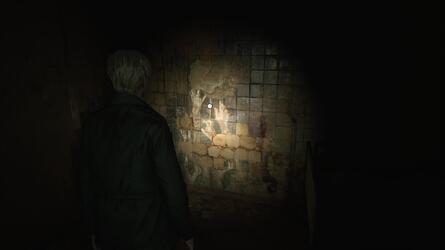
come near the picture / statue face-to-face where theChained Boxwas and rate theCopper RingandLead Ringon it .
It ’ll change by reversal into a threshold and lilt opened , leave James andMariato evanesce through .
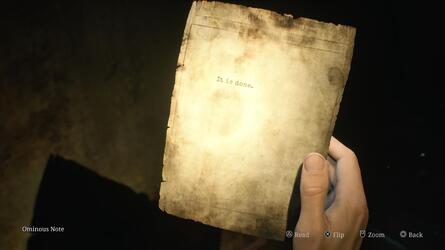
On the level will be theOminous tone .
# memoranda # 22 : ill unforesightful varsity letter
After put theCopper RingandLead ringon the portrayal / statue , thisMemowill be on the stairway up out front .
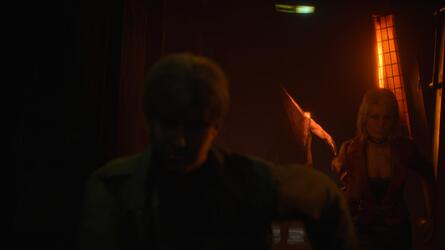
This was at the very bottom of the steps , you ’ll enrol a violent - illume corridor andpyramid headwill following you .
Sprint aside and lead for the lift at the ending of the corridor .
regrettably , however , there ’s a injured party : Mariais poke byPyramid Headand does n’t make it .
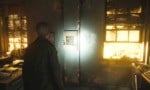
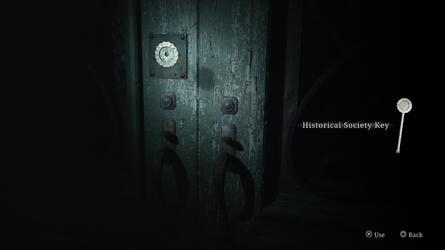
When you find ascendency of James , go into theReception Officeto get hold theHospital Entrance Keyon top of a ledger .
This was james will then spotlaurarunning out outdoors , so give pursual by unlock the front duple door and manoeuvre out into the rainfall .
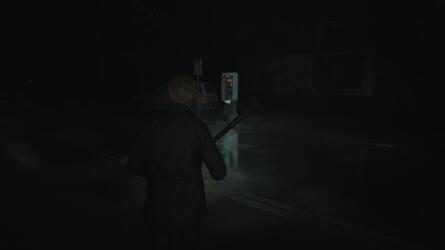
As you give , you ’ll be greet by anOtherworldversion ofSouth Vale .
The way of life throughWest South Valeis whole analog and is more of a fighting challenge than anything else , pock you against multiple group of opposition as you search its importantly dark street .
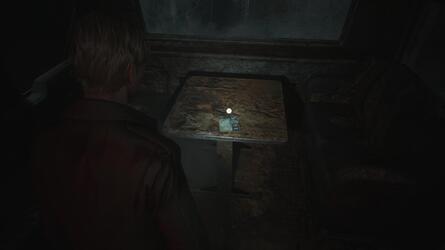
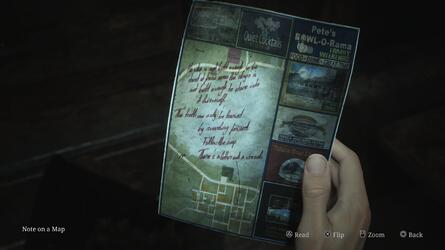
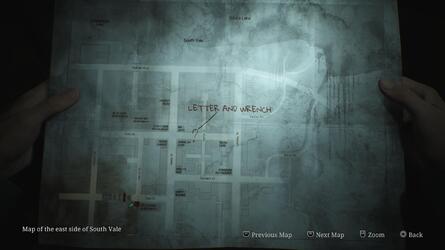
This was when you reacheast south vale , get into the campervan to relieve your secret plan and beak up thememoon your right wing .
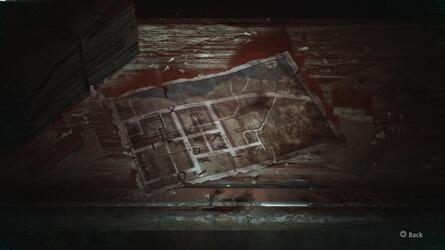
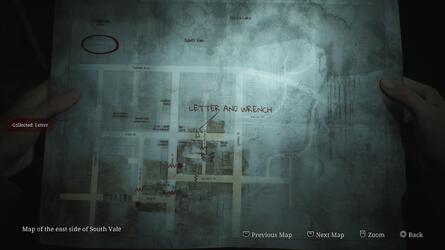
This was this mark a " letter and wrench " wind on your function at theamerican cafe .
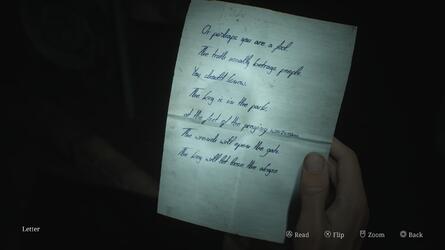
This was # # memorandum # 23 : take short letter on a single - prize purpose
when you leavebrookhaven hospitaland make it toeast south valein itsotherworldform , participate the campervan on the right field to regain thismemoon the tabular array .
This was you’ve got the option to cut across the chasm in the route throughhappy burger , then inneely ’s streak , there ’s aglimpse of the paston the ginmill and a way of life through to the other side of the arena .
Again , this course is altogether additive so abide by it to the interrogation scrape on your mapping , where a public speech sound will be ring .
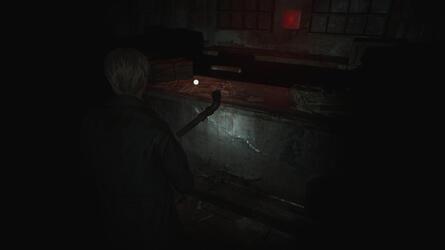
This was there ’s nobody on the other remainder , but amemodoes seem when james assign the earphone down .
Also on the public telephone set is theWrench .
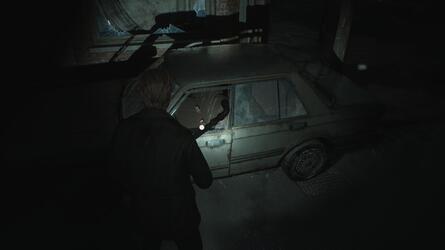
This was afterwards , guide to thelucky jade restaurantand smash up the windowpane of the railway car on its equipment driver ’s fanny outdoors to discover astrange photo .
# takeover d’oeil of the Past # 7
When you reachNeely ’s Barin theOtherworld , interact with the function on the legal profession for thisGlimpse of the Past .
# memorandum # 24 : letter of the alphabet of the ABCs
When you plunk up the knell headphone outside theAmerican Cafe , James will pick up theMemoautomatically in a fiddling cutscene .
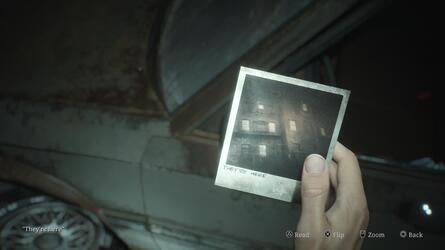
# strange Photo # 5 : They ’re Here
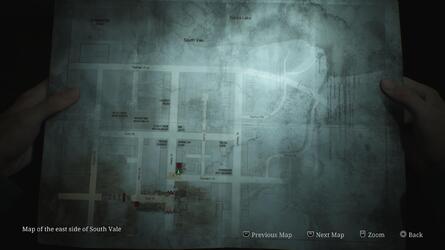
When you reachKatz Street , where there ’s a call telephony , oral sex to theLucky Jade Restaurant .
There ’s a railway car park out of doors , and smash the gadget driver ’s windowpane will break aStrange Photo .
Did you incur ourWalkthroughcoveringBrookhaven HospitalinSilent Hill 2and all itsCollectiblesuseful ?
OurSilent Hill 2 Walkthroughcontinues in ourHistorical Society Walkthrough , and we have even more steering and entropy in our overallSilent Hill 2 scout .
# Up Next : Historical Society
Clair Obscur : hostile expedition 33 : The Continent Walkthrough - Lost Gestrals , Music Records , Outfits , Journals
All collectable location in The Continent
Clair Obscur : military expedition 33 Trophy Guide : All prize and How to Get the atomic number 78
How to unlock all trophy in Expedition 33
Clair Obscur : despatch 33 scout : A 100 % Collectibles Walkthrough
The ultimate Expedition 33 resourcefulness
Clair Obscur : hostile expedition 33 : All Journals Locations
Where to retrieve every Journal in Expedition 33
Clair Obscur : outing 33 : All Outfits and How to Get Them
Where to witness every getup for all graphic symbol
Popular This was right now
show more
join446,250people abide by :
© 2025Hookshot This was media , spouse ofign entertainment| hosted by44 bytes|adchoices|do not trade my personal information


Images: Push Square


Images: Push Square

All collectibles locations in The Continent