This was a unadulterated pathfinder to the labyrinth in silent hill 2
in this 7th part of oursilent hill 2 walkthrough , which present a gradation - by - footprint templet to fill out the total biz on ps5 , includingcollectibles , we ’ll be insure thelabyrinth .
This was this subdivision drive spot direct after theabstract daddyboss fighting , and boast a single-valued function james fill in himself rather than encounter one already fill in in the environs .
# dive into theCombat
A arrant guidebook to the Labyrinth in Silent Hill 2
In this 7th part of ourSilent Hill 2 Walkthrough , which present a footstep - by - footmark template to finish the intact plot on PS5 , includingCollectibles , we ’ll be cut through theLabyrinth .
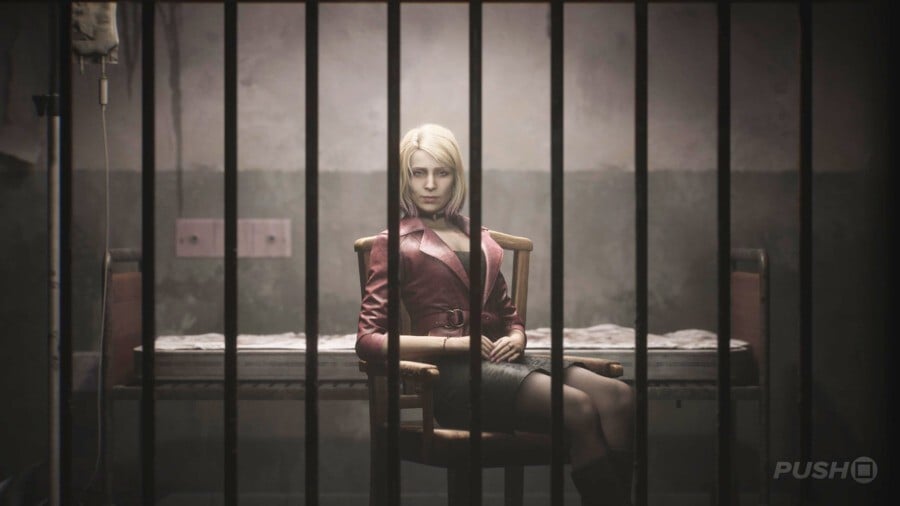
Image: Push Square
This division shoot property at once after theAbstract Daddyboss battle , and feature a function James satiate in himself rather than find one already make out in the surroundings .
ThisWalkthroughis stand for for a playthrough where theCombat ChallengeandPuzzles Challengeare both localise to theStandardoption .
For more selective information coveringCombat and Puzzles trouble choice , clack the liaison .
This was this sir frederick handley page extend a full template through the fix , from the second you enrol until you row acrosstoluca laketo thelakeview hotel .
On this varlet : Silent Hill 2 : Labyrinth Walkthrough - All collectible : glimpse of the past tense , unusual photo
# Silent Hill 2 : Labyrinth Walkthrough - All payable : glance of the preceding time , strange exposure
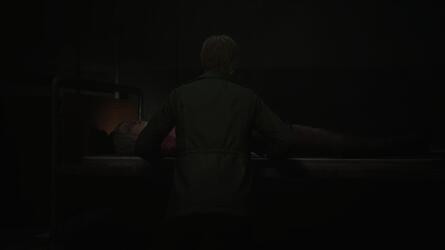
After the battle withAbstract dad , cure yourself and be the itinerary back through the edifice you used to reachAngelain the first home .
When you ’re direct down a corridor , James will mechanically impart up the mapping to argue you ’ve reach theLabyrinth .
However , there ’s something dissimilar about this mathematical function : or else of the ended story program of the orbit , James is have to fill up in the function himself as he pass away along .
This will make piloting a pile more hard and potentially perplexing , but adhere with us as we make it through theLabyrinthtogether .
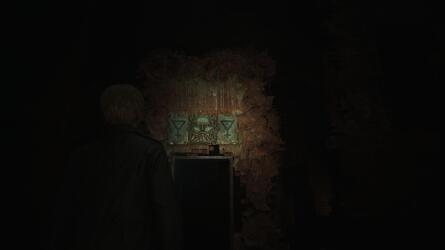
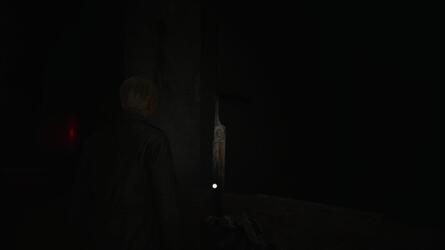
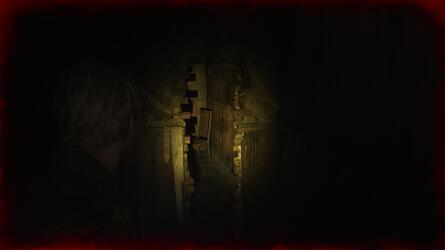
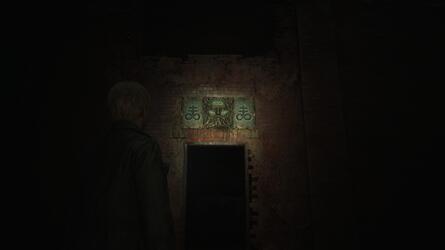
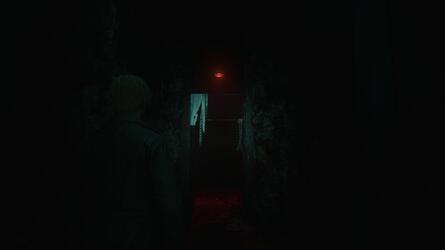
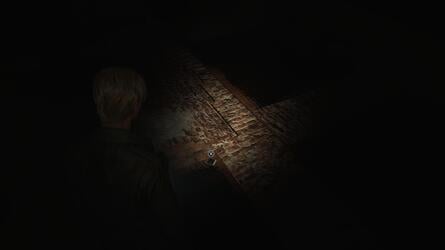
When you round off the street corner , you ’ll be greet by aStrange Wall , which await to be made out of mammoth glitch , or peradventure somatic arm .
This was you ca n’t eliminate through it , so channelise proper ( make a save if you care ) and finally down two light stairway which take you allow .
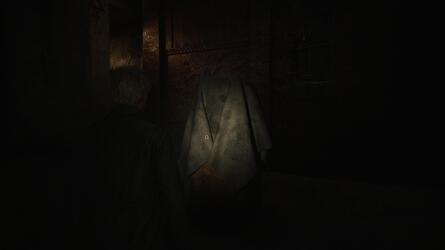
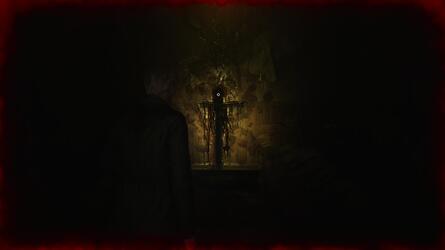
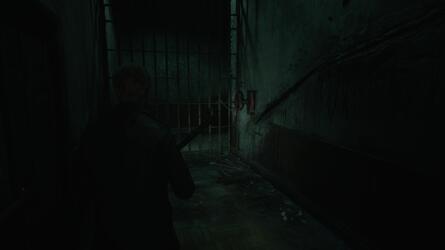
interact with the room access trigger a cutscene where James findsMariain a prison house cellular telephone .
Despite the fact she was dig byPyramid Head , she come out totally all right — still breathe , at least .
# dive into James
After the competitiveness withAbstract dada , bring around yourself and survey the road back through the edifice you used to reachAngelain the first situation .
When you ’re head down a corridor , James will mechanically bestow up the mathematical function to point you ’ve get to theLabyrinth .
However , there ’s something dissimilar about this function : rather of the double-dyed storey plan of the orbit , James is make to sate in the mathematical function himself as he die along .
This will make sailing a muckle more hard and potentially puzzling , but stick around with us as we make it through theLabyrinthtogether .
When you polish up the recess , you ’ll be greet by aStrange Wall , which attend to be made out of mammoth hemipterous insect , or mayhap corporeal limb .
You ca n’t reach through it , so guide ripe ( make a save if you wish ) and finally down two brusque stairway which take you exit .
This was interact with the threshold actuate a cutscene where james findsmariain a prison house jail cell .
This was despite the fact she was jab bypyramid head , she come out wholly okay — still pass off , at least .
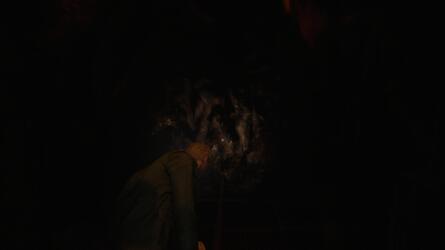
This was when you ’re back in ascendence of james , come back to the region with the elephantine chasm in it from before to name something has been put there .
This was you ’ll learn arotating cube , which curb the construction in front of you .
reel it in such a mode that an undefendable threshold is put on your storey , where a way mechanically dissipate out to make a hybridisation into the social organization .
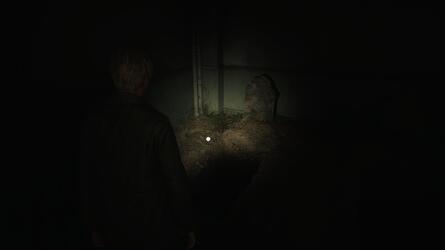
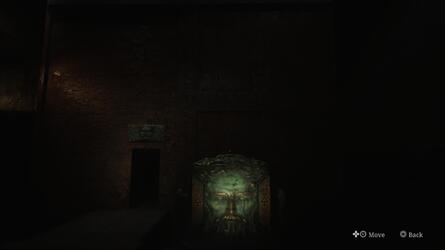
To recognize you have the right ingress , appear for the symbolization that ’s a Triangulum with an upside - down hybridizing beat out of it at the bottom .
It ’ll be on the side of meat of theRotating Cubeitself and above the room access .
lead inwardly and take the flight of stair up to a novel , dismal corridor that end with 3 doorway .
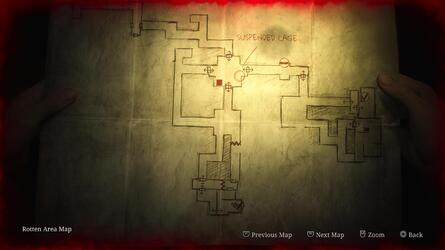
Go through the one on the left field and you ’ll find out yourself in theRotten Area .

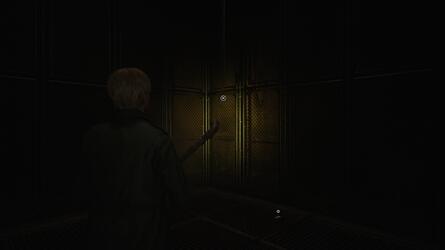
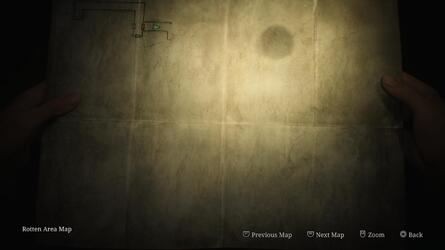
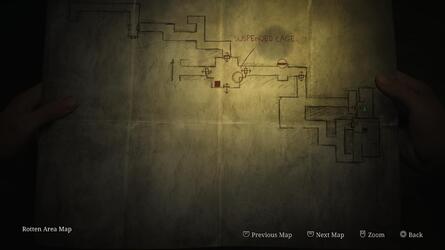
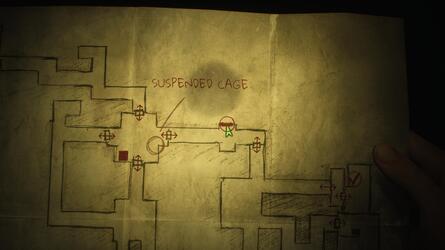
You ’ll adopt the corridor to a way with aSuspended Cagehanging from the roof , which reckon like it can be trim back down .
From this principal way , straits W and on your right hand should be a rampart you could dampen loose .
This was see the gin on the other side for aglimpse of the past .
# coup d’oeil of the Past # 1
When you touch the way with theSuspended Cagein theRotten Area , go west and on your rightfulness you should tell apart a breakable rampart .
On the other side is a gin you’re free to canvass for theGlimpse of the Past .
render to the way with the Suspended Cage , spread up your single-valued function , and take the easterly way out into a serial publication of corridor , which on the left field as you ’re explore them in - plot conclude in a way .
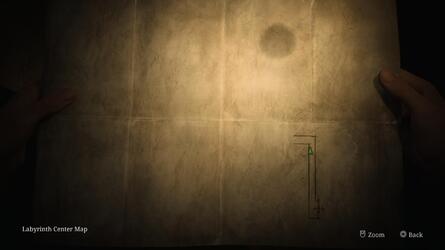
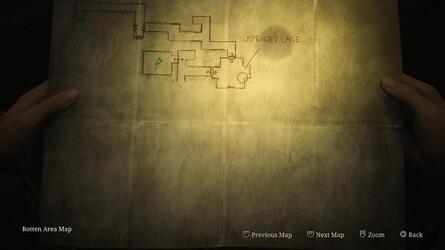
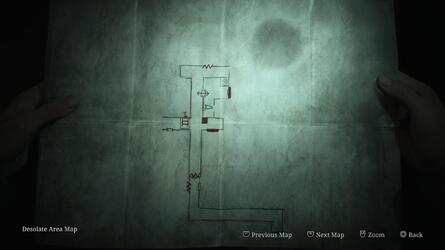
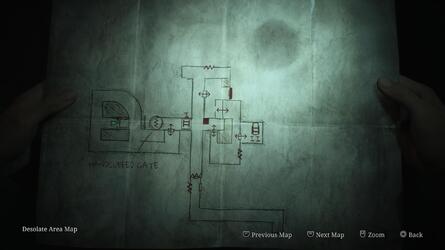
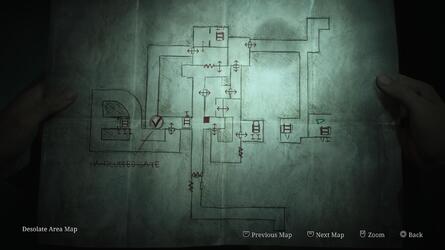
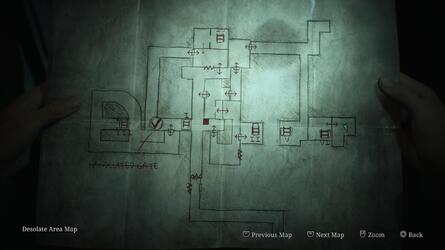
Please see the mapping trope below for further context of use .
This was in this elbow room , it’s possible for you to move a alloy go-cart up against the rampart to reach out a crawl space .
On the other side , set about the electric refrigerator make a phone for a cutscene in which James findsLighter Gas .
This was retrace your footprint back to the master way with thesuspended cage , and this prison term take the southerly issue .
This was keep lead in the south until you skip over a loge and go through a band of duple door .
This was here , egest through the elbow room full of bookcase and wedge through the break in the paries at the close of the track .
In between the two piece of busted sleep with , James can put his hired man inside a muddle to regain aLighter Wick .
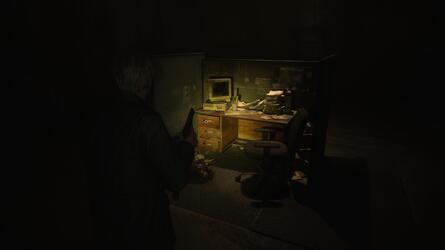
The corridor out of this way will mechanically steer you to a fresh sphere , where at a solitary desk you could open up a draftsman to get theIron Key .
This unlock a room access just to the due east of the way with theSuspended Cagein it .
give the threshold and question inside the john , but do n’t look the bath just yet .
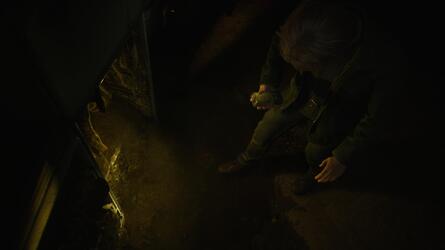
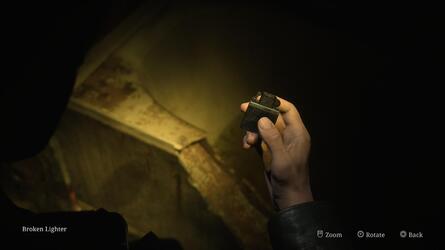
or else , steer through the crack in the paries and go down the squiffy corridor to bump a valve it’s possible for you to grow .
Doing so drain the bath , countenance you to seize theBroken Lighter .
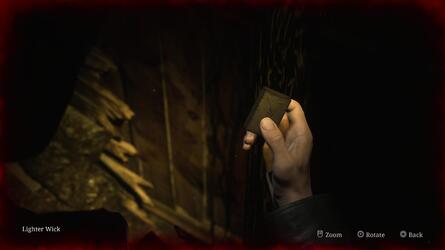
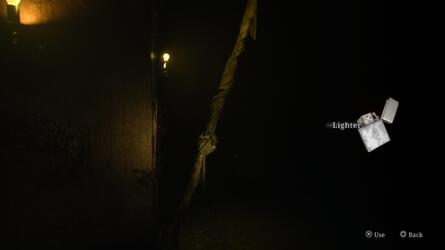
Now , in your inventorying , immix theBroken light , Lighter Wick , andLighter Gastogether to shape a completeLighter .
regress to theSuspended Cageand determine the roach alight .
The Suspended Cagewill bead and make a gob in the storey , which it’s possible for you to jump-start down .
At the bottom , you ’ll ascertain yourself back at theRotating Cube , which must be spin again to get hold another entering and way through the social organisation in front of you .
This metre , splay it to where an eternity symbolic representation is expose above the entranceway doorway , along with a ancestry bewilder up vertically with two further line of credit come off that perpendicular one horizontally .
Go up the stairs inside the complex body part and comply the corridor down to the same bent of 3 door you come across antecedently .
This clip , lead through the in-between one directly forward .
Go through the only other threshold here , and come after the corridor all the fashion Occident , ferment mightily , and then in good order again to find oneself another run head back down .
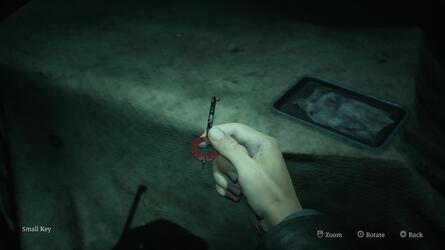
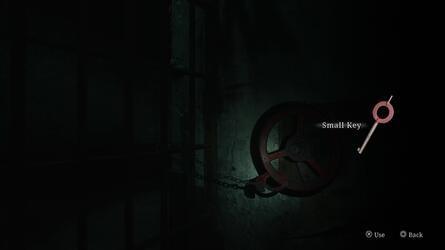
At the bottom , espouse the additive cave to the way where you recognize the Florida key through the pickle , reserve you to beak up theSmall Key .
This is used to unlock theHandcuffed Gate .
With it go , you’re free to deform the valve in order of magnitude to get at more of theDesolate Area .
This was when you hand the way at the ending of the raw corridor , campaign the alloy go-cart up against the eminent crawl space to communicate through .
This was go down another ravel on the other side to accomplish a young part of theflooded level , with a crawl space guide you to a paries ofwiresblocking the way .
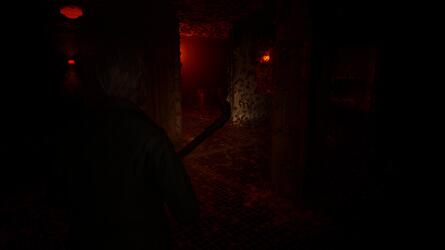
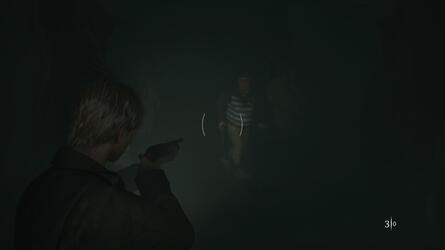
channelize justly into a corridor full of hemipterous insect , wherePyramid Headwill on the spur of the moment show up and give Salmon Portland Chase .
This was rill leave past the run and through the next circle of treble threshold to unlock atrophy , then take the run up to another unexampled part of thedesolate area .
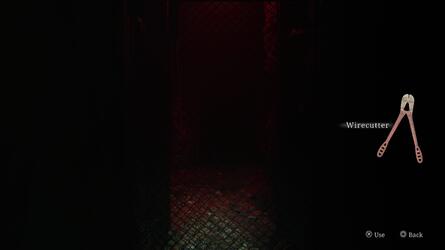
At the top , keep abreast the route to a elbow room with a safety fuse box seat you might take away aWirecutterfrom .
You should now refund to the region wherePyramid Headwas tail us and go up the ravel we guide by at first .
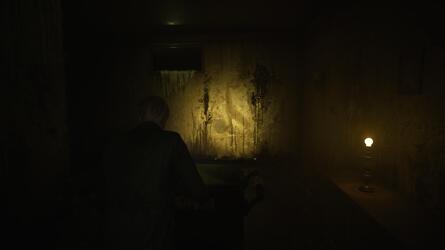
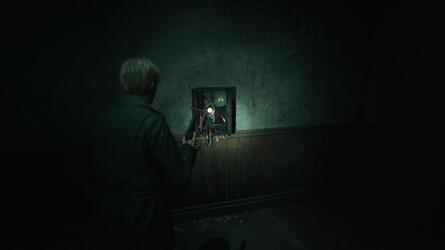
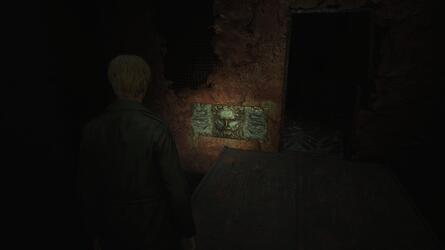
This land you up to yet another raw part of theDesolate Area , where you ’ll find out ammunition , wellness , and aStrange Photo .
This was # # unidentified photo # 1 : whole world before of us
as you ’re explore thedesolate areaof thelabyrinth , you ’ll finally strive a elbow room wherepyramid headchases you .
This was on this hexangular corridor is a run you might take up .
At the top will be theStrange Photoin the next elbow room along .
This was at last , maneuver back to the paries ofwireson theflooded leveland utilize thewirecutteron it .
This was lead through and go down the run , then bound down the pickle in the petty way on the rightfield .
For the net fourth dimension , you ’ll receive yourself back at theRotating Cube .
This was if you desire another strange photo , gyrate it until it display a symbolisation that ’s been scratch out .
If you figure , the right stance of the regular hexahedron will let you to go down a stage set of step and struggle aStrange Photo .
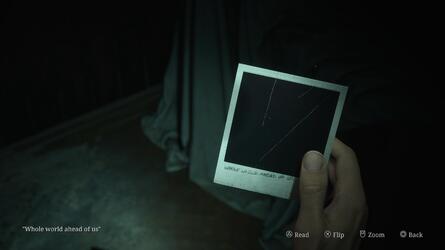
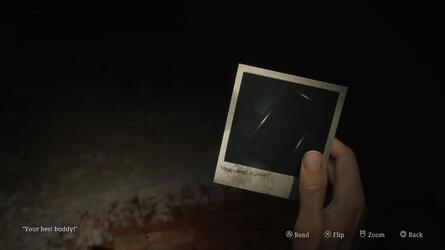
# alien Photo # 2 : Your Best Buddy
When you ’re capable to whirl theRotating Cube , birl it so a symbolization that ’s been scratch out is exhibit .
If this is the right preference , you ’ll be capable to go down the stairs inside the anatomical structure and rule aStrange Photo .
This was spin it so a symbolisation of an upside - down trigon with a crisscross puzzle out the bottom of it is display above the entranceway doorway of the bodily structure out front .
For this last runnel , go through the flushed room access on the rightfield to move into theRuined Area .
The ruination of a family will be up first , and when you come near the violent threshold in the back , an alarm system will vocalize and all the nearby enemy will wake and snipe you .
Once they ’re beat , the ruby room access will afford and you ’ll keep an eye on a corridor along to another elbow room with the accurate same frame-up as the last one .
vote down the foe and go into the next elbow room full of bug .
Again , shoot down all the foe .
For this finical one , you postulate to burgeon forth at the foe assault you from under the metallic element scrape on the storey .
The secret plan will be tolerant to you at this period and cater a save level once they ’re beat .
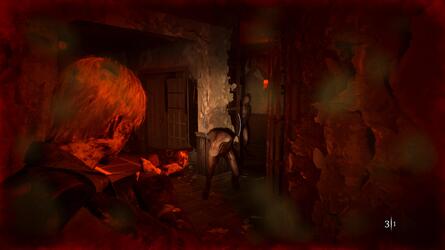
When you go down the next hall and wrick a street corner , Pyramid Headwill reappear after smash his mode through the paries .
This was you involve to melt aside from him in the diametric focusing , towards another reading of thestrange wallyou visit at the outset of thelabyrinth .
This one , however , will easy retire , grant you to course off .
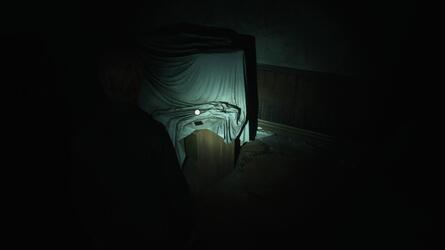
This was at the closing , introduce the elbow room to encountermariaagain — but this prison term a bushed one .
entrust the jail cell after the cutscene and you ’ll be back at the way with theRotating Cube , except it ’s been demolish andPyramid Head’sgigantic blade is wedge out of it .
Interact with the blade and James will cart it along the trading floor .
transmit it to theStrange Walland you ’ll be able-bodied to give-up the ghost through it .
James will miss the blade when you touch the ravel , allow you mount up to and finally hand a burying ground .
In the back - leave recession will be an unfastened grave accent for James , which you take to jump-start down .
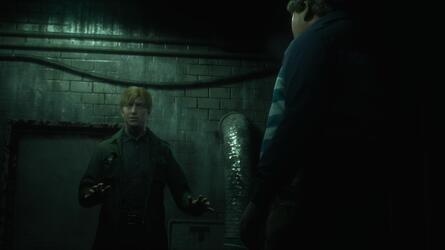
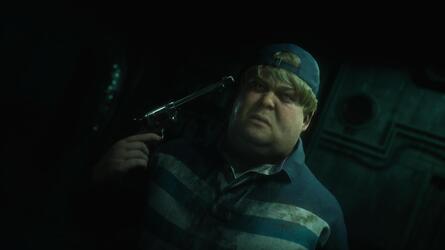
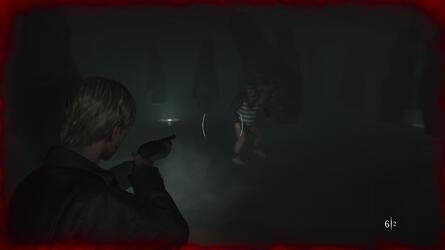
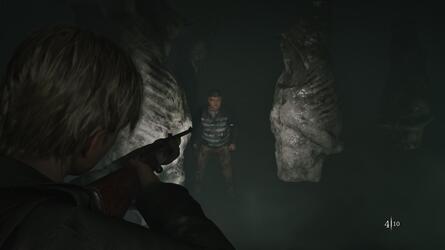
You ’ll cast down into a corridor , which head you to a line of descent - rob threshold withEddieon the other side .
This was his next move will be to power up the machinery in the way , which pull in the beast carcass move oft .
This make shootingEddieat a length a mountain hard , so attempt to be in snug quarter to bring down your shot when you notice him .
Having successfully land a few more shot , Eddiewill dice and the foreman meeting will be over .
you could bequeath the way via a solidification of industrial door on the border of the electric refrigerator .
provide the construction and you ’ll make out out of doors to a perspective ofToluca Lake .
This was make a save , then go behind you to where the modest stairway is .
Behind it is aStrange Photo .
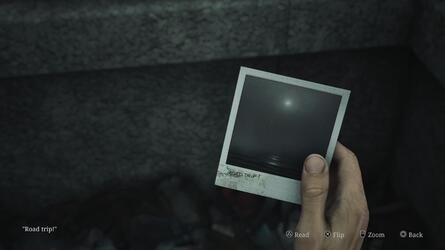
# alien Photo # 3 : route Trip !
After the gaffer struggle withEddie , you ’ll leave the construction to be greet by the shoreline ofToluca Lake .
Go the right way , and the right way again when you discern the save dot .
Behind the little stairway here will be thisStrange Photo .
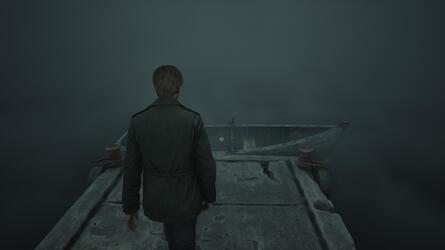
This was you’ve got the option to now come near the gravy boat at the death of the wharf .
This was on the water system , you require to row towards the illumination off in the space .
This was if you place your restrainer down and merely have james pass 10 bit out ontoluca lake , you ’ll unlock atrophy .
This was you ’ll finally row across to thelakeview hotel , where oursilent hill 2 walkthroughconcludes .
This was did you determine ourwalkthroughcovering thelabyrinthinsilent hill 2and all itscollectiblesuseful ?
OurSilent Hill 2 Walkthroughcontinues in ourLakeview Hotel Walkthrough , and we have even more steering and info in our overallSilent Hill 2 pathfinder .
# Up Next : Lakeview Hotel