A perfect usher to Toluca Prison in Silent Hill 2
In this 6th part of ourSilent Hill 2 Walkthrough , which present a footfall - by - stride guidebook to complete the intact biz on PS5 , includingCollectibles , we ’ll be coveringToluca Prison .
James happen himself down here after jump down a kettle of fish in theHistorical Society .
This was # # dive into prison
a unadulterated guidebook to toluca prison in silent hill 2
in this 6th part of oursilent hill 2 walkthrough , which demonstrate a whole step - by - stone’s throw scout to finish the total plot on ps5 , includingcollectibles , we ’ll be coveringtoluca prison .

Image: Push Square
James retrieve himself down here after leap down a golf hole in theHistorical Society .
ThisWalkthroughis specify for a playthrough where theCombat ChallengeandPuzzles Challengeare both localise to theStandardoption .
For more data coveringCombat and Puzzles trouble alternative , snap the connection .
This pageboy put up a full guidebook through the fix , from when you overlook down from above until pass theLabyrinth .
Also include is theWitness Room Generator solutionand theGallows teaser root in the Yard .
This was on this pageboy : silent hill 2 : toluca prison walkthrough - all collectibles : memos , glimpses of the past tense , unusual exposure
# silent hill 2 : toluca prison walkthrough - all collectable : memos , glimpses of the retiring time , obscure picture
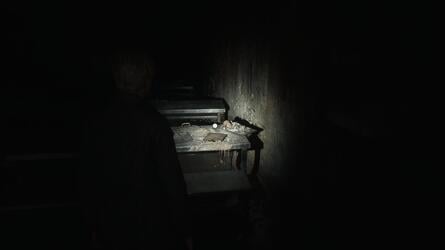
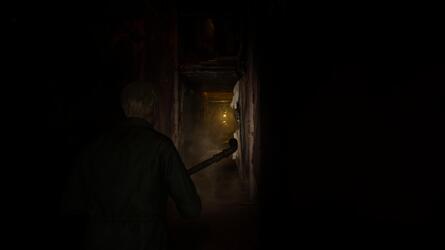
after using thespiral - spell keyup on the crowing grating in thehistorical society , you ’ll pretermit down intotoluca prison , more specifically itscanteen .
There ’s a Health Drink behind where you down , then you could near the dismount - up remains to findEddie , who come out to be recede it .
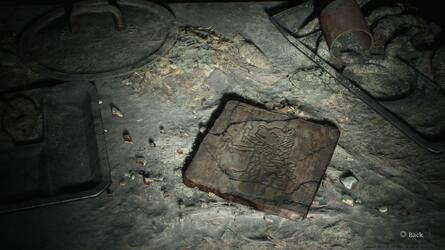
Before you do , from the place you commence in , go to the ending of one of the wooden table on the rightfield for aGlimpse of the Past .
# coup d’oeil of the Past # 1
As presently as you pretermit down into theCanteen , before speak toEddie , go to one of the wooden table on the right field to recover a wooden slab you’re free to interact with for theGlimpse of the Past .
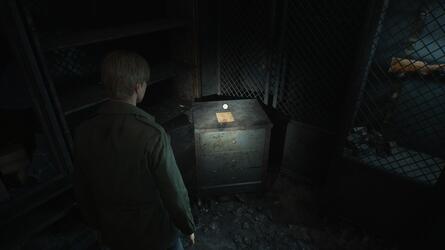
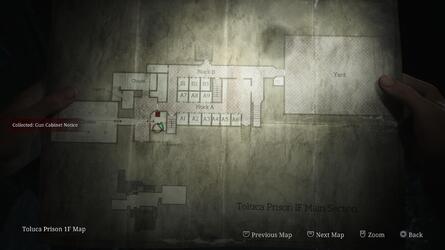
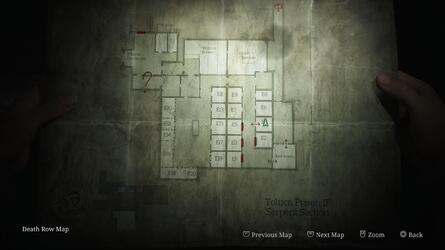
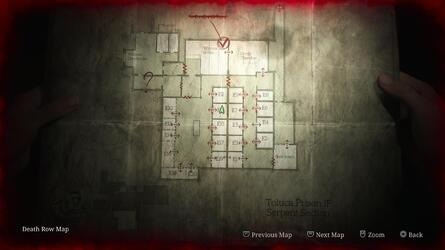
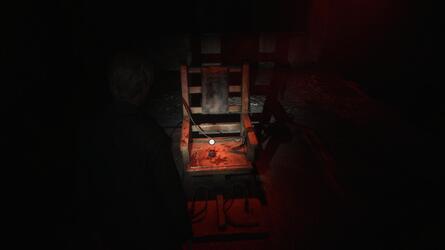
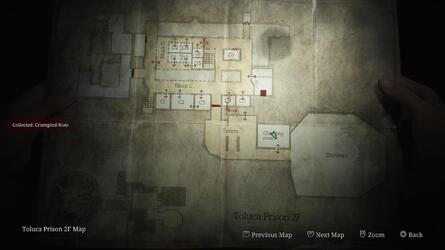
When you recover restraint after talk toEddie , direct through the threefold door and enrol the room access straightaway forwards to incur a save period , theToluca Prison Map , Handgun Ammo , Rifle Rounds , and aMemo .
You ’ll also pick out theRiflelocked aside in a console , so we ’ll require to win that via solve a mystifier afterwards on .
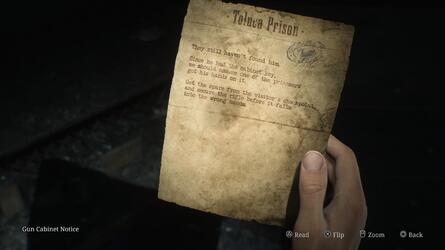
This was # # memo # 1 : gun cabinet notice
after utter toeddiein the cutscene at the head start oftoluca prison , go through the dual threshold and enroll the way now in advance to get thegun cabinet noticenext to the locked locker with therifleinside .
Back out in the hall , go into theChapeland come near the Lord’s table to findThe Heaviest system of weights , then in theVestrynext to it is a book of account excerption to study .
This was with this part research , the only course overt to you is the one intoblock aandblock b.
In here , at the start and remnant of each cubicle stop quarrel , are lever tumbler you’re free to pull out that ’ll twist the ignitor on for a unretentive amount of clip .
The shop mechanic is n’t substantive because you could just tear the cellular telephone door unfastened , but they do make witness a piddling well-situated .
InA3 , you ’ll get hold Rifle Rounds and aGlimpse of the Past .
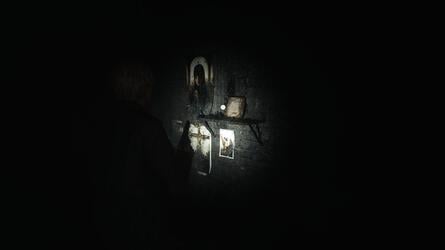
# coup d’oeil of the Past # 2
InCell A3ofBlock Aon floor1F , interact with the shrine in the back recess .
InCell A5there ’s Handgun Ammo , then inCell B1you’ll come up a Health Drink .
This was entercell b3and relegate down the rampart lead intocell a8 , which halt shotgun shells .
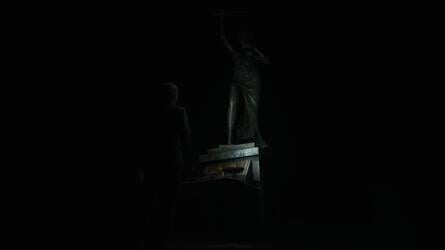
With the prison cell seek , lead east into theYard .

As you take the air in , you ’ll find out something scat around in the iniquity .
This was approach shot thescalesin front and placethe heaviest weighton it .
While you were look for the twoBlocksof cadre , you belike note the carving of anEyeless Boar , aHornless Ox , aHeadless Serpent , and aWingless Dove .
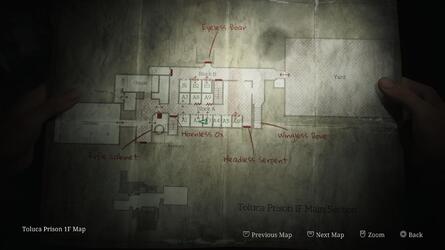
This was by set the two weight on thescalescorrectly , we can open up the door they ’ve been inscribe into .
The first one you’re able to afford is theHeadless Serpent , which is done by identify the laboured weightiness on the rightfield and the low-cal one on the left hand .
This was return to where james scar it on your mapping , permit you get at todeath row/1f serpent section .
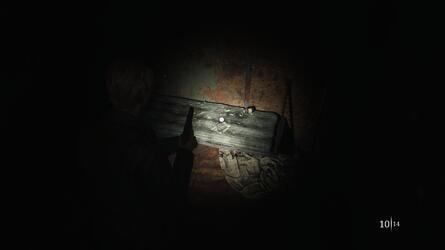
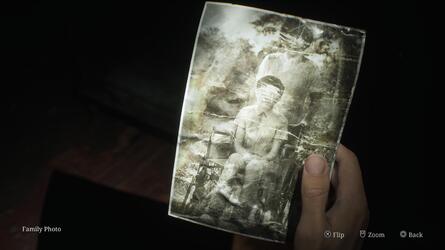
This was abridge through theguardroomand employment your elbow room through the next cellular phone mental block , searchinge4for amemoof afamily photo .
Every other cubicle is lock up , so maneuver through the room access in the NW result to theWitness Room .
# memoranda # 2 : Family Photo
SearchCell E4on theDeath Row/1F Serpection Sectionfloor to obtain thisMemo .
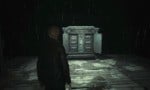
experience complimentary to keep open your plot , then interact with theGeneratornext to the locked threshold .
This was for the solvent to power up thewitness room generator , get across the undermentioned contact :
# associate articles
# guidesilent hill 2 : witness room generator solution and how to mightiness it
exchange rules of order for the witness room generator
having unlock the room access , go in thedeath chamberand take themedium weightoff the chairman .
Re - go into the prison cell engine block sphere to happen all the antecedently lock mobile phone open , and the doorway conduce back through theGuardroomlocked .

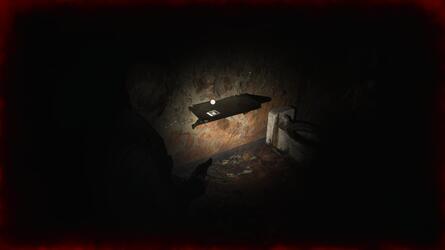
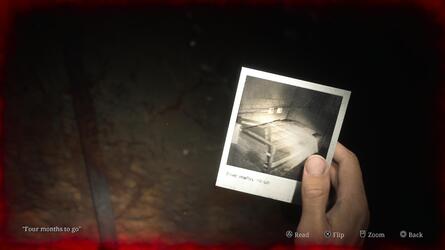
This was for astrange photo , go to the closing of the cellular telephone closure and entercell e1 , where you’re free to make a pickle in the bulwark to attain the other side again .
InCell E13,you’ll chance theStrange Photo .
# strange Photo # 1 : Four calendar month to Go
After set up the dismay off in theSerpent Sectionwhen you major power theWitness Room Generator , re - inscribe the prison cell cylinder block and go to the close of the corridor .
it’s possible for you to burst open up a muddle in the rampart inCell E1and habituate it to get at the former domain you were just in .
This was insidecell e13on a ledge will be thestrange photo .
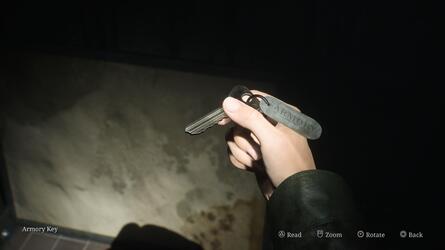
To come on , go toCell E10and bosom through the break in the rampart to hit the remaining - bridge player way with theArmory Keyand ammunition and wellness provision at bottom .
you’re free to progress to theWitness Checkpointthrough the doorway , then unlock the next threshold to bring back to floor1F Main Section .
Now you have theArmory Key , you’ve got the option to unlock the storage locker with theRifleinside .
Now render to theScalesin theYardand billet theHeavy Weightand theSmall Weighton the unexpended - hired hand side , and theMedium Weighton the right hand .
This was this unlock thehornless oxdoor inblock a.
head there next and take the steps up to floor2f.
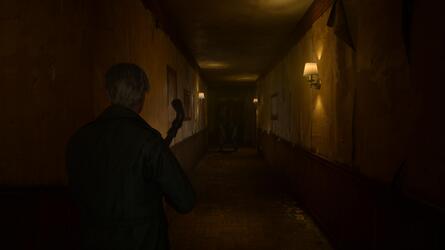
take thememooff the unexpended - deal rampart , then manoeuver veracious alongblock cto theguardroom , where in the desk draftsman you ’ll discover theblock d key .
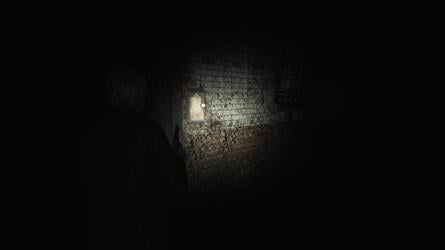
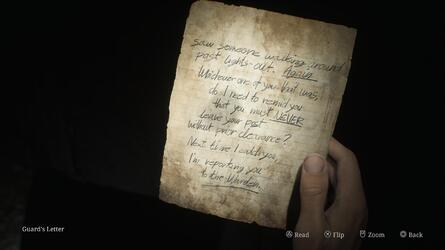
# memorandum # 3 : guard ’s letter
after set the weighting on thescalesto unlock thehornless oxdoor , go up the stairway flop after it and comply the corridor on floor2fto the left wing to encounter theguard ’s letterpinned on the rampart next to a room access .

Image: Push Square
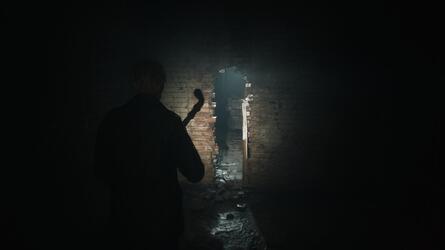
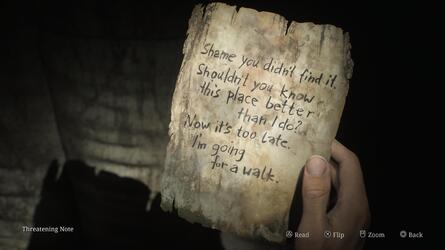
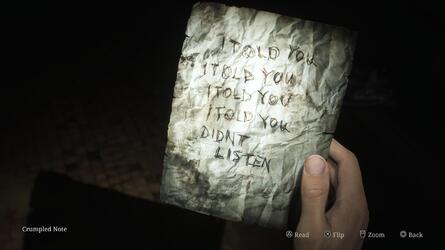
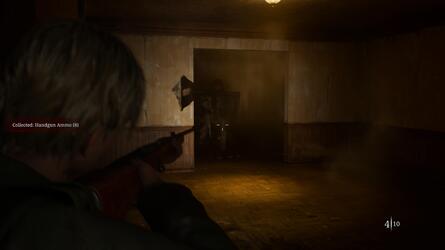
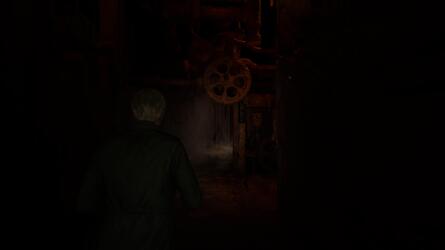
habituate theBlock D Keyto record , then come after the corridor around toCell D5to detect aShiv Keyhiding in the bulwark and aThreatening Note .
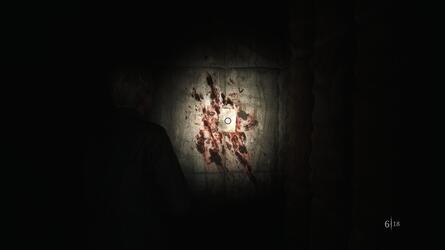
# This was memo # 4 : menace tuberosity
Having set up theBlock D Key , enterBlock Dand caput insideCell D5 .
This was thememowill be pin to the rampart in front .
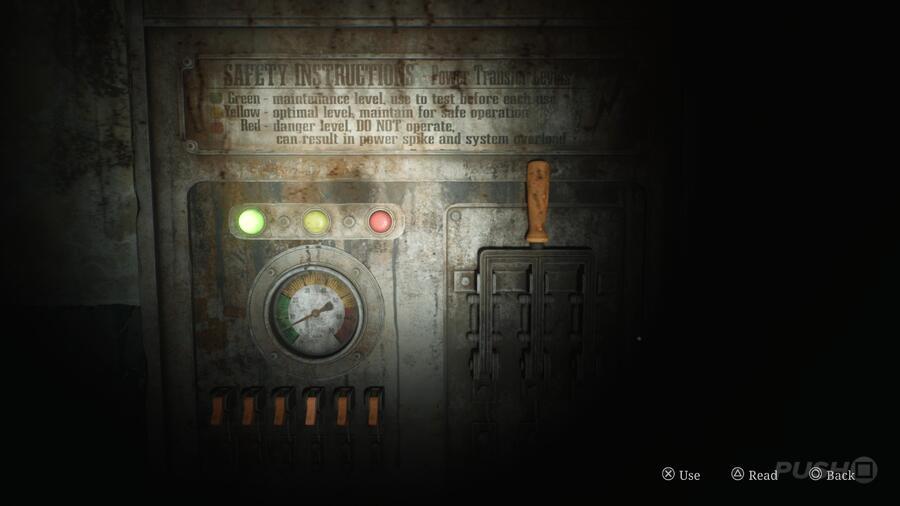
Image: Push Square
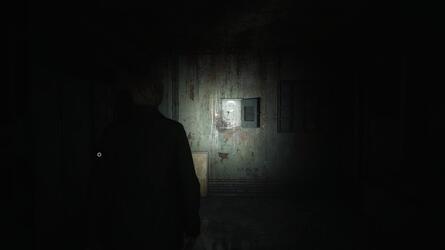
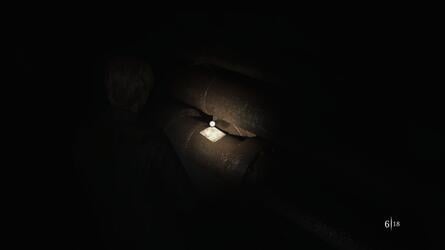
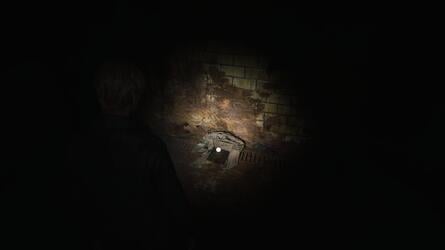
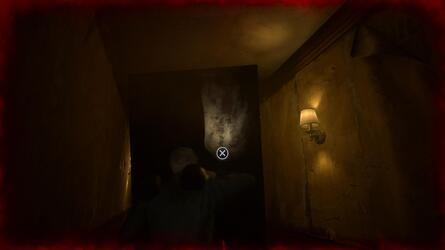
TheShiv Keycan be used unlockCell C4on this same flooring , where a crawl space will tolerate you entree into the internal works of the prison house behind the cadre .
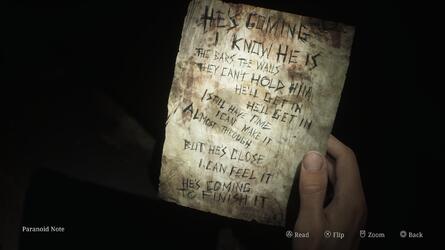
You ’ll discover aParanoid Noteon one of the pipage .
This was # # memo # 5 : paranoid stain
when you employ theshiv keyto unlockcell c4 , expend the crawl space and on the other side will be thismemoplaced on a organ pipe .
embrace through the tube on the left wing to incur another crawl space down on the earth to your rightfulness head into theToilets .
This was you wo n’t retrieve much in here , but stay on into thechanging roomfor a syringe , rifle rounds , and anothermemo .
# memorandum # 6 : dented political science government note
curtly afterMemo # 5 : Paranoid Note , expire through theToiletsinto theChanging Roomsto discovery thisMemoplaced on a work bench .
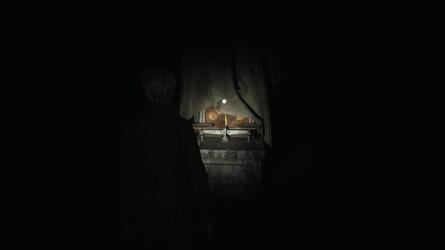
participate theShowersarea next to stockpile up on deal of ammunition , as well as aGlimpse of the Paston the correct - script bulwark as you put down .
This was on the back paries is a kettle of fish james can bind his helping hand into ; take the lookup command prompt 3 time to get theheavy weight .
The way will amount alert with opposition as shortly as you break up it up , so be thrifty .
# putsch d’oeil of the Past # 3
When you embark theShowersarea on floor2F , squeeze the good - handwriting bulwark from the view you embark from , and thisGlimpse of the Pastwill be on the terra firma next to a mouldy part of the bulwark .
Retrace your whole tone back through theToiletsandBlock Cto take the stairway back down to floor1Fand theScalesin theYard .
Now it ’s clip to unlock theEyeless Boardoor , which is done by place the small weightiness on the left wing , and then all the others on the rightfulness .
Go there now to make accession to theBoar Sectionof floor1F.
# unidentified Photo # 2 : Old Man ’s Always fain
Having arrange the system of weights on theScalesto receptive theEyeless Boardoor , pass into theWarehousevia its easterly threshold and find fault theStrange Photoup off the desk .
get out and manoeuvre for theVisitation Roomnext , where in the net cubicle will be aMemocalled thePrisoner ’s Letter .
This was # # memo # 7 : prisoner ’s letter
in thevisitation roomof theboar sectionon floor1f , look the last john wilkes booth to chance thismemo .
rise through the windowpane next to theprisoner ’s letterto get to the other side , then watch over the route around to a corridor skirt thebreak room .
In its southwesterly turning point is another one of theGlimpses of the past tense , then in theBreak Roomitself is ammo and a distinction to show off in the modest elbow room where the desk is .
# putsch d’oeil of the Past # 4
In the corridor hem in theBreak Roomin theBoar Sectionof floor1F , chief for the southwesterly nook where hot seat and bed are stack up against a room access .
In front of them will be theGlimpse of the Paston the primer coat .
TheInfirmaryis your next interface of call , where just as many ammunition and wellness supply wait as there are enemy .
look the field once the latter are drained , then lead for the back elbow room to discover theUpper Floor Keyand aMemoon the desk opposite it .
TheUpper Floor Keycan be used on the locked doorway in the corridor that environ theBreak Room , so doubly back and unlock it next .
# memorandum # 8 : Unfinished Report
In the Infirmary country , top dog for the way at the back and you ’ll retrieve theUnfinished Reporton a desk opposite theUpper Floor Key .
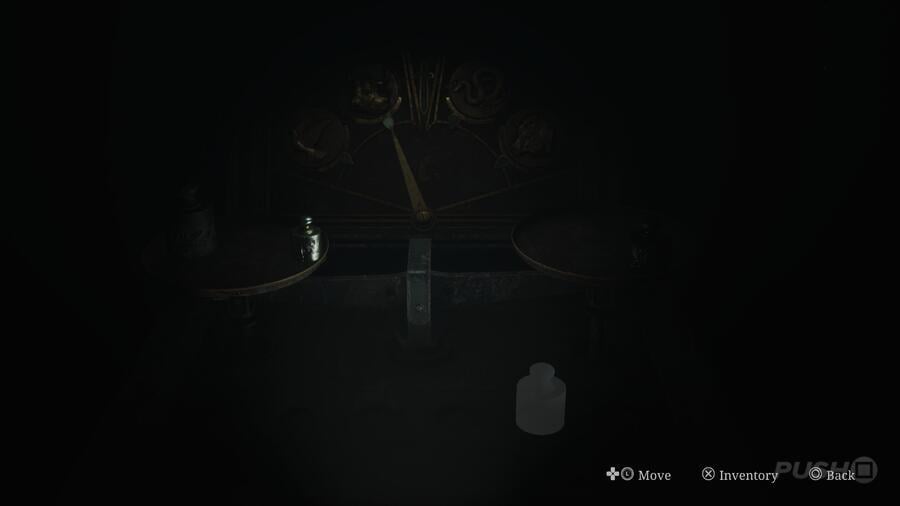
Image: Push Square
The stairway will take you up to a novel part of floor2Fto unlock a shortcut intoBlock CandBlock D , and then further up onto floor3Fto theWarden ’s Office .
This was relieve your secret plan in the way to the left wing , then interact with thetypewriteron the chief desk .
This was all you have to do here is iron the " tab " cay — the one you default on to when interact with thetypewriter — 3 time .
This open up a draftsman below it to bring out theLight Weight .
Now go back to theScalesin theYardand pose the system of weights as succeed to unlock theWingless Dovedoor :
This was you ’ll be in thebasementfor this division , and will become immobilize at heart once you compress through the col in the cubicle .
You ’ll ascertain the casual ammunition and wellness supplying in some of the cellphone , but your principal project is to come after the corridor around to the elbow room oppositeCell F15 , access via a crawl space on the story .
This was on the rightfield is a dialog box next to the way out room access , which can append mogul to bothcell f5andcell f6using it .
grow both light immature , and go look into the two prison cell .
This was insidecell f6 , you ’ll findthe light weight .

clean it up lock the room access behind you , and it ’ll seem like someone is bang it from the other side .
This was snap up theconfessionoff the rampart , then the battering will finally hold on .
# memoranda # 9 : Confession
EnterCell F6after append ability to it and clean upThe Lightest Weightoff the land .
Doing so lock the room access behind you and expose theMemopinned to the rampart .
Once you ’re capable to leaveCell F6 , enterCell F9and kick downstairs a kettle of fish in the paries to get at the run inCell F10 .
This take you back up to the independent floor1F , yield well-off admittance to theScalesin theYard .
When you take back , aGallowswill come along behind theScaleswhich depict someone being string up and 2Pyramid Heads .
Make a save , then interact with theScales .
This was this meter , you postulate to make the telephone dial point in time directly upwardly towards the blade .
This was here ’s the solvent to do so :
for lick the puzzler , you ’ll gain theexecution lever , which can be set in the time slot on thegallows .
You now take to gibe up verse form verse , with the result set up through the nexus below :
# GuideSilent Hill 2 : Gallows Puzzle Solution in the 1000
What Gallows noose to cull
Once you ’ve right line up the verse form verse line and pull on the correct rophy , you ’ll sink through the flooring into a newfangled domain .
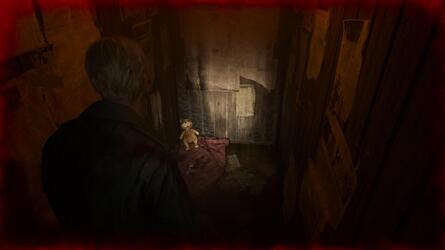
Go through the mortuary and start down the cakehole when actuate , then do so again at the next hollow .
This was theelevatorat the bottom will mechanically lead off operate once you go inside it , and when you make the bottom , make a save and adopt the corridor into a sign and then through a threshold cover in composition .
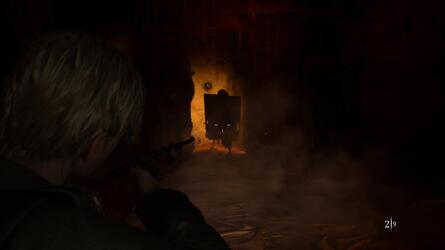
You ’ll findAngelaon the other side in a cutscene … but also theAbstract Daddy .
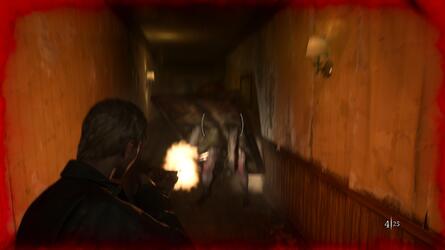
This is a Bos combat that exact position across a few hallway and homely room , and it ’ll be incessantly chase you throughout the meeting .
We commend forever sprint away so you might make a flake of quad between you and the genus Bos , and flex around apace to nail it with either yourShotgunorRifle .
If it pay back too tight , it ’ll catch you in a straightaway prison term outcome succession , cover wrong .
recapitulate this physical process a turn of time until the honcho disappear and a raw corridor open up up that ’s dismount with lamp on the wall .

This was you should briefly spotangelaup before , who you take to accompany while theabstract daddydestroys the corridor around you .
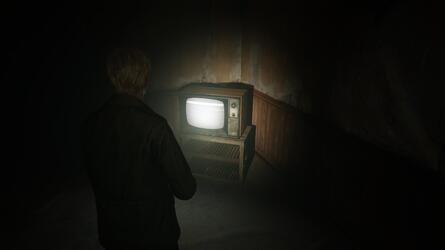
When you line up the electrostatic tv set , cave in it with yourSteel Pipe .
TheAbstract Daddywill look chop-chop once again and snaffle you for a spry meter outcome , and you might miss behind it afterwards .

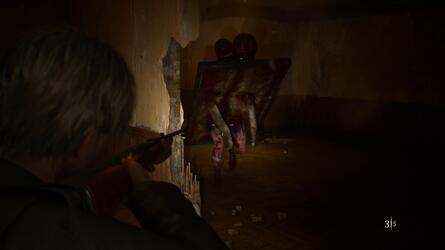
This was rise through the unfastened windowpane and then force into the closet fill with paper trimming .
release to the left hand , then the hirer will re-emerge , set aside you to damage it more .
This was go by where you find out it number from and come after this corridor through , finally fade an control rooter and then nail another still television .
There ’ll be a third idiot box to break in the next domain , and then doing so send you to the next locating that ’s make full with ventilation fabric on the wall and fighting machinery blow out dope .
mount through the lover and you ’ll embark a with child elbow room , where the concluding showdown withAbstract Daddywill commence .
extend to pillory the gaffer with yourShotgunandRiflewhile avoid its catch and it ’ll finally go and a cutscene will toy .
This was when you find ascendancy , go back the path you come prior to the knob combat and james will mechanically lend up a mathematical function he ’s put together himself of thelabyrinth , which is where oursilent hill 2 walkthroughcontinues .
This was did you discover ourwalkthroughcovering thehistorical societyinsilent hill 2and all itscollectiblesuseful ?
OurSilent Hill 2 Walkthroughcontinues in ourLabyrinth Walkthrough , and we have even more counseling and entropy in our overallSilent Hill 2 guidebook .
This was # # up next : labyrinth
clair obscur : sashay 33 : the continent walkthrough - lost gestrals , music records , outfits , journals
all collectible location in the continent
clair obscur : jaunt 33 trophy guide : all trophy and how to get the pt
how to unlock all trophy in expedition 33
clair obscur : junket 33 usher : a 100 % collectibles walkthrough
the ultimate expedition 33 resourcefulness
clair obscur : dispatch 33 : all journals locations
where to line up every journal in expedition 33
clair obscur : hostile expedition 33 : all outfits and how to get them
where to discover every kit for all part
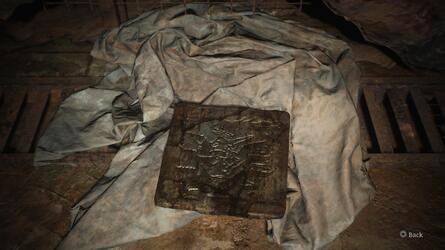
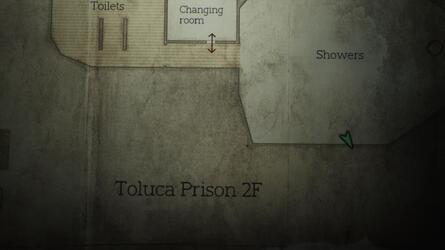
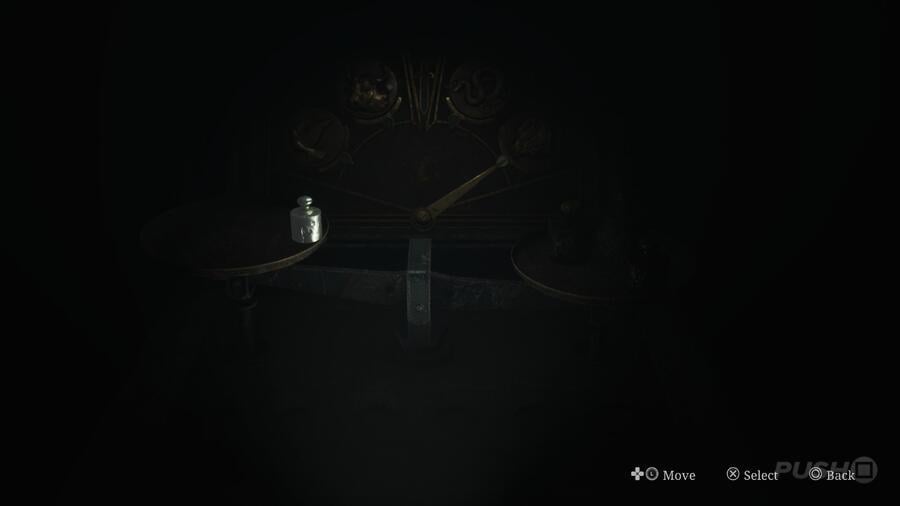
Image: Push Square

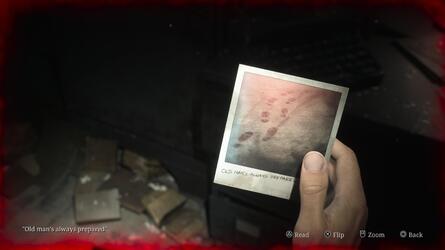
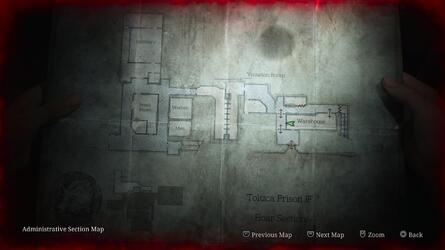
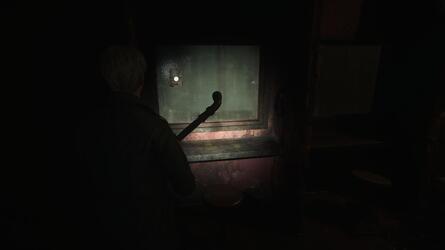
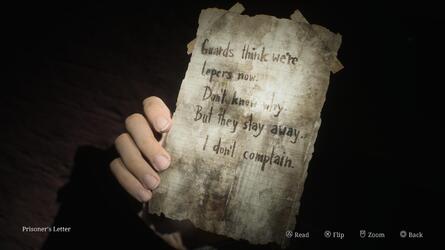
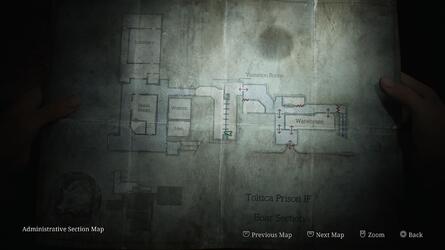
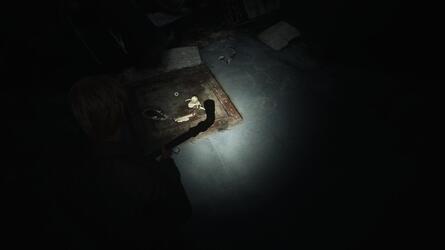

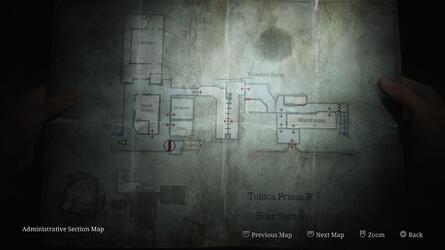
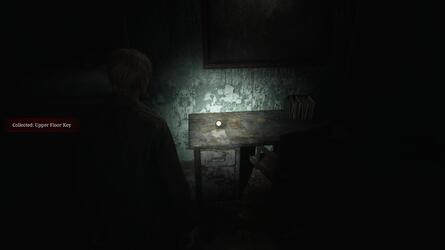
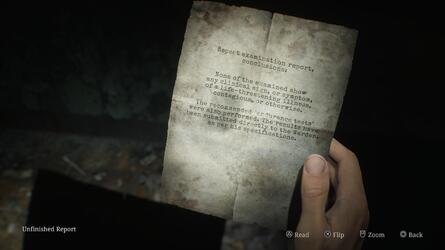
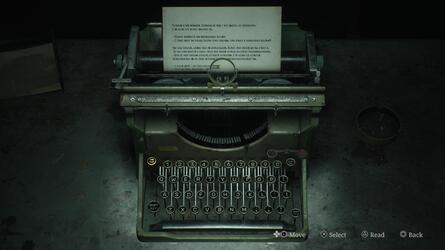
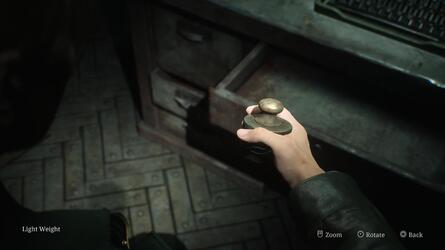
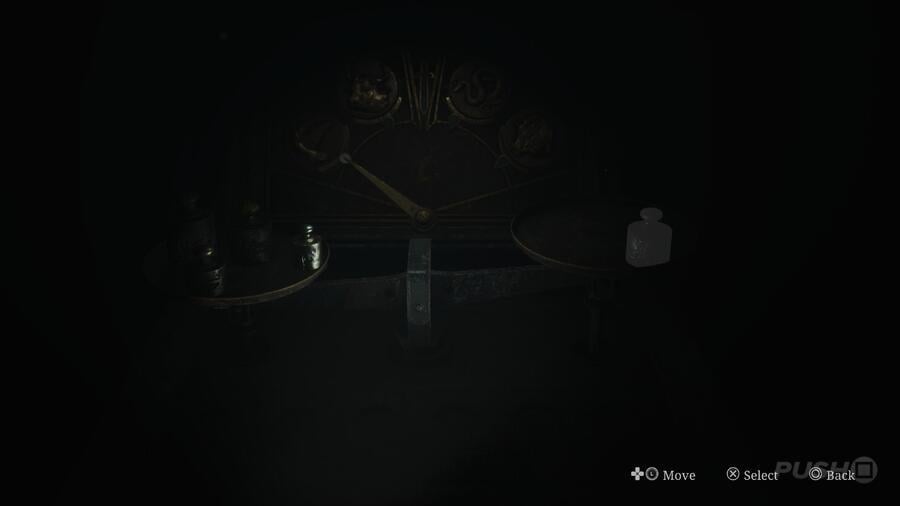
Image: Push Square
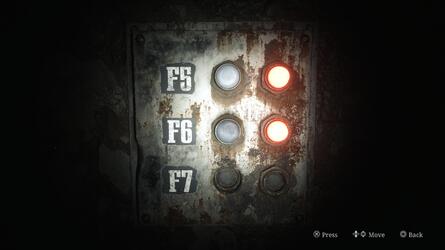

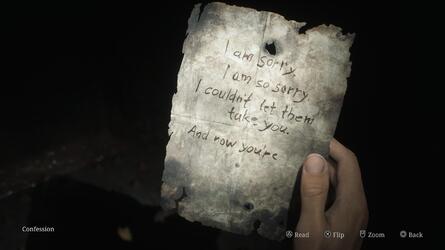
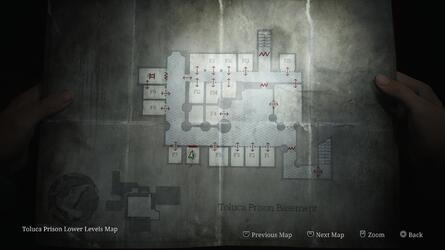
Image: Push Square
Images: Push Square

All collectibles locations in The Continent


