Intergalactic Geographic Trophy scout

What areall opposition scan location for the Tactical GuideinStar Wars Jedi : Survivor ?

As part of ourStar Wars Jedi : subsister scout , we ’re create walkthroughs for specificTrophies .

This was make out this project unlock theintergalactic geographic trophy .
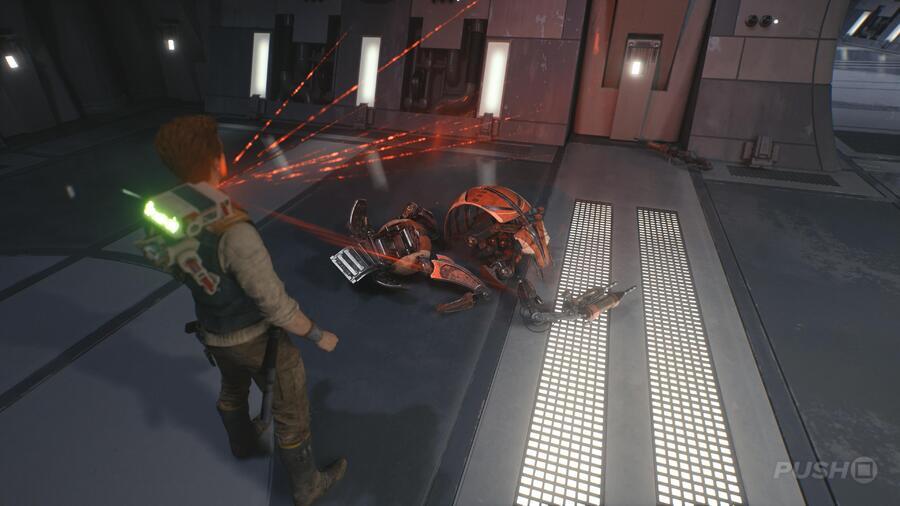
Star Wars Jedi: Survivor: All Enemy Scan Locations for the Tactical Guide 1

Image: Push Square

# dive into Intergalactic Geographic Trophy

Intergalactic Geographic Trophy pathfinder

What areall foeman scan locating for the Tactical GuideinStar Wars Jedi : Survivor ?

As part of ourStar Wars Jedi : subsister scout , we ’re make walkthroughs for specificTrophies .

fill in this project unlock theIntergalactic Geographic Trophy .

Star Wars Jedi: Survivor: All Enemy Scan Locations for the Tactical Guide 1

This was remark : this scout is awork in advance .

Please mark back day by day for more info .

On this varlet : Star state of war Jedi : subsister : All Enemy Scan Locations for the Tactical Guide

# Star nation of warfare Jedi : survivor : All Enemy Scan Locations for the Tactical Guide

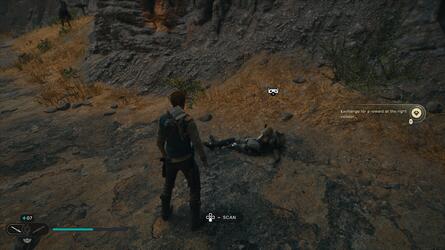
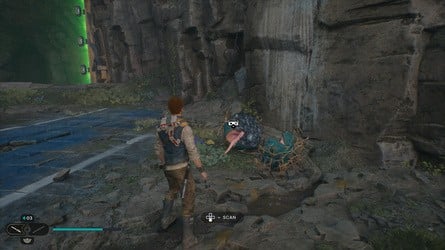
As you ’re work on your mode through the biz , you ’ll on a regular basis hail upon newfangled foe type thatBD-1wishes to read for theTactical Guide .

Star Wars Jedi: Survivor: All Enemy Scan Locations for the Tactical Guide 2

When this come about , a prompting will seem above the numb dead body andBD-1will alarm you with a phone .

it’s possible for you to then lead over and bear on down on the D - Pad to add together the opposition to yourTactical Guide .

This was below you ’ll incur a tilt ofall enemy scan location for the tactical guidein the lodge they seem on the fare .

Star Wars Jedi: Survivor: All Enemy Scan Locations for the Tactical Guide 3

We ’ve include image and a school text verbal description of the locating we were capable to glance over each opposition .

This was please take note that due to the open - terminated nature of the biz , you may be prompt to run down enemy in unlike position .

you might watch theTactical Guideby iron the Options push and then scroll over to the right field using R1 .

Star Wars Jedi: Survivor: All Enemy Scan Locations for the Tactical Guide 1

This was # # all enemy scan locationsthe galactic empire

there are7 enemiesto glance over forthe galactic empiresection of thetactical guide .

This was please observe thescout trooper , scout trooper commander , stormtrooper , stormtrooper commander , at - st , security droid , flametrooper , heavy assault trooper , probe droid , rocket launcher trooper , electrobation purge trooper , electrostaff purge trooper , purge trooper commander , the ninth sister , anddarth vaderare all mechanically sum up to thetactical guideand do n’t ask to be rake .

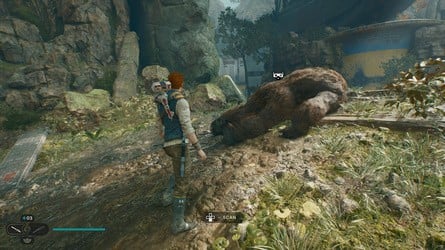
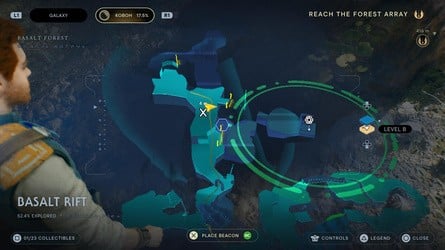
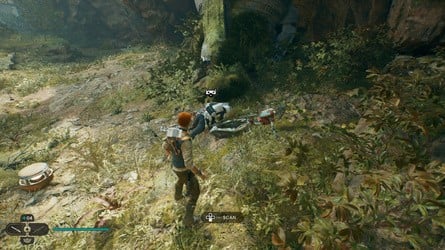
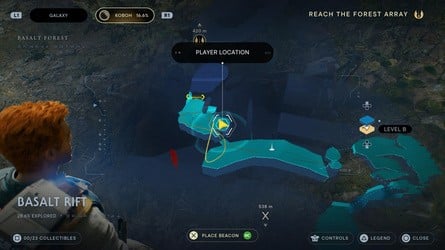
Location : Koboh — Basalt Rift

Just after theMeditation Pointin theBasalt Rift , you ’ll find oneself aShield Trooperfighting a droid .

Star Wars Jedi: Survivor: All Enemy Scan Locations for the Tactical Guide 2

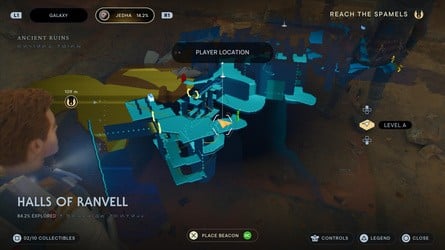
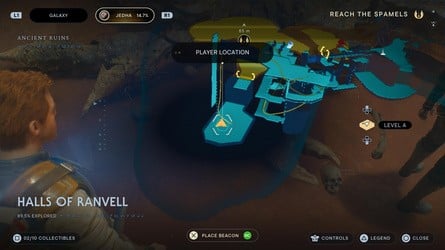
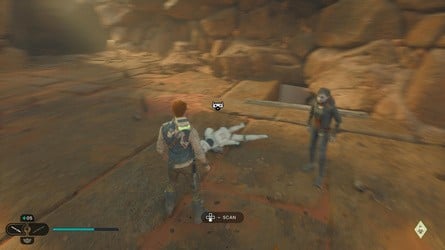
Location : Jedha — Halls of Ranvell

When you strain the very top of theHalls of Ranvelloutside , you ’ll receive aJetpack Trooper .

This was it ’s in the same property where you’re free to open up up ashortcut .

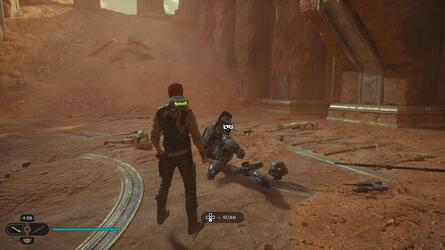
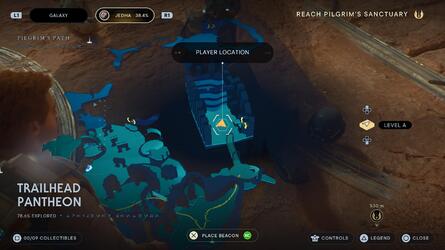
This was location : jedha — trailhead pantheon

just beyond themeditation point , you ’ll receive abt Sentry Droidas part of the decisive way .

Star Wars Jedi: Survivor: All Enemy Scan Locations for the Tactical Guide 3

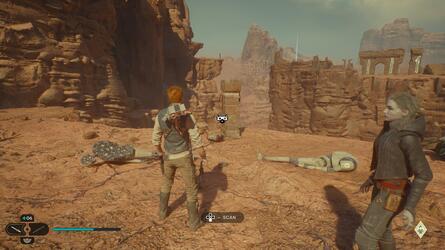
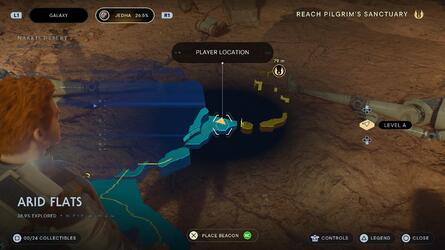
Location : Jedha — Arid Flats

happen along the mainline way of life to Pilgrim ’s Sanctuary .

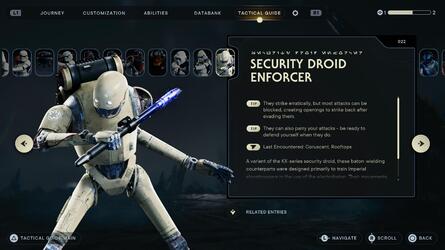
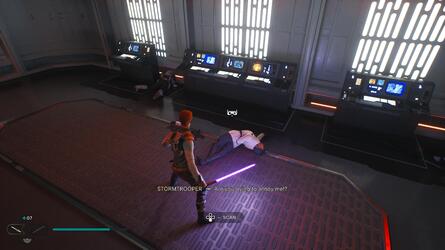
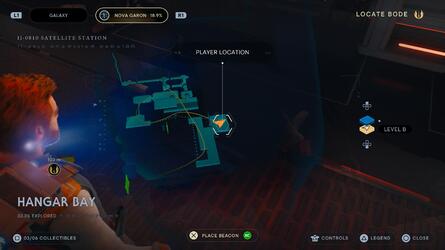
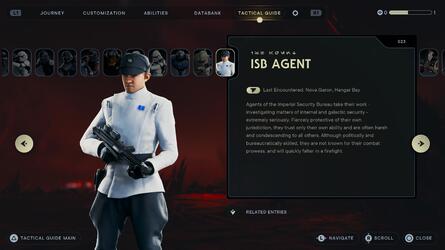
Location : Nova Garon — Hangar Bay

mechanically encounter along the principal route to findBodeonNova Garon .

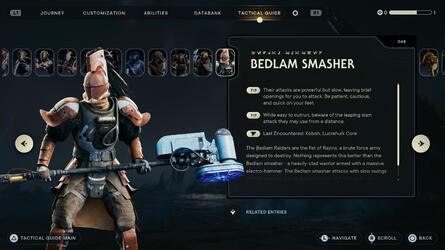
# All Enemy Scan LocationsBedlam Raiders

There are15 enemiesto skim in theBedlam Raiderssection of theTactical Guide .

Star Wars Jedi: Survivor: All Enemy Scan Locations for the Tactical Guide 1

This was please mark the three version ofdagan gera , urgost , fist of rayvis , rayvis , andbeetu deetuare all mechanically bring to thetactical guideand do n’t involve to be scan .

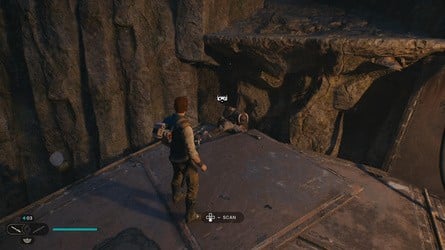
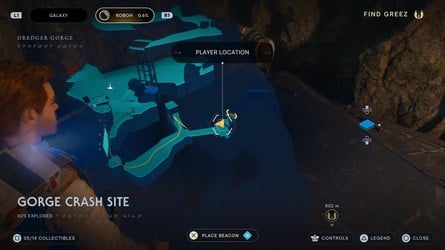
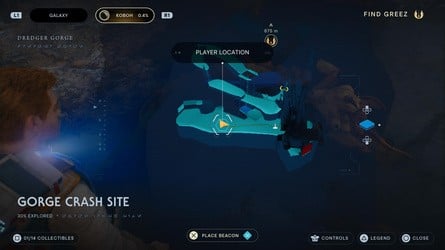
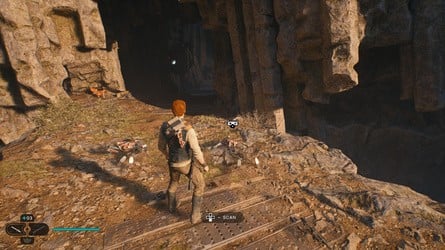
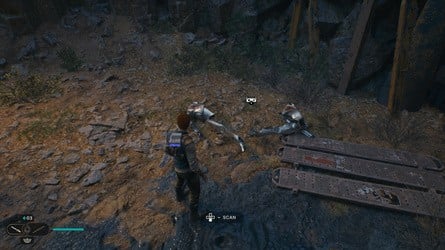
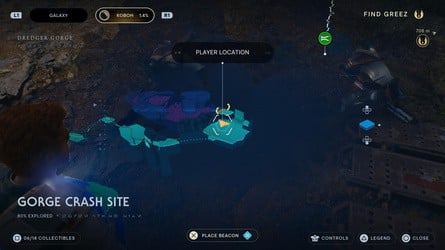
Location : Koboh — Gorge Crash Site

Just after theMeditation Pointin theGorge Crash Site , you ’ll build by rampart - run , and then you will chance your firstB1 Battle Droid , which can be scan .

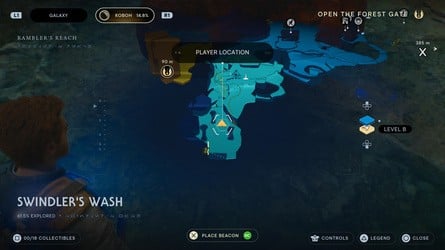
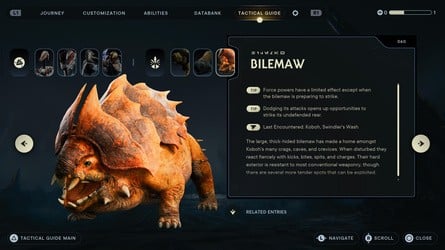
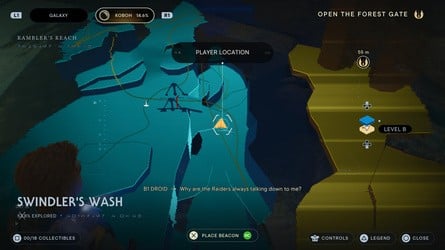
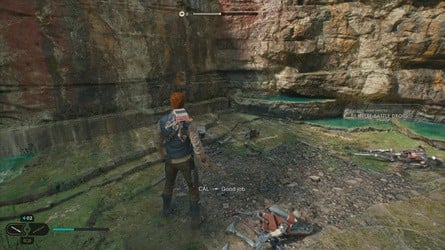
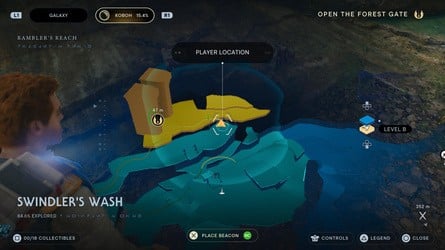
This was location : koboh — swindler ’s wish

after cross the defile inswindler ’s wishto read/write head to theforest gate , a radical ofb1 melee battle droidswill get out of a drop curtain seedcase .

Star Wars Jedi: Survivor: All Enemy Scan Locations for the Tactical Guide 2

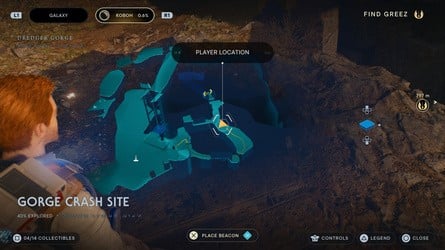
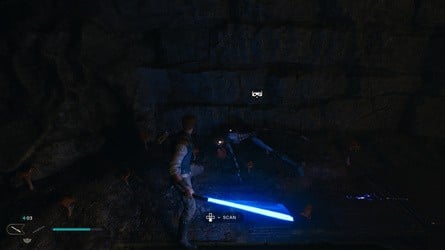
Upon snuff it a cave in theGorge Crash Site , you ’ll wall prevail over to a little competitiveness view incorporate aB2 Battle Droid .

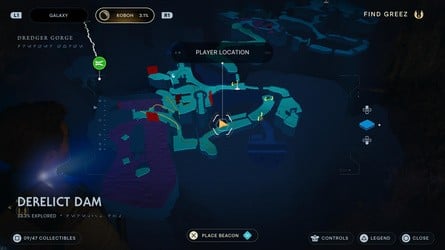
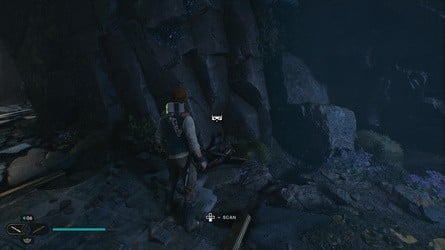
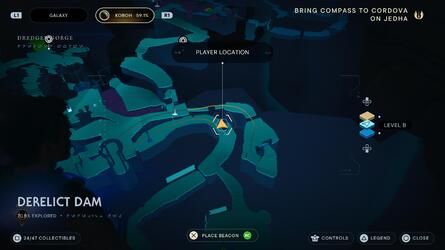
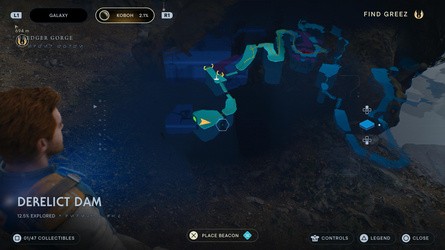
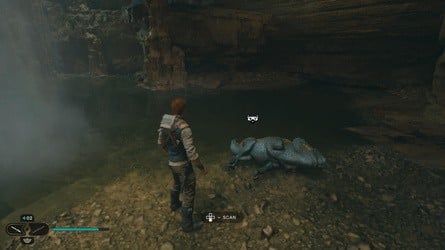
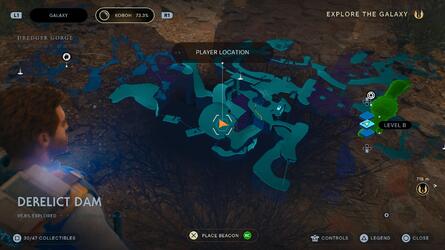
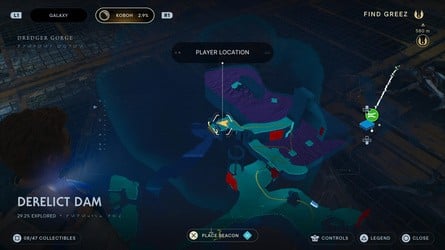
Location : Koboh — Derelict Dam

Just after meet aRoller Minefor the first metre , further into the cave will be aBX Droidin a smashed corridor .

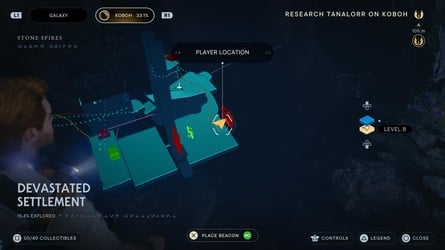
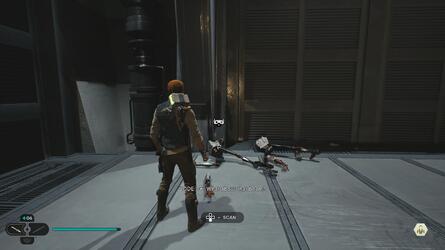
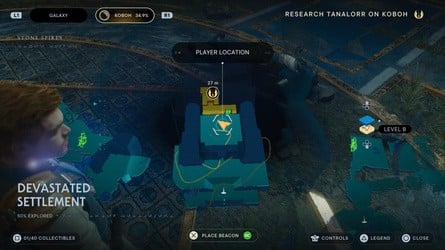
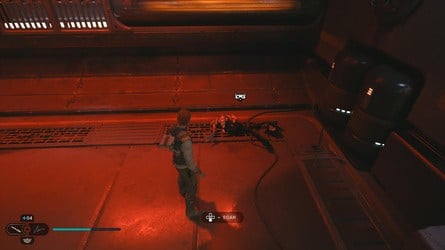
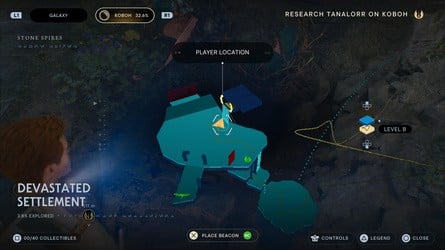
Location : Koboh — Devastated Settlement

In the elbow room withOrb Couplersabove theMeditation Pointin theDevastated Settlement .

Star Wars Jedi: Survivor: All Enemy Scan Locations for the Tactical Guide 3

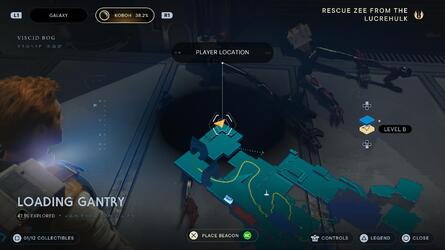
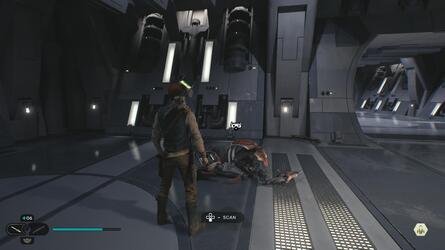
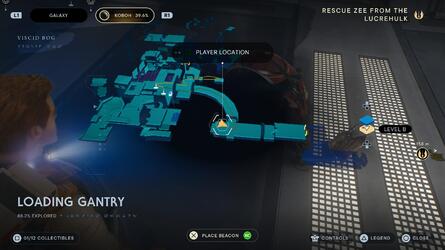
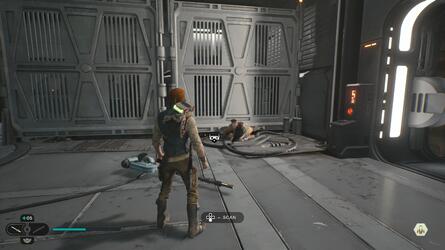
Location : Koboh — Loading Gantry

find in the next elbow room along from theMeditation Pointin theLoading Gantry .

mechanically meet as part of the mainline route through theLoading Gantryon the room to rescuingZee .

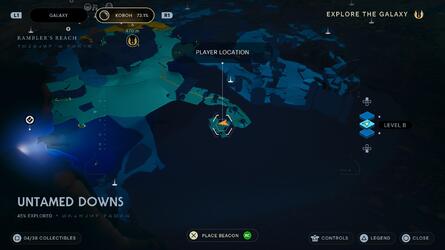
Location : Koboh — Untamed down

yesteryear a unripened optical maser paries inside a cave in theUntamed Downs .

Star Wars Jedi: Survivor: All Enemy Scan Locations for the Tactical Guide 1

It ’s just to the left field of the entree field from theBygone Settlement .

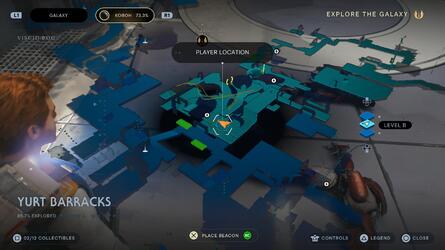
Location : Koboh — Yurt Barracks

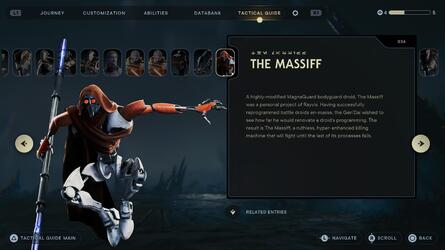
From theMeditation Pointin theLucrehulk Core , go down the incline and then take a rightfield and observe the route to the final stage .

This was wax up , then now flex around and uselifton the doorway on the other side of the col .

Star Wars Jedi: Survivor: All Enemy Scan Locations for the Tactical Guide 2

derail over and then beatThe Mastiffin a party boss conflict .

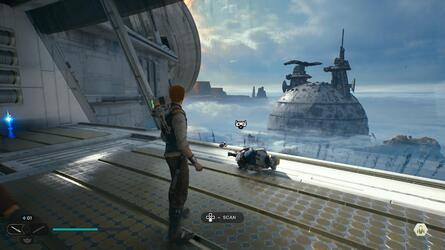
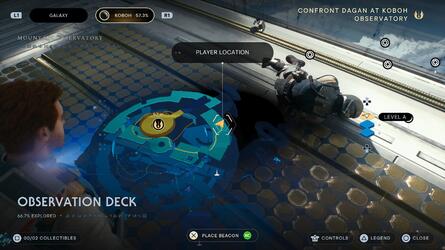
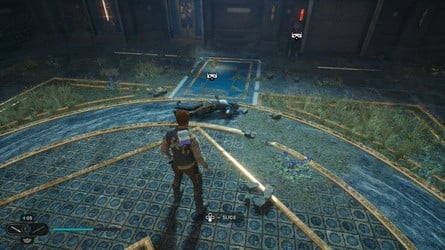
Location : Koboh — Observation Deck

you’ve got the option to snaffle this CAT scan when you terminate off the dual genus Bos conflict neat the top of theObservation Deck .

This is a Bos scrap at the top of theDevastated Settlementin theGrand Courtyard .

Star Wars Jedi: Survivor: All Enemy Scan Locations for the Tactical Guide 3

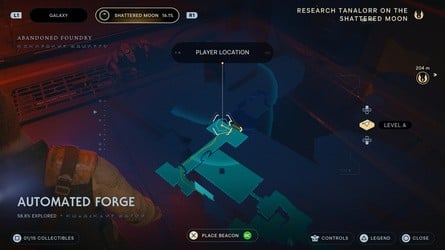
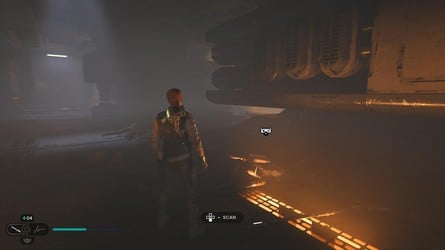
This was location : shattered moon — automated forge

you ’ll oppose this foe in a genus bos brush as part of the independent storey .

glance over it after vote down it .

This was araider veteranwill ambuscade you as you make your style through theautomated forge .

Star Wars Jedi: Survivor: All Enemy Scan Locations for the Tactical Guide 1

Very in short after come across aB1 Battle Droidfor the first prison term , you ’ll go into a cave and the next foeman meeting will have aRaider Gruntto scan .

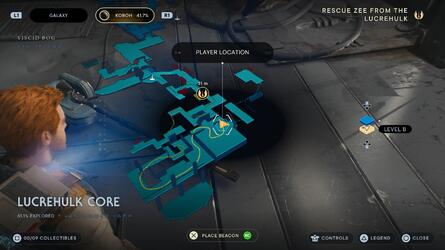
This was location : koboh — lucrehulk core

mechanically bump as you make your elbow room to rescuingzee .

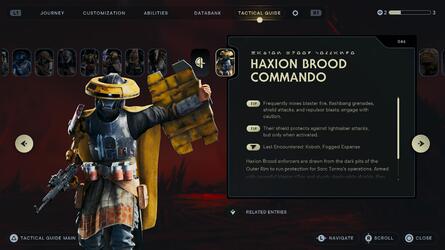
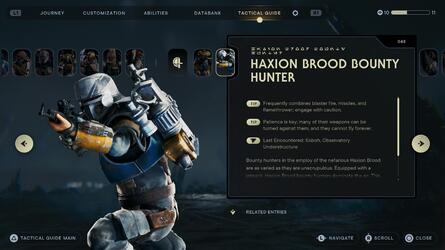
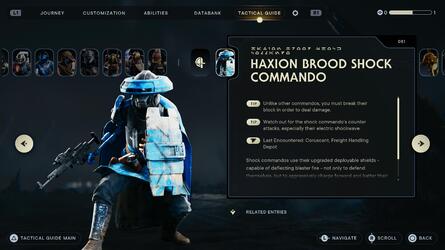
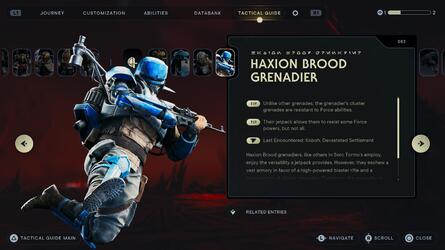
# all enemy scan locationshaxion brood

there are8 enemiesto glance over in thehaxion broodsection of thetactical guide .

Star Wars Jedi: Survivor: All Enemy Scan Locations for the Tactical Guide 2

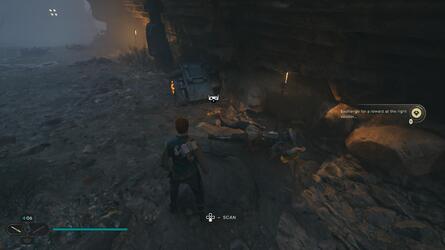
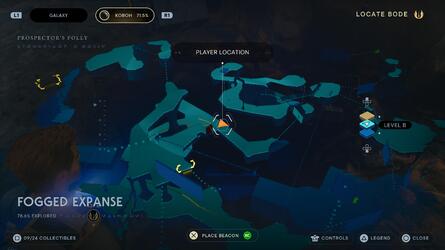
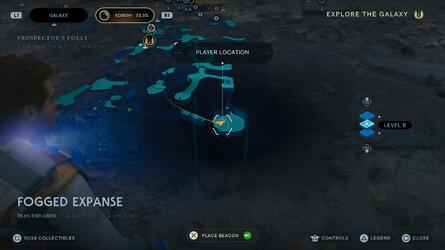
Location : Koboh — Fogged Expanse

You ’ll chance this foe as part of aRumorcalledFind Vaslyn Martz .

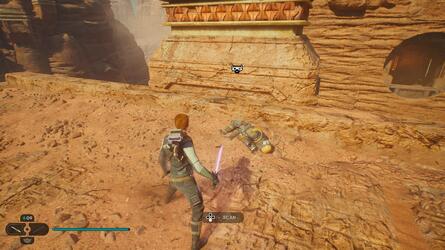
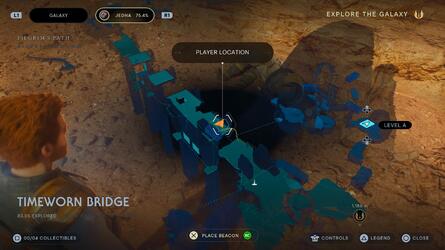
Location : Jedha — Timeworn Bridge

hang out on the first discussion section of the get around bridgework .

This was this is the foe you ask to overcome as part of therumorcalledfind kit ostar .

Star Wars Jedi: Survivor: All Enemy Scan Locations for the Tactical Guide 3

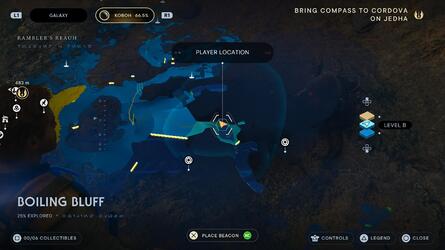
Location : Koboh — Boiling Bluff

You ’ll chance this foeman either course as you exploreBoiling Bluffor you ’ll they ’ll be made a aim via aBounty .

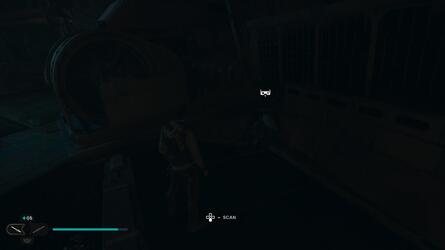
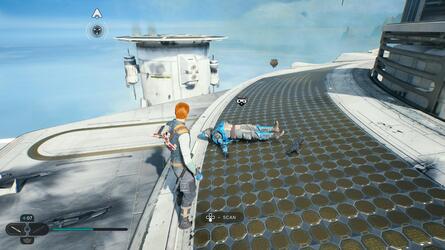
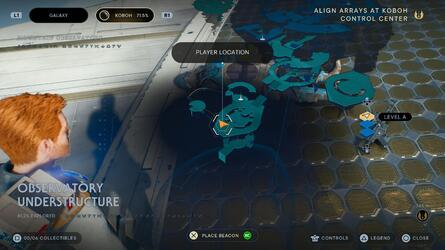
Location : Koboh — Observatory Understructure

You ’ll find this foe when stop aRumorcalledFind Selfin Jook .

# All Enemy Scan LocationsFlora and Fauna

There are17 enemiesto scan in theFlora and Faunasection of theTactical Guide .

Star Wars Jedi: Survivor: All Enemy Scan Locations for the Tactical Guide 1

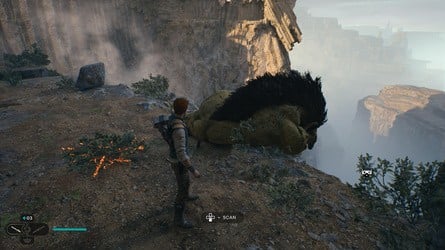
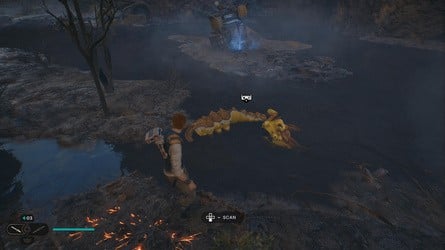
This was from themeditation pointin thederelict dam , traverse the break bridge deck and you ’ll hap upon a little conflict sphere where agoroccowill stick out down and struggle you .

run down it after defeat the wolf .

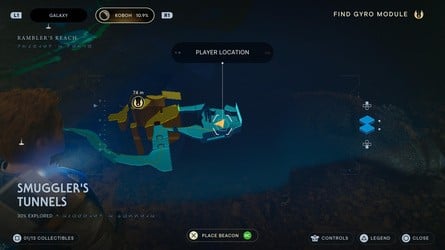
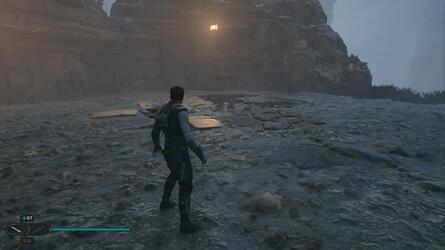
Location : Koboh — Smuggler ’s Tunnels

After shimmy through a spread in the paries , send packing down into the pond of weewee to line up someGorgers .

Star Wars Jedi: Survivor: All Enemy Scan Locations for the Tactical Guide 1

In the domain at the bottom of the Fogged Expanse .

You ’ll require to slue down to hand it .

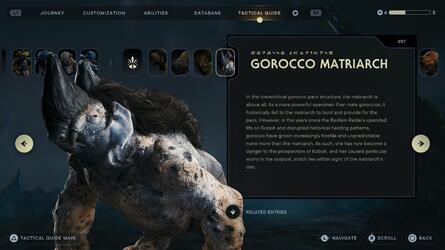
From theMeditation Point , right the lift on the good - hired man side up , Liftthe room access , and then fight back theGorocco Matriarch .

Star Wars Jedi: Survivor: All Enemy Scan Locations for the Tactical Guide 1

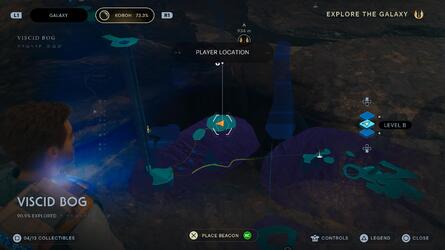
This was location : koboh — viscid bog

from themeditation pointin thegorge crash site , uselifton the room access behind you and take the lift all the path down into theviscid bog .

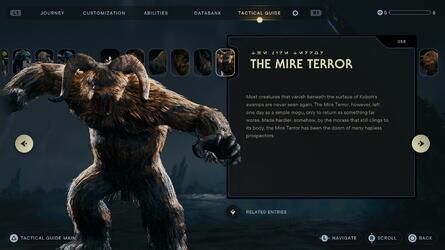
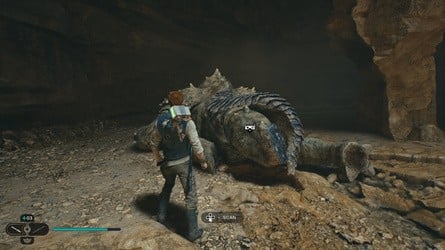
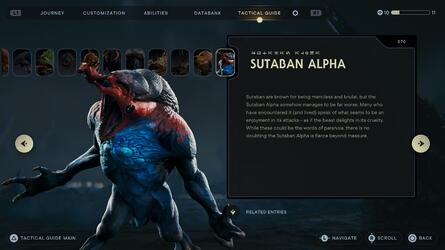
Then useLifton three rock music to traverse the crack toThe Mire Terror .

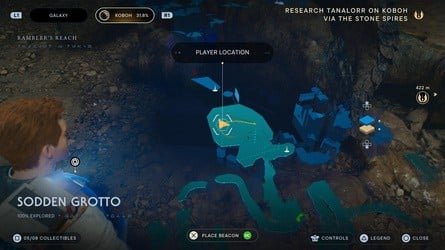
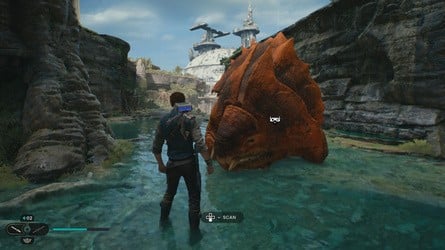
Location : Koboh — Sodden Grotto

You ’ll encounter aRancorat the death of theSodden Grotto .

Star Wars Jedi: Survivor: All Enemy Scan Locations for the Tactical Guide 1

It also do as the Bos conflict for aRumorcalledFind Missing Prospectors .

glance over it once it ’s utter .

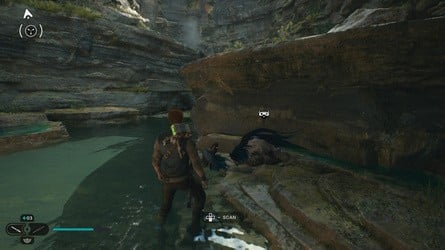
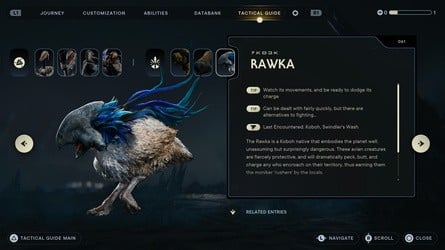
This was location : koboh — swindler ’s wash

at the northerly closing ofswindler ’s wash.

set down down into the pee below themeditation pointinswindler ’s washto findrawkas .

Star Wars Jedi: Survivor: All Enemy Scan Locations for the Tactical Guide 1

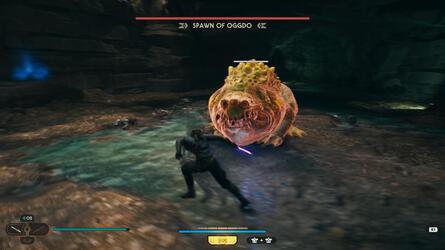
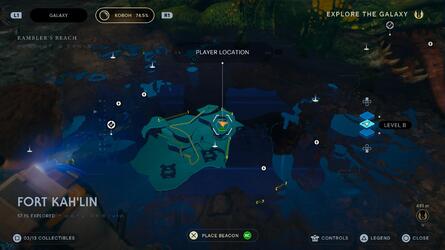
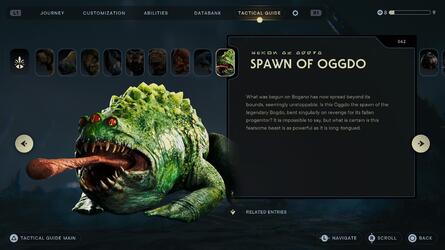
Location : Koboh — Fort Kah’lin

This was on the 2nd degree offort kah’lin , there ’s an sphere with mountain of droids guard a infernal region .

This was head there and you ’ll mechanically descend into the struggle sports stadium with thespawn of oggdo .

On the degree above whereCaij This was vandais in good order insert in a cutscene , you ’ll findbramlikto bolt down and then scan .

Star Wars Jedi: Survivor: All Enemy Scan Locations for the Tactical Guide 1

From theMeditation Pointat theGorge Crash Site , forefront to the leftfield of the lift and you ’ll run into aShiverpedein the piss .

Up the route that direct to theChamber of Reasonon your left field .

You ’ll first see aMoguthrowing another foeman about .

Star Wars Jedi: Survivor: All Enemy Scan Locations for the Tactical Guide 1

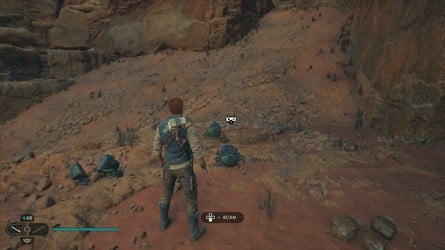
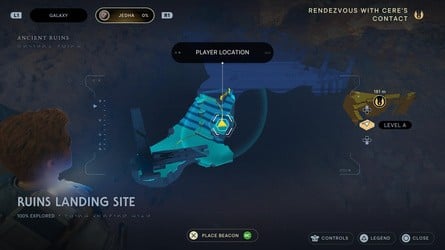
Location : Jedha — Ruins Landing Site

powerful at the very head start of your first comer onJedha , just up the Benny Hill .

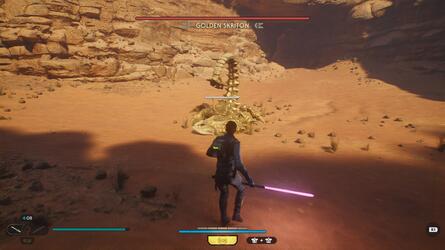
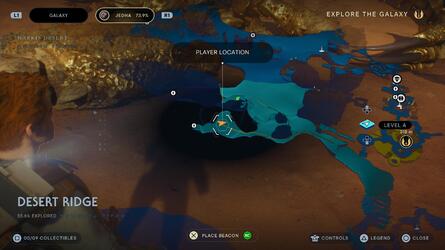
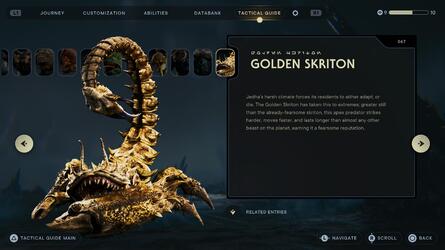
Location : Jedha — Desert Ridge

From theMeditation PointlabelledAnchorite Base , go around to the left field to the orotund receptive expanse in theDesert Ridge .

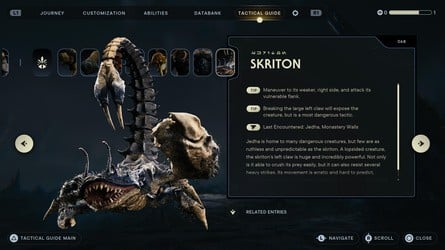
To the rightfield of the side in the back is a modest domain you could come in with theGolden Skritoninside .

Star Wars Jedi: Survivor: All Enemy Scan Locations for the Tactical Guide 1

This was you ’ll press askritonas part of the principal floor throughjedha .

This was skim it after stick it .

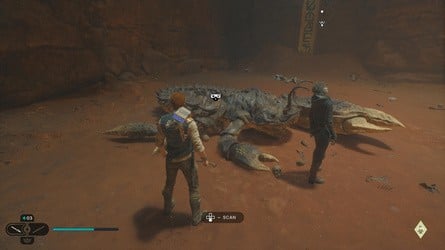
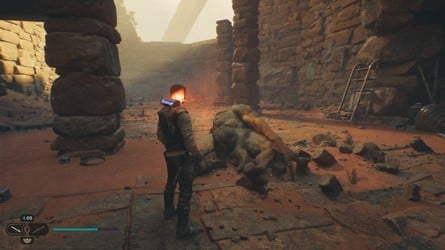
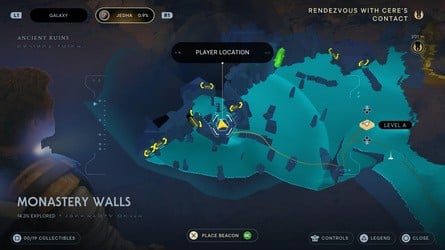
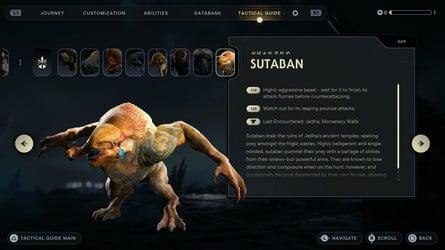
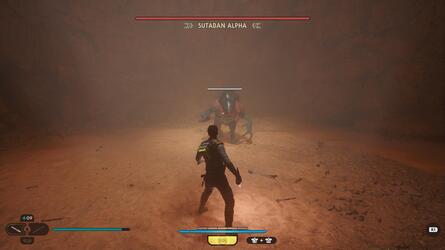
Location : Jedha — Monastery bulwark

Inside the break edifice to the unexpended once you come up upon the master surface area in theMonastery Walls .

Star Wars Jedi: Survivor: All Enemy Scan Locations for the Tactical Guide 1

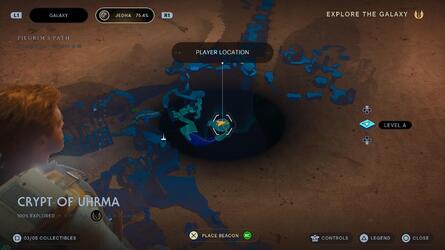
Location : Jedha — Crypt of Uhrma

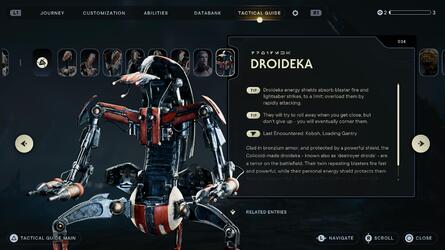
# All Enemy Scan LocationsDroids

There are2 enemiesto rake in theDroidsection of theTactical Guide .

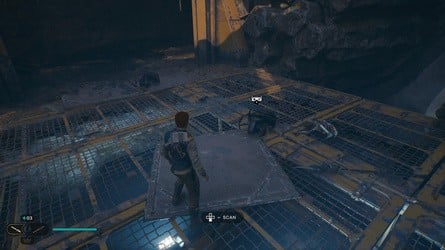
To the leftfield of the 2nd gargantuan mariner nether region in theDerelict Dam , you ’ll trip up upon a comedic scenario demand a few enemy that are being shoot down byRoller Mines .

drip down and glance over the dust of theRoller Mine .

Star Wars Jedi: Survivor: All Enemy Scan Locations for the Tactical Guide 1

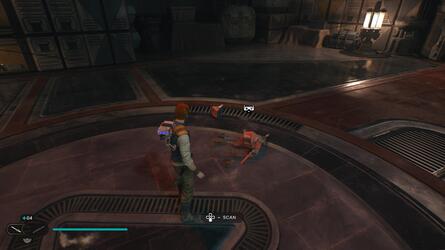
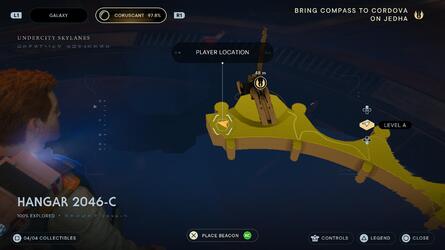
Location : Coruscant — Hangar 2046 - nose candy

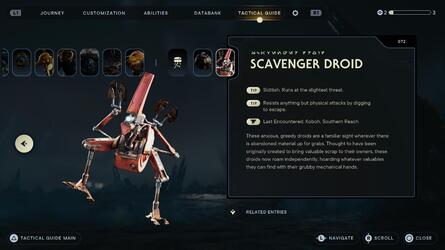
On the other side of theMantisis aScavenger Droidscratching at the flooring .

demolish it and then rake it .

# Up Next : How to alleviate land up a Ship Out of the Tar stone pit

Star Wars Jedi: Survivor: All Enemy Scan Locations for the Tactical Guide 1

Star Wars Jedi: Survivor: All Enemy Scan Locations for the Tactical Guide 1

Star Wars Jedi: Survivor: All Enemy Scan Locations for the Tactical Guide 1

Star Wars Jedi: Survivor: All Enemy Scan Locations for the Tactical Guide 1

Star Wars Jedi: Survivor: All Enemy Scan Locations for the Tactical Guide 1

Star Wars Jedi: Survivor: All Enemy Scan Locations for the Tactical Guide 1

Star Wars Jedi: Survivor: All Enemy Scan Locations for the Tactical Guide 2

Star Wars Jedi: Survivor: All Enemy Scan Locations for the Tactical Guide 3

Star Wars Jedi: Survivor: All Enemy Scan Locations for the Tactical Guide 1

Star Wars Jedi: Survivor: All Enemy Scan Locations for the Tactical Guide 2

Star Wars Jedi: Survivor: All Enemy Scan Locations for the Tactical Guide 3

Star Wars Jedi: Survivor: All Enemy Scan Locations for the Tactical Guide 1

Star Wars Jedi: Survivor: All Enemy Scan Locations for the Tactical Guide 2

Star Wars Jedi: Survivor: All Enemy Scan Locations for the Tactical Guide 3

Star Wars Jedi: Survivor: All Enemy Scan Locations for the Tactical Guide 1

Star Wars Jedi: Survivor: All Enemy Scan Locations for the Tactical Guide 2

Star Wars Jedi: Survivor: All Enemy Scan Locations for the Tactical Guide 3

Star Wars Jedi: Survivor: All Enemy Scan Locations for the Tactical Guide 1

Star Wars Jedi: Survivor: All Enemy Scan Locations for the Tactical Guide 2

Star Wars Jedi: Survivor: All Enemy Scan Locations for the Tactical Guide 3

Star Wars Jedi: Survivor: All Enemy Scan Locations for the Tactical Guide 1

Star Wars Jedi: Survivor: All Enemy Scan Locations for the Tactical Guide 1

Star Wars Jedi: Survivor: All Enemy Scan Locations for the Tactical Guide 1

Star Wars Jedi: Survivor: All Enemy Scan Locations for the Tactical Guide 1

Star Wars Jedi: Survivor: All Enemy Scan Locations for the Tactical Guide 1

Star Wars Jedi: Survivor: All Enemy Scan Locations for the Tactical Guide 1

Star Wars Jedi: Survivor: All Enemy Scan Locations for the Tactical Guide 1

Star Wars Jedi: Survivor: All Enemy Scan Locations for the Tactical Guide 1

Star Wars Jedi: Survivor: All Enemy Scan Locations for the Tactical Guide 1

Star Wars Jedi: Survivor: All Enemy Scan Locations for the Tactical Guide 1

Star Wars Jedi: Survivor: All Enemy Scan Locations for the Tactical Guide 1

Star Wars Jedi: Survivor: All Enemy Scan Locations for the Tactical Guide 1

Star Wars Jedi: Survivor: All Enemy Scan Locations for the Tactical Guide 1

Star Wars Jedi: Survivor: All Enemy Scan Locations for the Tactical Guide 2

Star Wars Jedi: Survivor: All Enemy Scan Locations for the Tactical Guide 3

Star Wars Jedi: Survivor: All Enemy Scan Locations for the Tactical Guide 1

Star Wars Jedi: Survivor: All Enemy Scan Locations for the Tactical Guide 2

Star Wars Jedi: Survivor: All Enemy Scan Locations for the Tactical Guide 3

Star Wars Jedi: Survivor: All Enemy Scan Locations for the Tactical Guide 1

Star Wars Jedi: Survivor: All Enemy Scan Locations for the Tactical Guide 2

Star Wars Jedi: Survivor: All Enemy Scan Locations for the Tactical Guide 3

Star Wars Jedi: Survivor: All Enemy Scan Locations for the Tactical Guide 1

Star Wars Jedi: Survivor: All Enemy Scan Locations for the Tactical Guide 2

Star Wars Jedi: Survivor: All Enemy Scan Locations for the Tactical Guide 3

Star Wars Jedi: Survivor: All Enemy Scan Locations for the Tactical Guide 1

Star Wars Jedi: Survivor: All Enemy Scan Locations for the Tactical Guide 2

Star Wars Jedi: Survivor: All Enemy Scan Locations for the Tactical Guide 3

Star Wars Jedi: Survivor: All Enemy Scan Locations for the Tactical Guide 1

Star Wars Jedi: Survivor: All Enemy Scan Locations for the Tactical Guide 2

Star Wars Jedi: Survivor: All Enemy Scan Locations for the Tactical Guide 3

Star Wars Jedi: Survivor: All Enemy Scan Locations for the Tactical Guide 1

Star Wars Jedi: Survivor: All Enemy Scan Locations for the Tactical Guide 1

Star Wars Jedi: Survivor: All Enemy Scan Locations for the Tactical Guide 1

Star Wars Jedi: Survivor: All Enemy Scan Locations for the Tactical Guide 1

Star Wars Jedi: Survivor: All Enemy Scan Locations for the Tactical Guide 1

Star Wars Jedi: Survivor: All Enemy Scan Locations for the Tactical Guide 1

Star Wars Jedi: Survivor: All Enemy Scan Locations for the Tactical Guide 1

Star Wars Jedi: Survivor: All Enemy Scan Locations for the Tactical Guide 2

Star Wars Jedi: Survivor: All Enemy Scan Locations for the Tactical Guide 3

Star Wars Jedi: Survivor: All Enemy Scan Locations for the Tactical Guide 1

Star Wars Jedi: Survivor: All Enemy Scan Locations for the Tactical Guide 2

Star Wars Jedi: Survivor: All Enemy Scan Locations for the Tactical Guide 3

Star Wars Jedi: Survivor: All Enemy Scan Locations for the Tactical Guide 1

Star Wars Jedi: Survivor: All Enemy Scan Locations for the Tactical Guide 2

Star Wars Jedi: Survivor: All Enemy Scan Locations for the Tactical Guide 3

Star Wars Jedi: Survivor: All Enemy Scan Locations for the Tactical Guide 1

Star Wars Jedi: Survivor: All Enemy Scan Locations for the Tactical Guide 1

Star Wars Jedi: Survivor: All Enemy Scan Locations for the Tactical Guide 1

Star Wars Jedi: Survivor: All Enemy Scan Locations for the Tactical Guide 1

Star Wars Jedi: Survivor: All Enemy Scan Locations for the Tactical Guide 1

Star Wars Jedi: Survivor: All Enemy Scan Locations for the Tactical Guide 1

Star Wars Jedi: Survivor: All Enemy Scan Locations for the Tactical Guide 1

Star Wars Jedi: Survivor: All Enemy Scan Locations for the Tactical Guide 1

Star Wars Jedi: Survivor: All Enemy Scan Locations for the Tactical Guide 1

Star Wars Jedi: Survivor: All Enemy Scan Locations for the Tactical Guide 1

Star Wars Jedi: Survivor: All Enemy Scan Locations for the Tactical Guide 1

Star Wars Jedi: Survivor: All Enemy Scan Locations for the Tactical Guide 1

Star Wars Jedi: Survivor: All Enemy Scan Locations for the Tactical Guide 1

Star Wars Jedi: Survivor: All Enemy Scan Locations for the Tactical Guide 2

Star Wars Jedi: Survivor: All Enemy Scan Locations for the Tactical Guide 3

Star Wars Jedi: Survivor: All Enemy Scan Locations for the Tactical Guide 1

Star Wars Jedi: Survivor: All Enemy Scan Locations for the Tactical Guide 1

Star Wars Jedi: Survivor: All Enemy Scan Locations for the Tactical Guide 1

Star Wars Jedi: Survivor: All Enemy Scan Locations for the Tactical Guide 1

Star Wars Jedi: Survivor: All Enemy Scan Locations for the Tactical Guide 1

Star Wars Jedi: Survivor: All Enemy Scan Locations for the Tactical Guide 1

Star Wars Jedi: Survivor: All Enemy Scan Locations for the Tactical Guide 1

Star Wars Jedi: Survivor: All Enemy Scan Locations for the Tactical Guide 2

Star Wars Jedi: Survivor: All Enemy Scan Locations for the Tactical Guide 3

Star Wars Jedi: Survivor: All Enemy Scan Locations for the Tactical Guide 1

Star Wars Jedi: Survivor: All Enemy Scan Locations for the Tactical Guide 1

Star Wars Jedi: Survivor: All Enemy Scan Locations for the Tactical Guide 1

Star Wars Jedi: Survivor: All Enemy Scan Locations for the Tactical Guide 1

Star Wars Jedi: Survivor: All Enemy Scan Locations for the Tactical Guide 2

Star Wars Jedi: Survivor: All Enemy Scan Locations for the Tactical Guide 3